
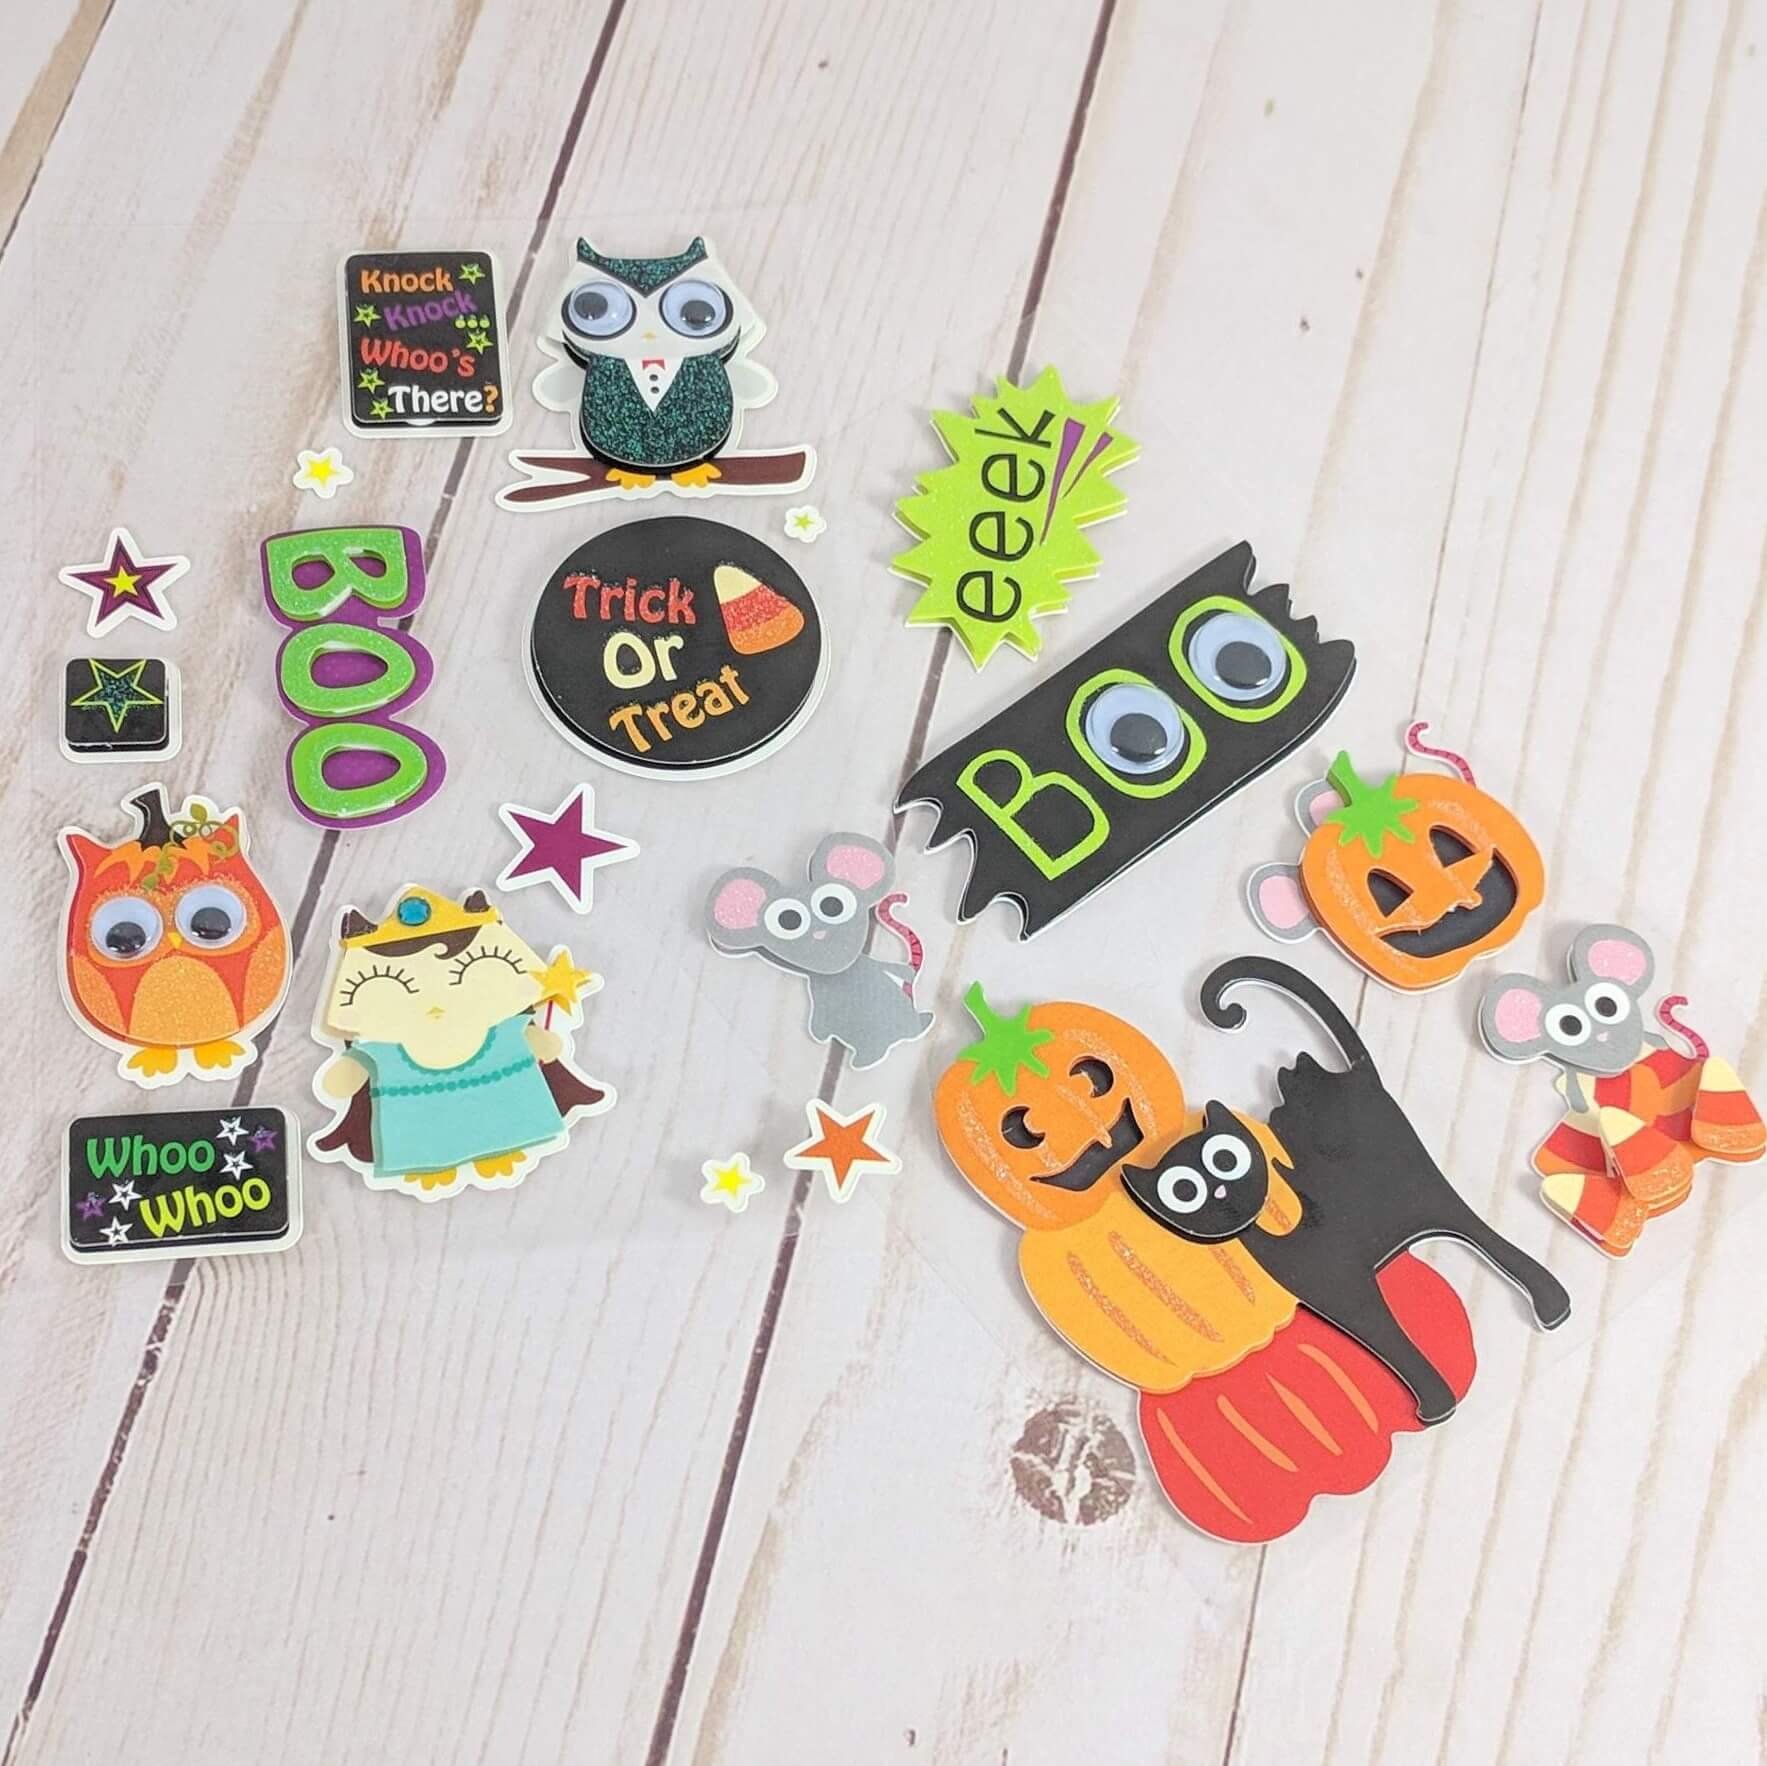
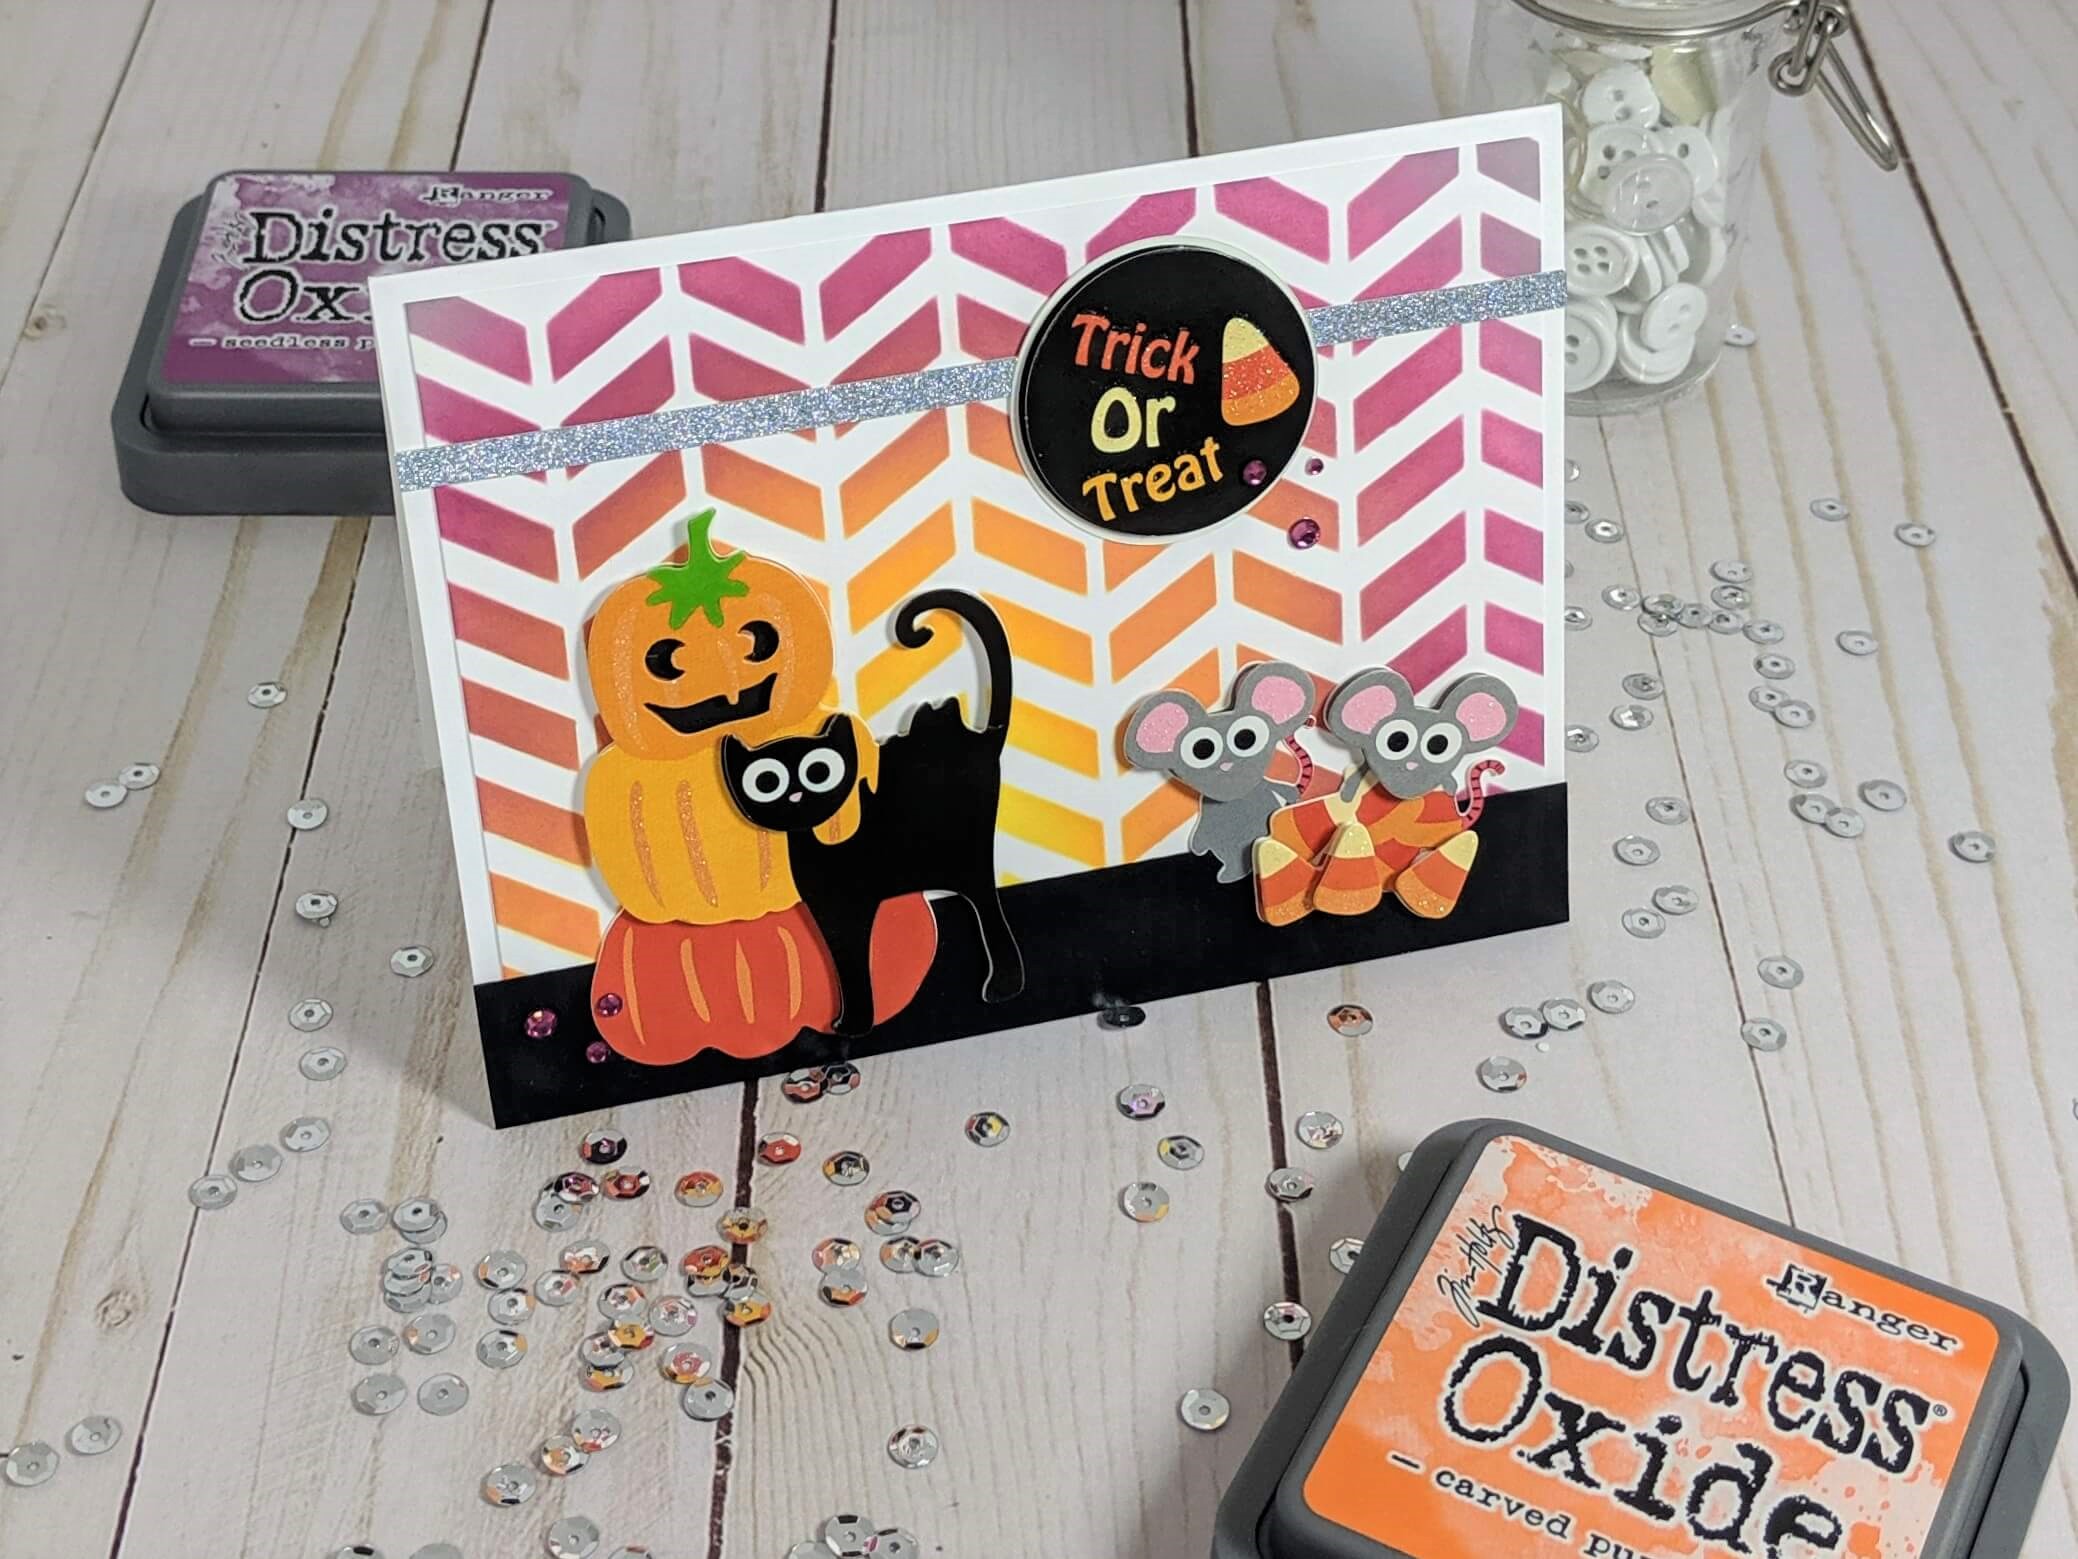
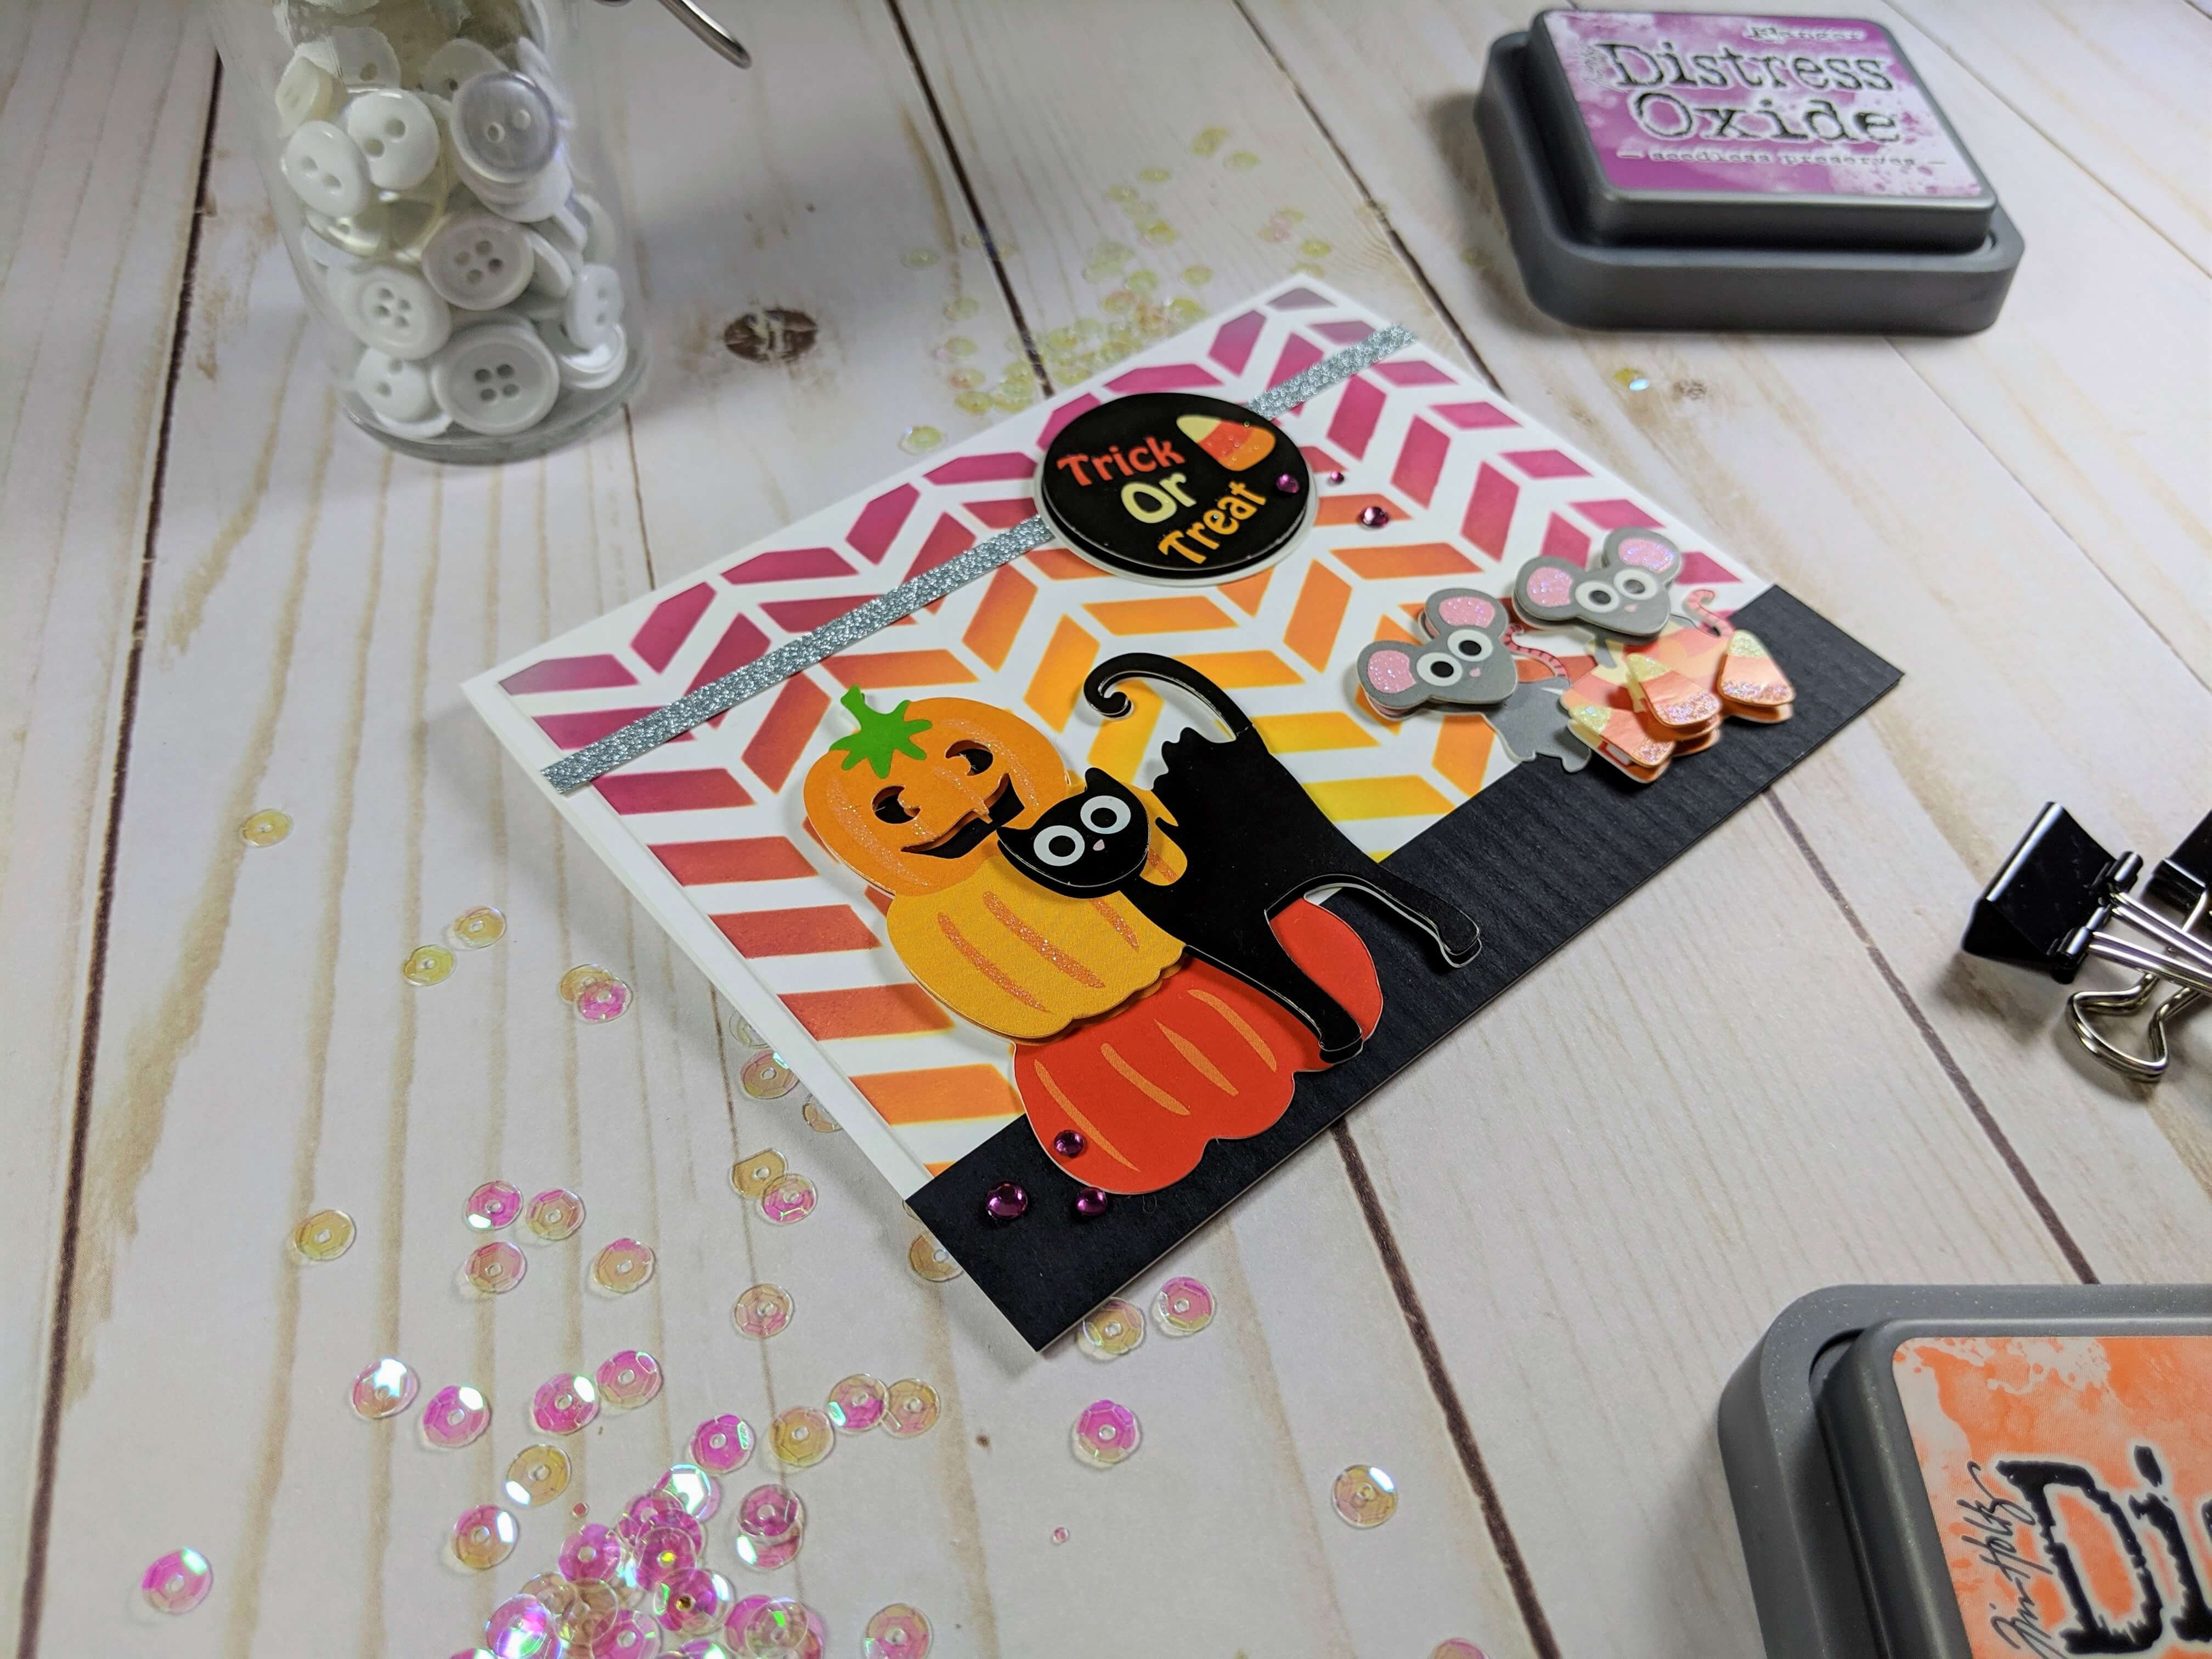
Hey friends! Happy Halloween. I can’t believe October has flown by already! I’ve been sharing some sneak peeks of this card over the last couple of days, but the end result is this cute little trick-or-treat pals card! I made this card by pairing up some stenciling with distress oxide inks and added some adorable stickers I found from Halloweens past. I’ll walk you through how I made it and share the materials I used. Keep reading to find out more.
Materials Used:

Scrapbook.com

Amazon

Scrapbook.com

Amazon

Scrapbook.com

Amazon

Scrapbook.com

Amazon

Scrapbook.com

Amazon

Scrapbook.com

Amazon

Scrapbook.com

Amazon
Stenciling with Distress Oxides | Trick-or-Treat Pals Tutorial:
Step 1.
To start my trick-or-treat pals card, I cut a sheet of Neenah Solar White Cardstock into a 5.25 x 4-inch sheet of paper. Next, I needed to find a flat surface to work on, that wouldn’t be stained by the distress oxide ink. A glass crafting mat can be great for this type of project because you can just wipe the ink off the mat without it getting staining. However, I don’t own a glass. So, I grabbed a sheet of wax paper from my kitchen and taped it down to my table to protect it.
Step 2.
After I prepped my surface, I laid my Solar White Cardstock down, laid my Faber-Castell stencil over top of the paper then taped my stencil down to the wax paper with painters tape. If I could go back and do it over again, I would have also taped the cardstock down too. I saw someone else put the tape behind the white paper to stick it to the stencil directly recently, and I would definitely suggest giving that a try.

Step 3.
From here, I just had fun with the blending! I used my mustard seed distress oxide ink first and applied it a little off-center so the black cat could live there. I used a Ranger mini blending tool to work the ink into the stencil in a circular motion. The stencil was thick cardboard, so I was a little worried that the ink wouldn’t fill the stenciling design properly, but I didn’t have any problems with it.
Pro Tip: When I’m blending, I start at the outside of the paper and work my way in. This ensures that I don’t get any harsh lines that are too difficult to buff out.
Step 4.
After I was done with the mustard seed distress oxide ink, I got out a second blending tool and moved on to the carved pumpkin ink pad. Working my way around the card, I added color around the mustard seed ink. I also made sure to alternate between colors during the blending process and applied a little more ink as needed. I also repeated this process with seedless preserves and the hickory-smoked distress oxide inks to finish off the background of my card. Once I was done with all the blending, I peeled up the stencil and had a beautiful background design!
Pro Tip: I used the Ranger mini blending tool refills to, keep a different sponge for each ink pad you use.
Step 5.
I just needed to piece the card together after stenciling with the distress oxides. There was a little strip of black that I had cut, so I decided to lay it at the bottom of the card. I added the black cat on top of the black paper then chose some little mice to keep him company.
Adding the sentiment was easy. I grabbed a slice of left-over glitter cardstock that I had laying around from a past project and placed it near the top of the card and added a Trick-or-Treat sticker to layer over the glitter strip.
I love how my little Trick-or-Treat Pals card turned out. This was my first time stenciling with distress oxides and the background ended up being my favorite part by far. Never be afraid to explore and try new things with your projects.