
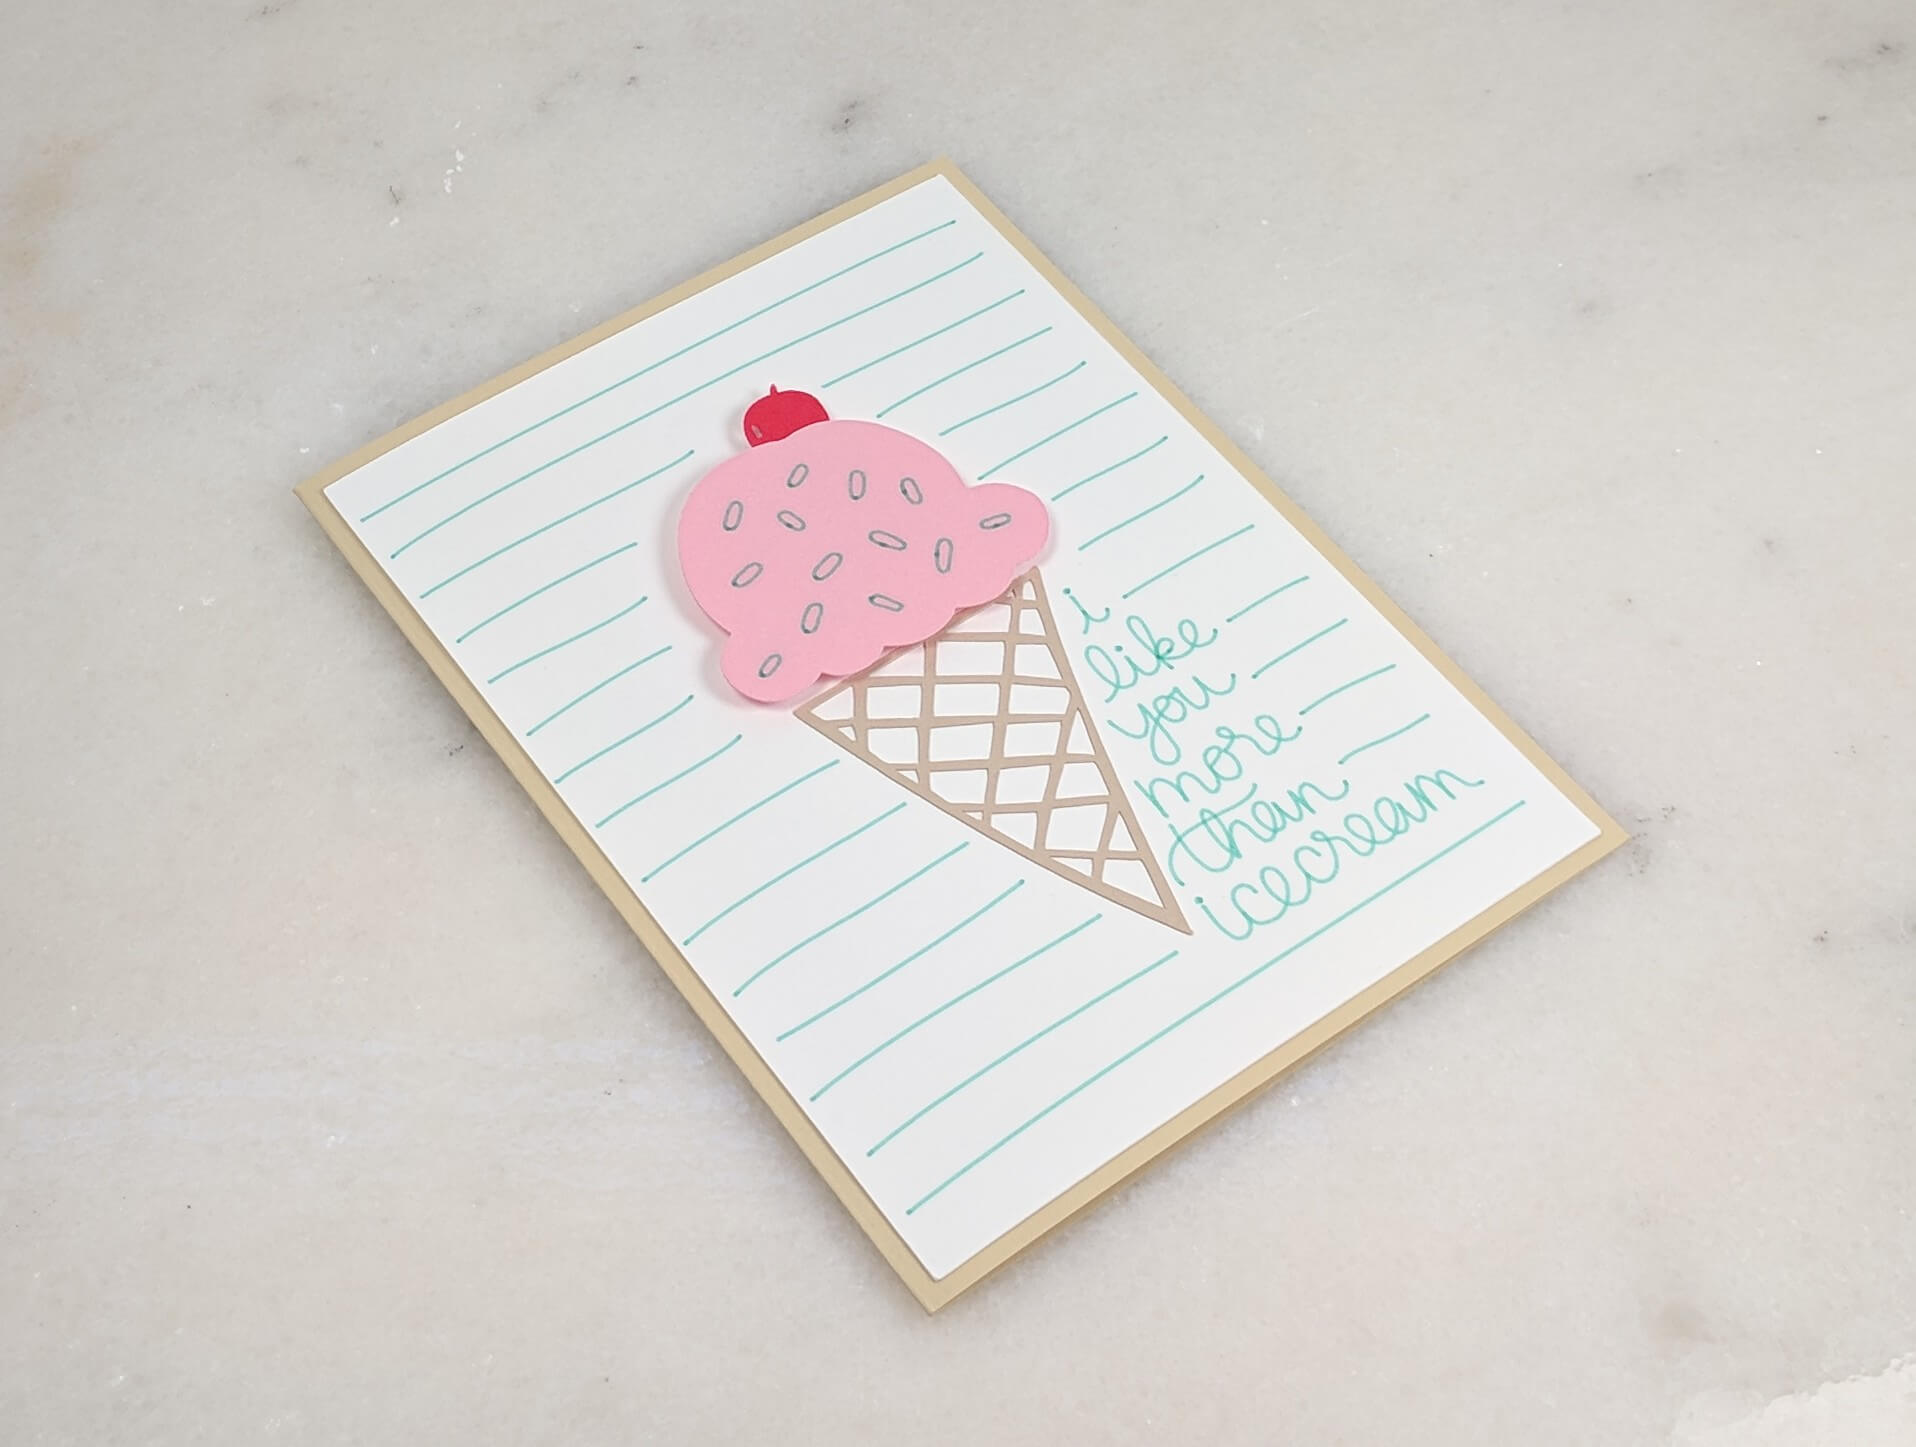
Hey Everyone! Today’s simple Valentines Day card is a card that I had a lot of fun designing and making. I actually started it a little differently than I start most others. I used a pre-designed project found in the Cricut Design Space as my inspiration. Then, I re-designed it to be exactly what I wanted. At the end of the day, this finished card was a lot of fun to make. I hope you’ll enjoy reading this post! I’ve also provided links to the “I Like You More Than Ice Cream” project that I created vs. the original Cricut design. Leave a comment and let me know which one you like best!
Materials Used:
Cricut Images Used:
Standard Square (Basic Shapes)
Ice Cream Cone Card (Maker – Party and Events cartridge)
View the exact specifications of this project in the Cricut Design Studio.
I Like You More Than Ice Cream Walkthrough:
Step 1.
Settle on the colors that you want to use for your own simple Valentine’s Day project. Once you’ve chosen the cardstock you’d like to use for your card base, cut it to make an 8.5′ x 5.5′ sheet of cardstock. If you’re using an 8.5′ x 11′ sheet of cardstock, then you can cut it in half to make two greeting cards.
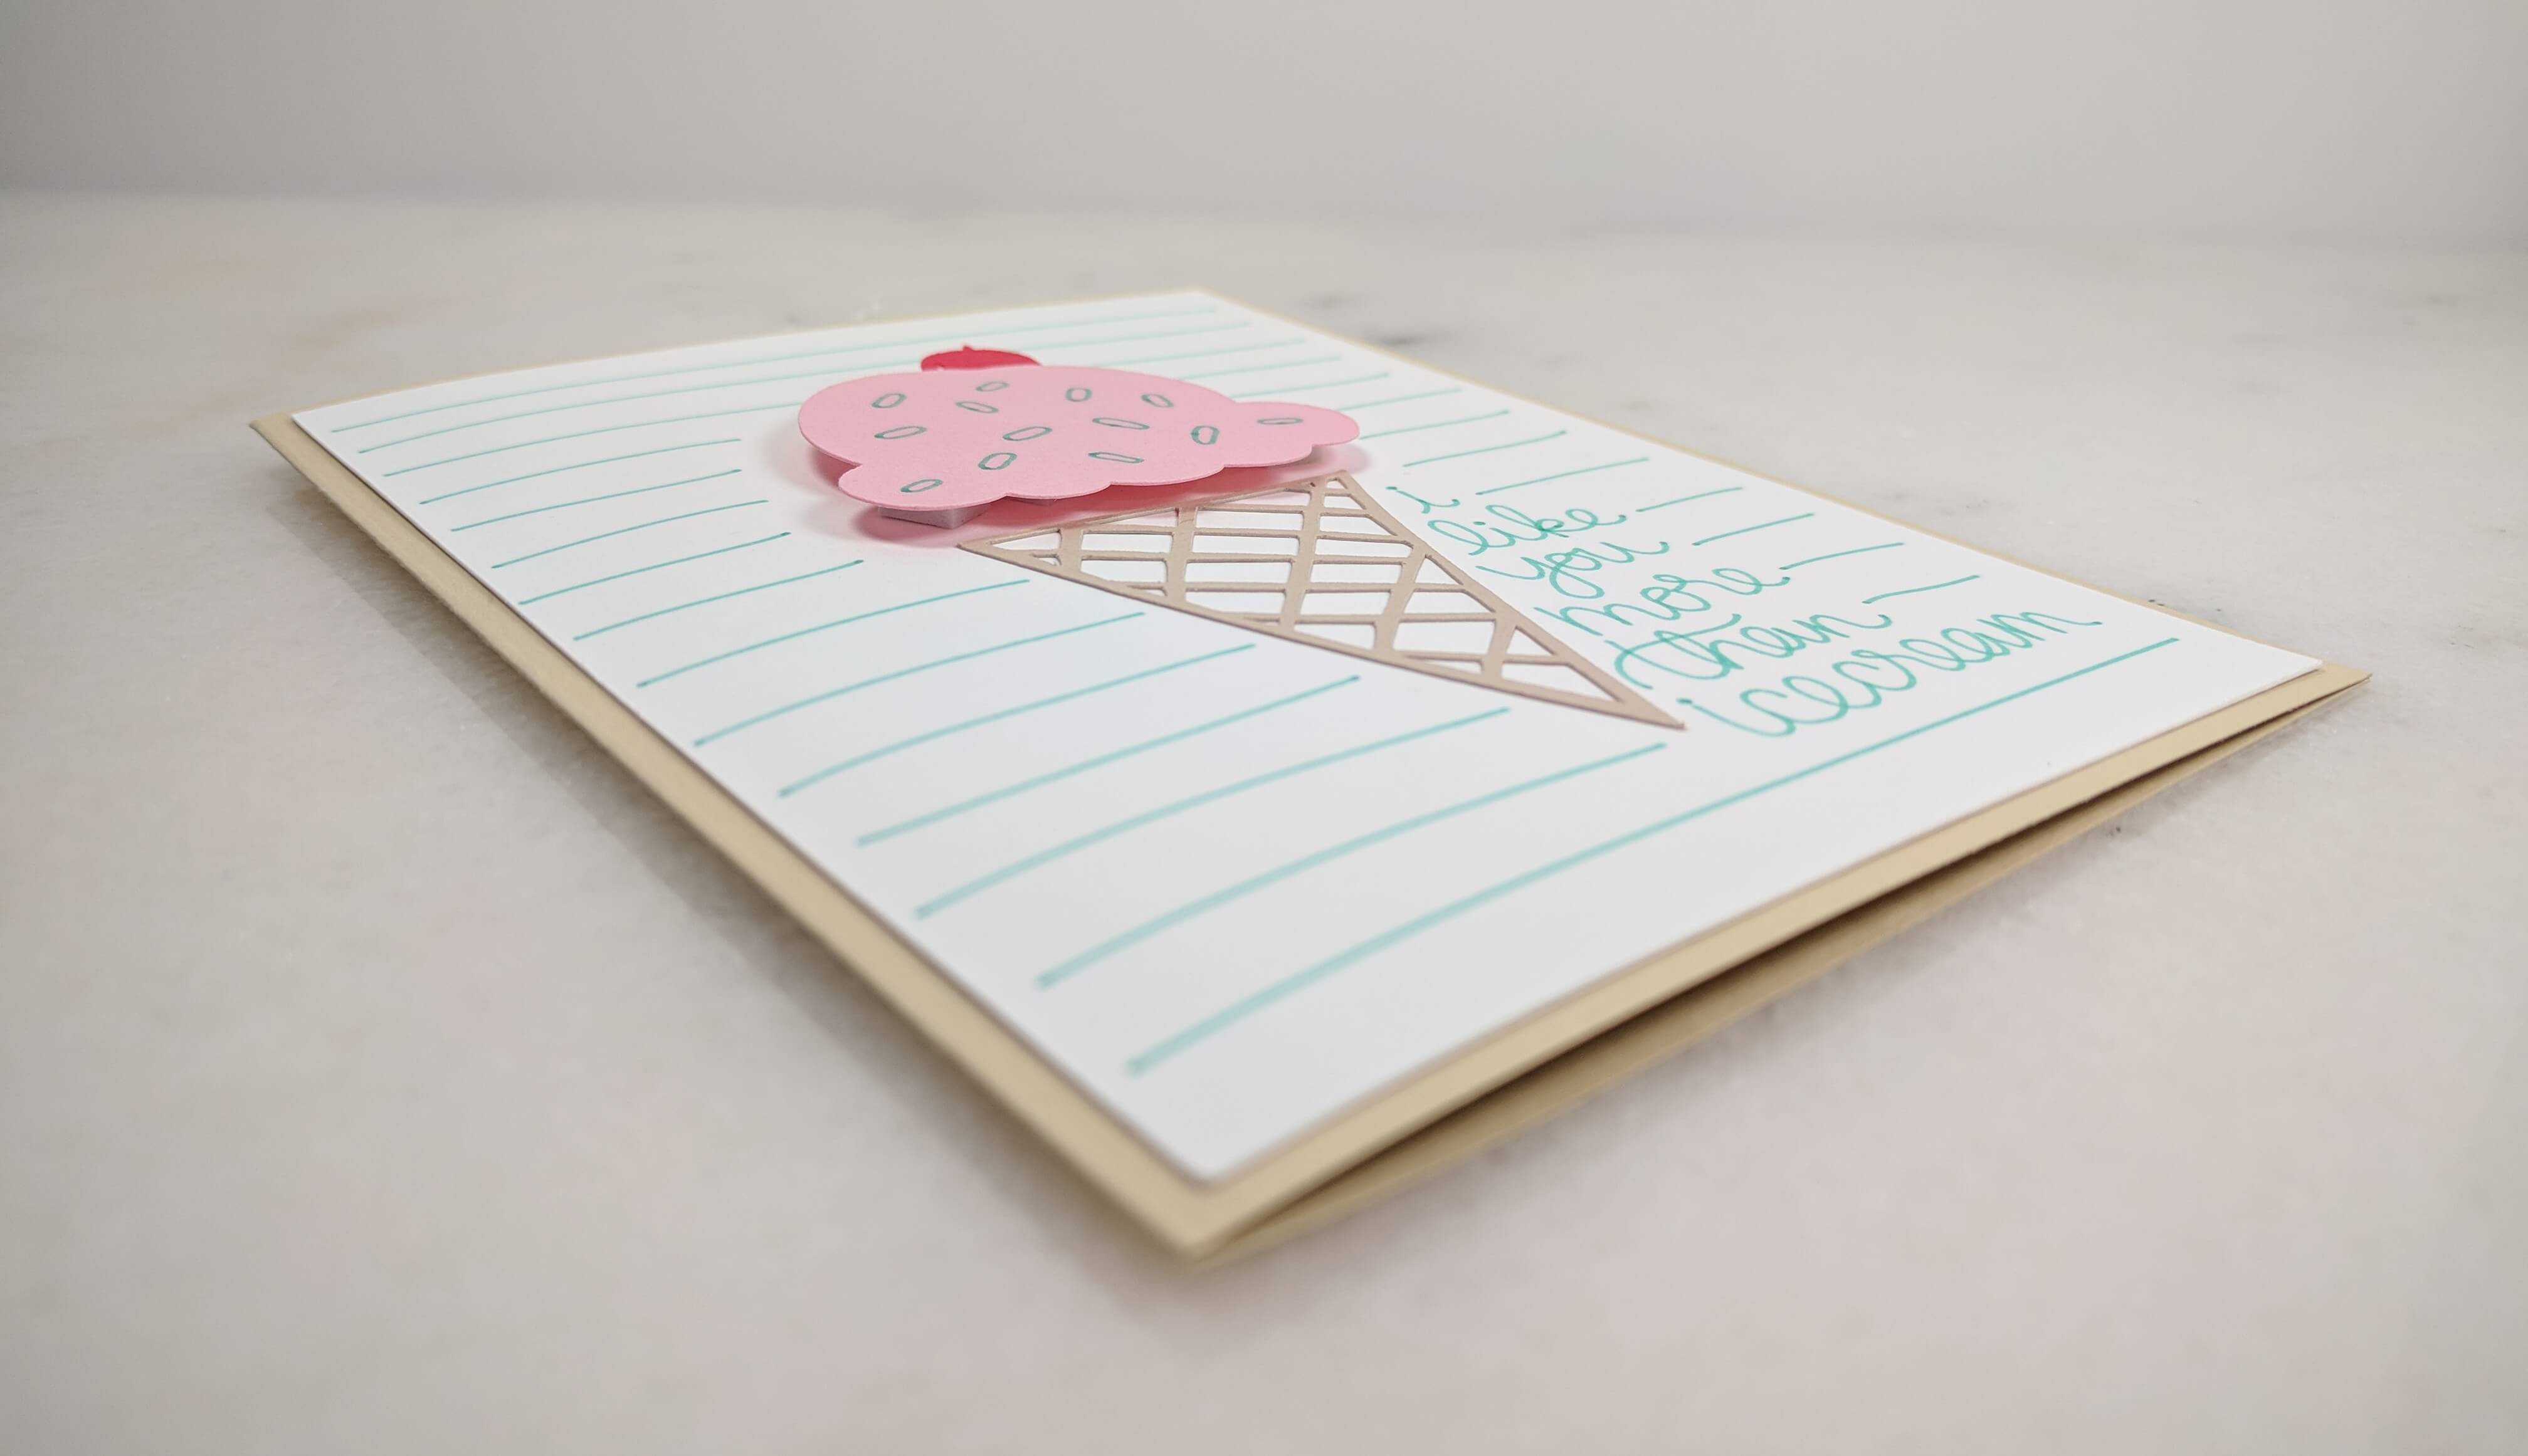
Next, use your Cricut machine to follow the steps to draw and cut this project. The background and the words on this design were drawn out using a Jade colored Cricut marker on white cardstock. I used some pink cardstock for the ice cream and beige cardstock for the ice cream cone. The last piece of the design that to cut is the little cherry on top which I used a medium red-toned cardstock for that cut-out.
Tip: to learn more tips and tricks about using your Cricut machine, read the Mastering your Cricut article.

Step 2.
Once all the pieces have been cut out use glue to adhere the cone to the striped background first. I used Tombow Mono liquid glue and put it on the borders of the cone as well as a few places in the middle of the cone. Be careful you don’t use too much glue, otherwise, you will find it’s squeezing out of the sides of your cone. Place your cone in the white space where the stripes end and try to leave a little bit of white between the stripes and the cone.
After the glue on your cone has dried, use some 3D foam tape too stick the top of the ice cream onto the cone. Use another piece of 3D foam adhesive and stick it to the cherry so that that can pop off the page as well. The cherry is pretty small, so cut a piece of 3D foam tape in half or in quarters if needed.
Step 3.
The last step in this simple Valentine’s Day card is to take the striped background with the completed ice cream cone on it and to the card base that you created in the first step. Use regular mounting tape to stick this background on to the card base. You may also choose to put a white interior insert inside the card if you’d like. I recommend this insert be approximately 3.75 x 5 inches in size.
And that’s it! It’s really just that simple. I hope you enjoyed this More Than Ice Cream greeting card tutorial and if you want to check it out any way other tutorials please feel free to browse the web site and sign up for my email newsletter. Thanks for stopping by!
