
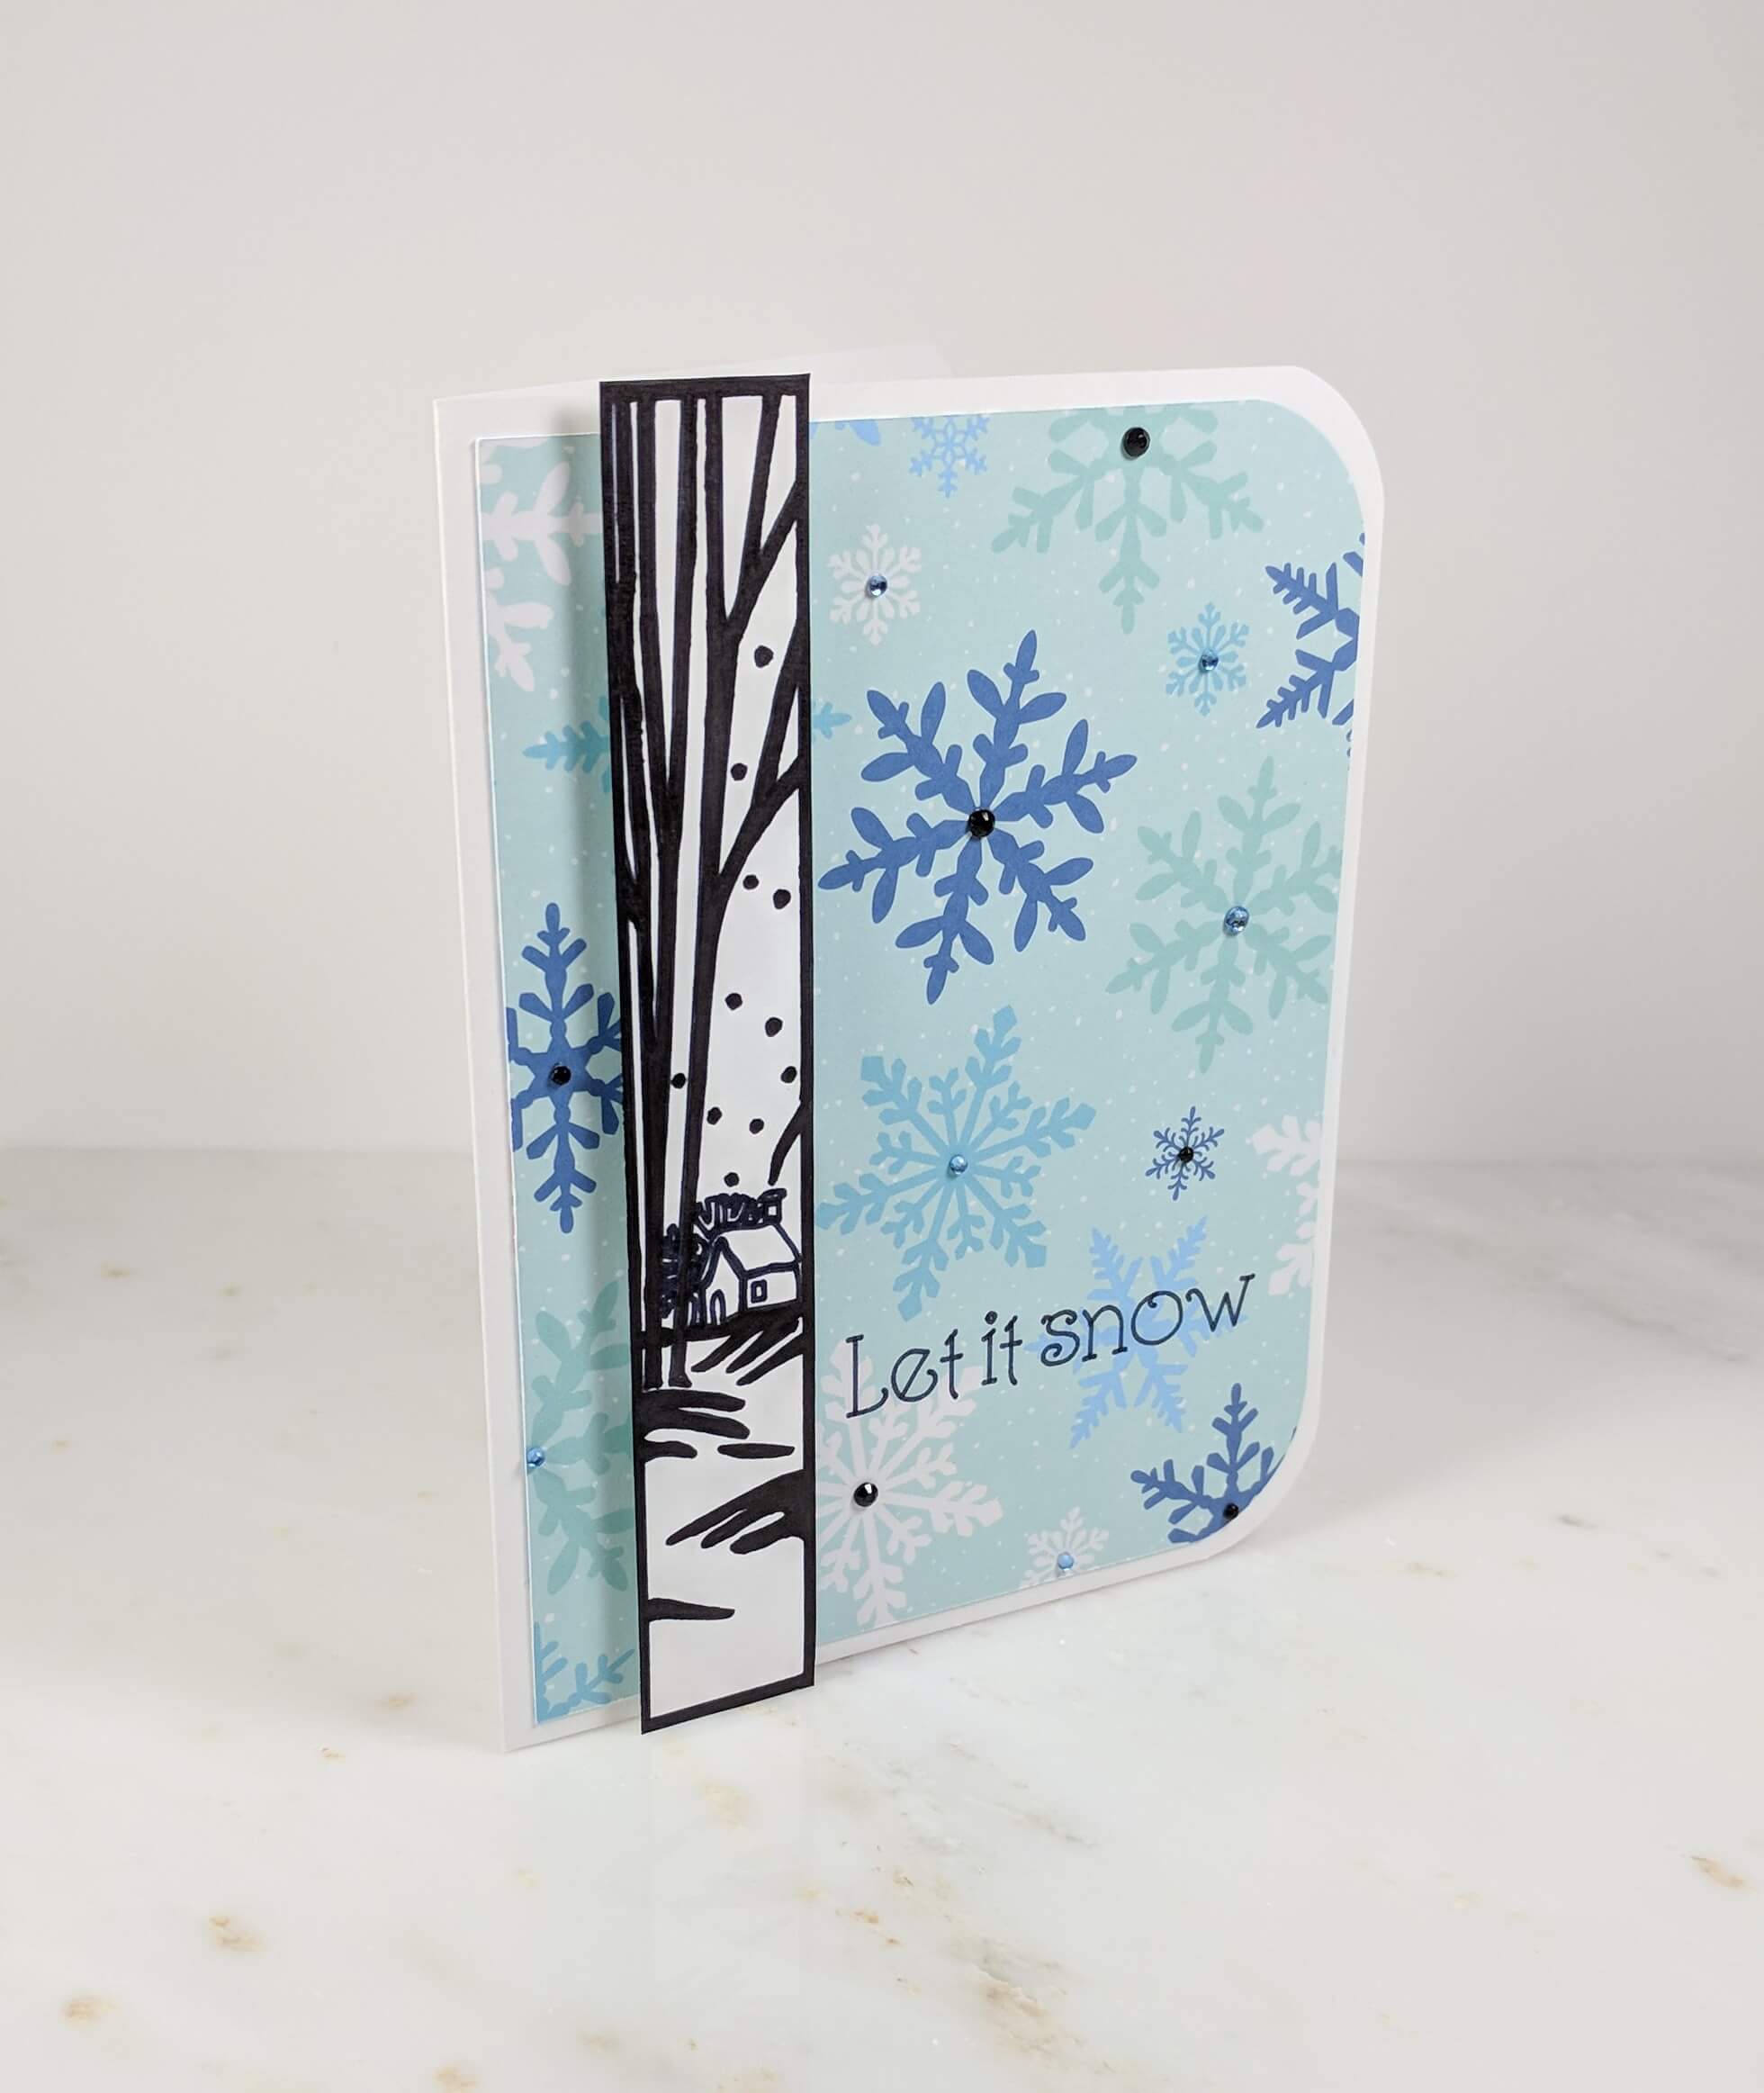
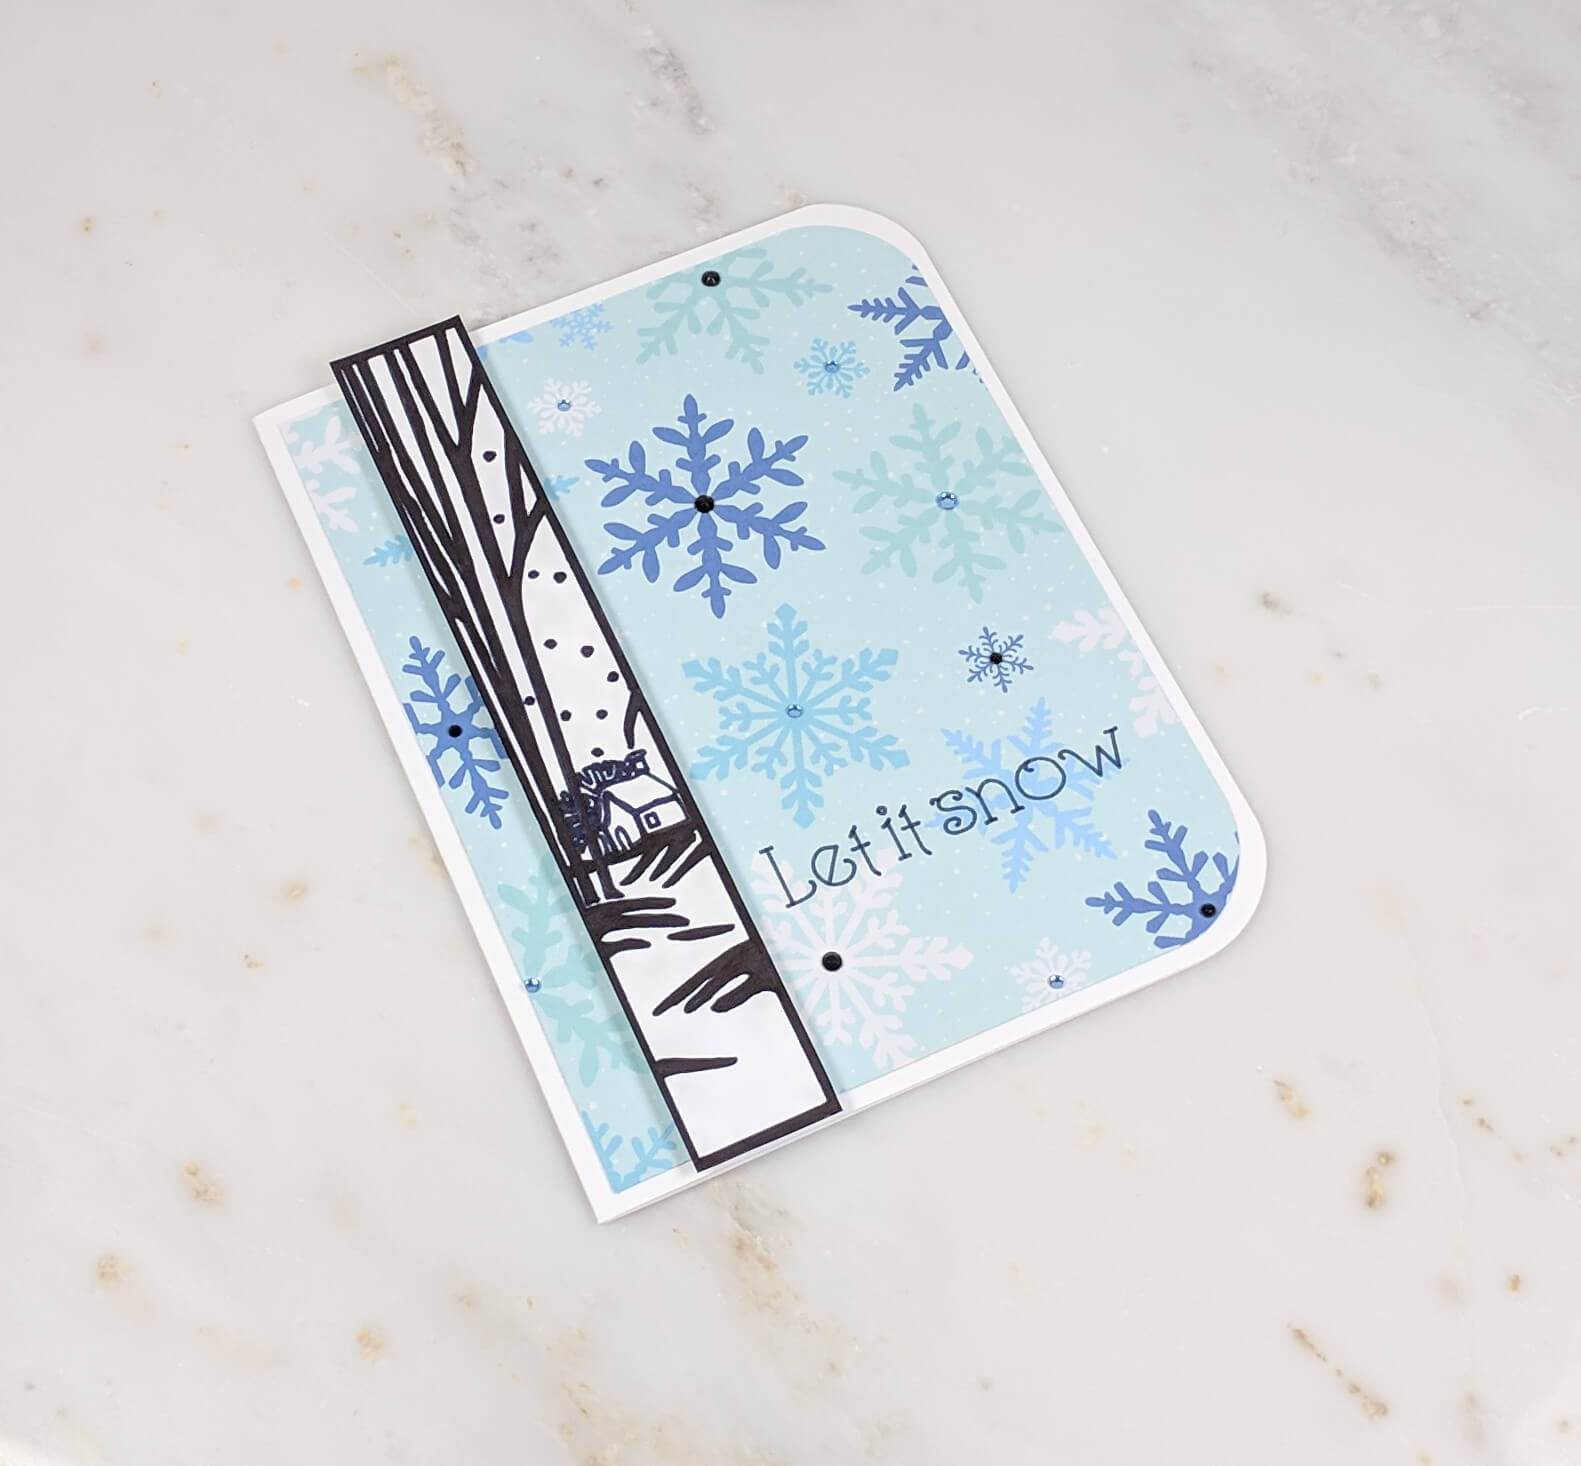
Even though Christmas is over and the New Year has begun, snow is still falling and winter is far from being over. I love how beautiful untouched snow looks, laying on the ground near a winter cabin and wanted to find a way to make my own winter scene.
I wanted my winter cabin to be easy to create since I don’t own any winter scene stamps. So, I turned to my trusty Cricut Explore Air 2 to find an image that could be easily drawn. One of the machine’s handy features is that it can draw certain images, if you make them large enough. So when I’m in a pinch or I don’t like any of the stamps that I own, I can likely find an image in the Cricut library then, draw it out with my Cricut Explore Air 2. Pretty neat huh!
Keep reading to find links to the materials I used for this Winter Cabin greeting card, and to see how I made it, step by step!
For more Cricut tutorials, click here.
Materials Used:
This blog may use affiliate links when they’re available. If you choose to make a purchase through one of these links, I may receive a small commission at no cost to you. I don’t make recommendations lightly, and will only link to products I know and trust.
- Sticro 5 Sizes Self-adhesive Rhinestone Sticker 4950 Pieces [Amazon]
- Scrapbook Adhesives Initially Repositionable Mounting Squares [Amazon]
- Forever In Time 3D Pop Dots Square Dual-Adhesive Foam Mount, 1/2-Inch [Amazon] [Scrapbook.com]
- Martha Stewart Crafts Corner Punch, Rounder [Amazon]
- Trim Slant Tip Tweezers [Amazon]
- Feather No.55 Switch-Blade Shear, 5.5 Inch [Amazon]
- Fiskars Recycled Bypass Trimmer, 12 Inch [Amazon]
- Cricut Explore Air 2 Machine [Cricut] [Amazon]
- Adhesive Cricut Cutting Mat, Standard Grip [Scrapbook.com] [Cricut] [Amazon]
- Basic Tool Set – Cricut [Cricut] [Amazon]
- Ultimate Fine Point Pen Set – Cricut [Cricut] [Amazon]
- Neenah Solar White Cardstock [Amazon] [Scrapbook.com]
- EK Tools EK Scoring Board 12×12 [Amazon]
Cricut Images Used:
Winter Scene (Simple Christmas cartridge)
Standard Square
Storyteller Font
View the exact specifications of this project in the Cricut Design Space.
Winter Cabin Card Making Tutorial:
Step 1. Prep the card base.
I used Neenah Solar White cardstock to make the card base. I trimmed it to be 5.5 x 8.5 inches, then used my EK Tools EK Scoring Board to make the fold in the center of the base. Next, I cut a sheet of patterned snowflake cardstock to create the snowflake background that would eventually sit behind the winter cabin drawing. I have a ton of Christmas paper that I’ve accumulated over the years, so the pattern card stock probably came from Michael’s some time ago. The snowflake card stock would be 5.25 x 4 inches in size.
Tip: If you’re looking for other seasonal card making projects, I’d recommend these articles.
Step 2. Draw and cut out the winter cabin design using the Cricut machine.
Next, I used my Cricut Explore Air 2 to cut out the Winter Cabin design. I created this Cricut Design Space project that keeps the formatting and size of my card here. Following the steps in the Cricut Design Space to draw and cut was super easy, so I walked through that process pretty quickly. Once the images were drawn and cut, I used my basic toolset to peel the designs off of the adhesive cutting mat.
Tip: I always add a square the size of my greeting card in the Cricut Design Space so that I know how big each image will be in comparison to a standard A2 card. I never cut that square out.
Step 3. Color the winter cabin.
When the Cricut machine draws an image, it only creates an outline, so once I was done with the machine, I simply began coloring in the image. since some of the areas of the image were very small and detailed I used a fine point marker to color in those areas. I used an old alcohol marker that I have since discontinued and would not recommend to you. However, any fine point marker should suffice for this project.
Step 4. Add embellishments.
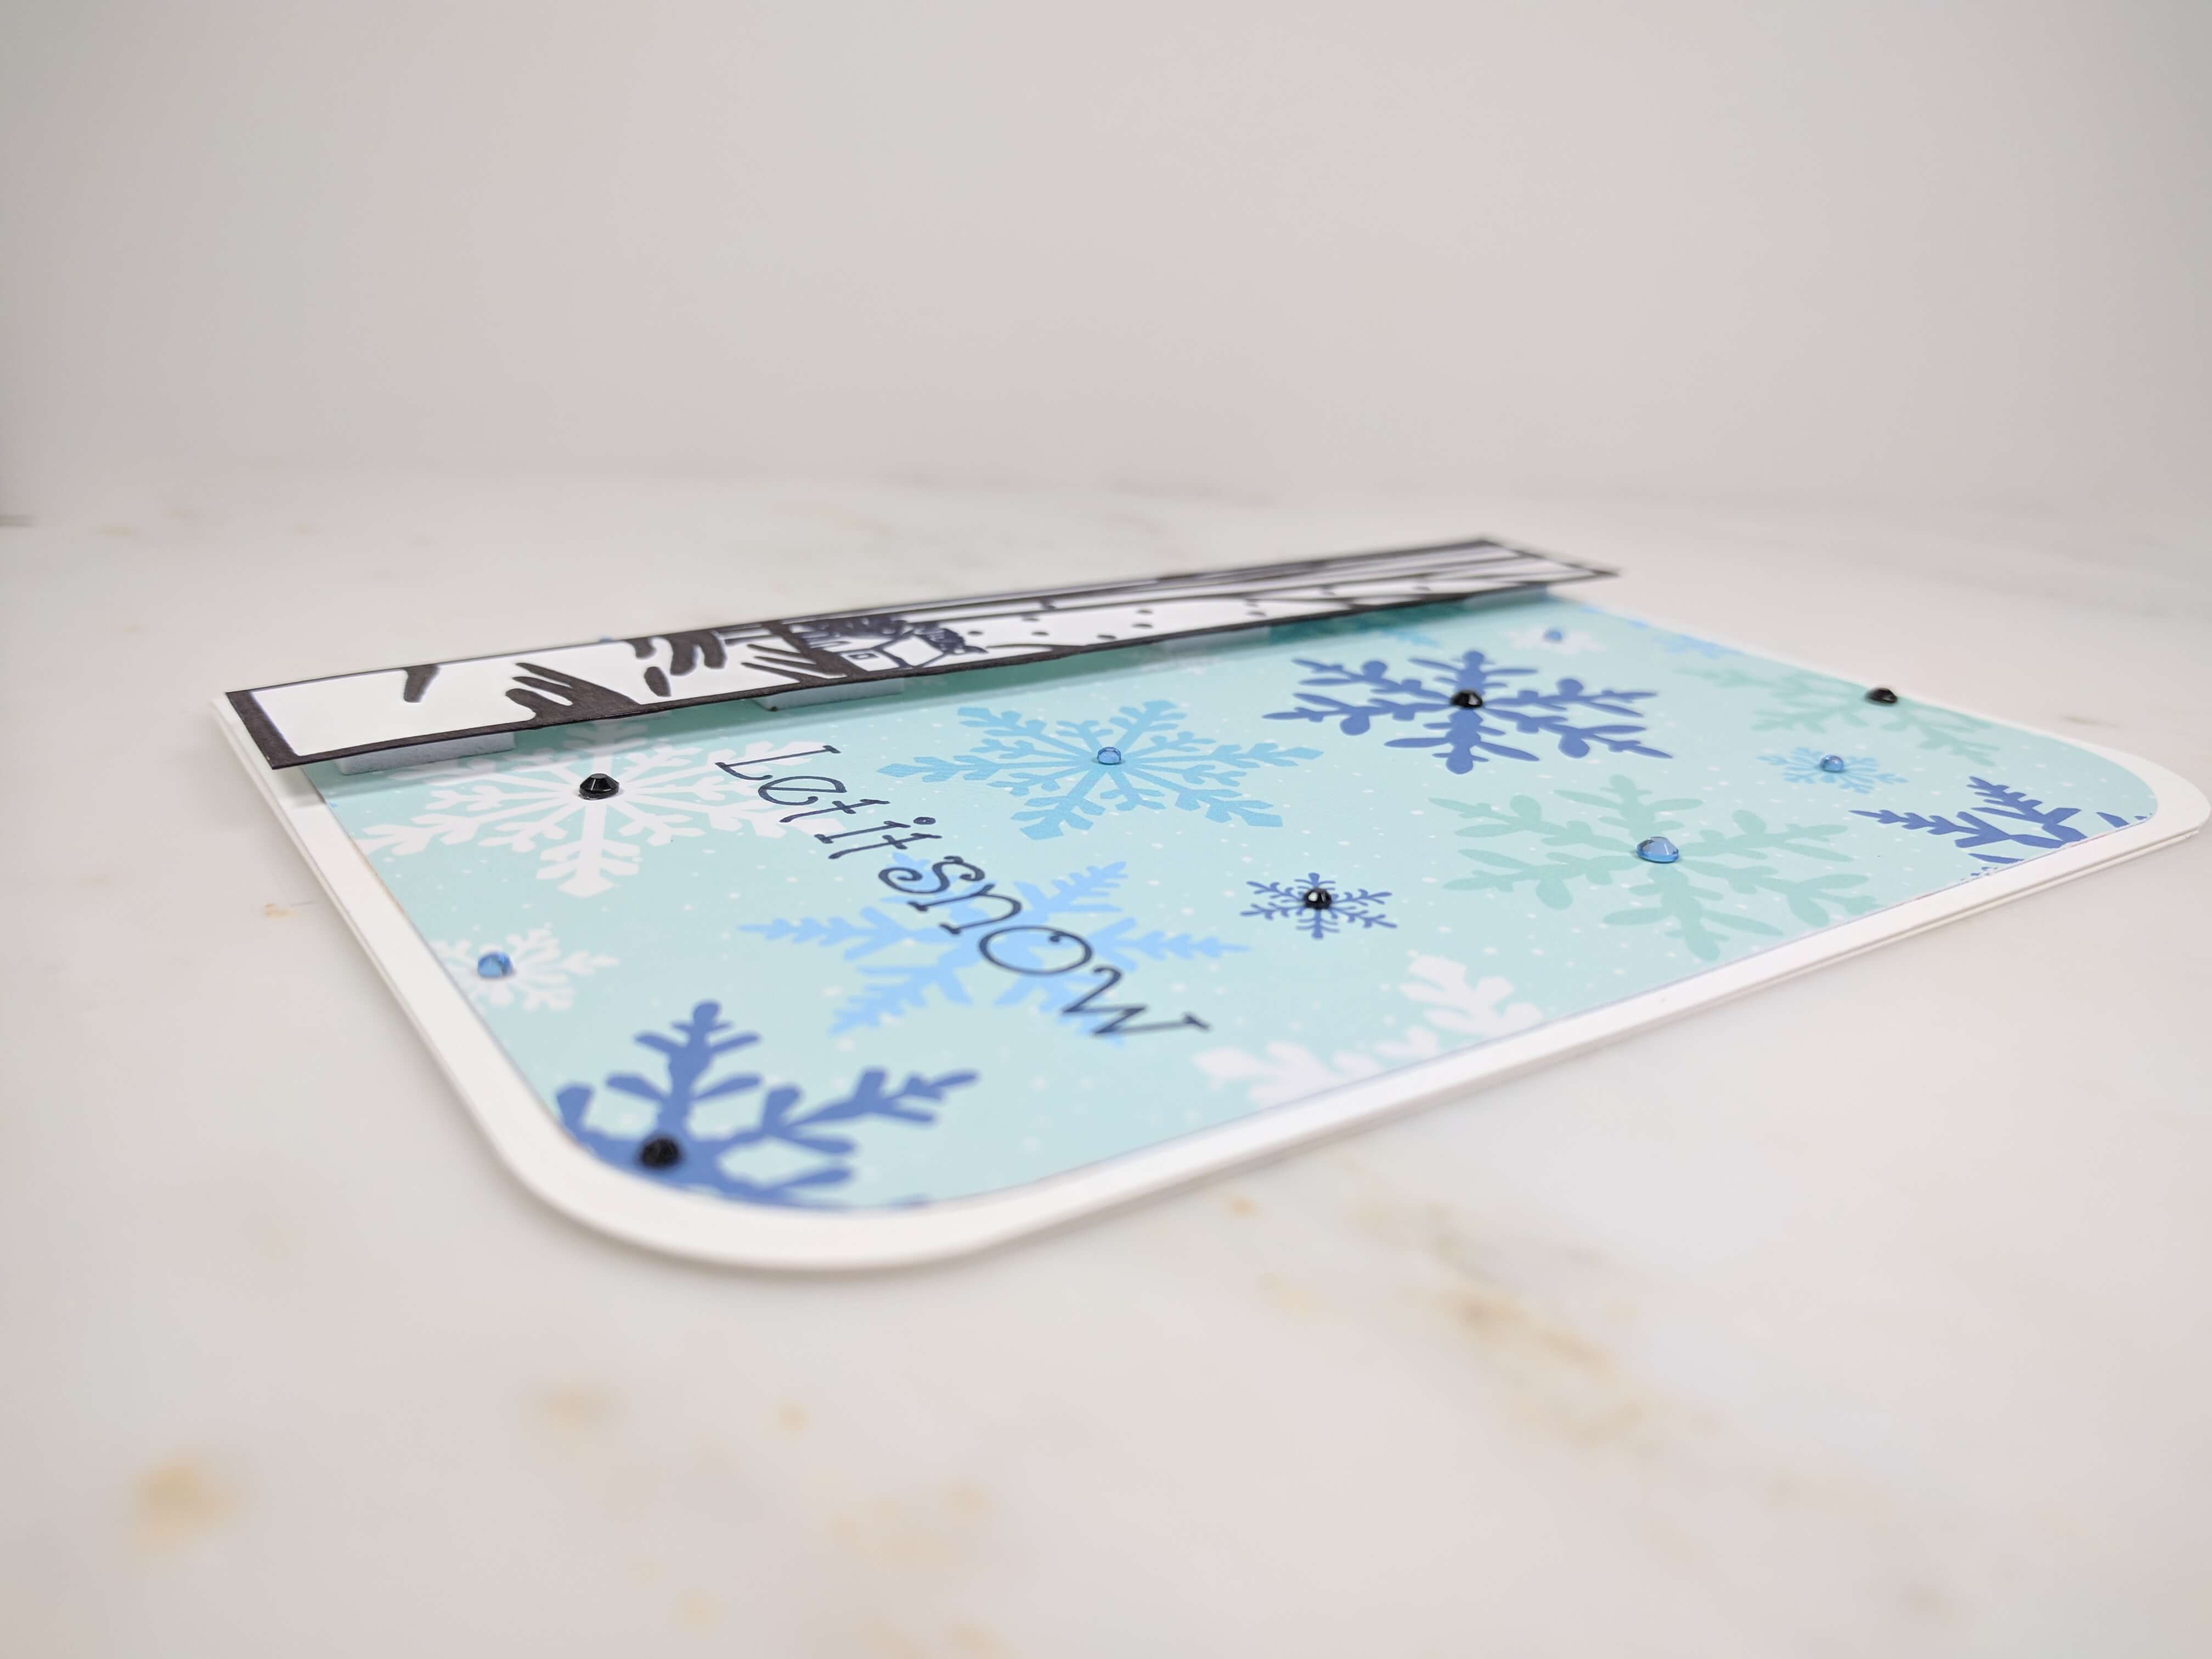
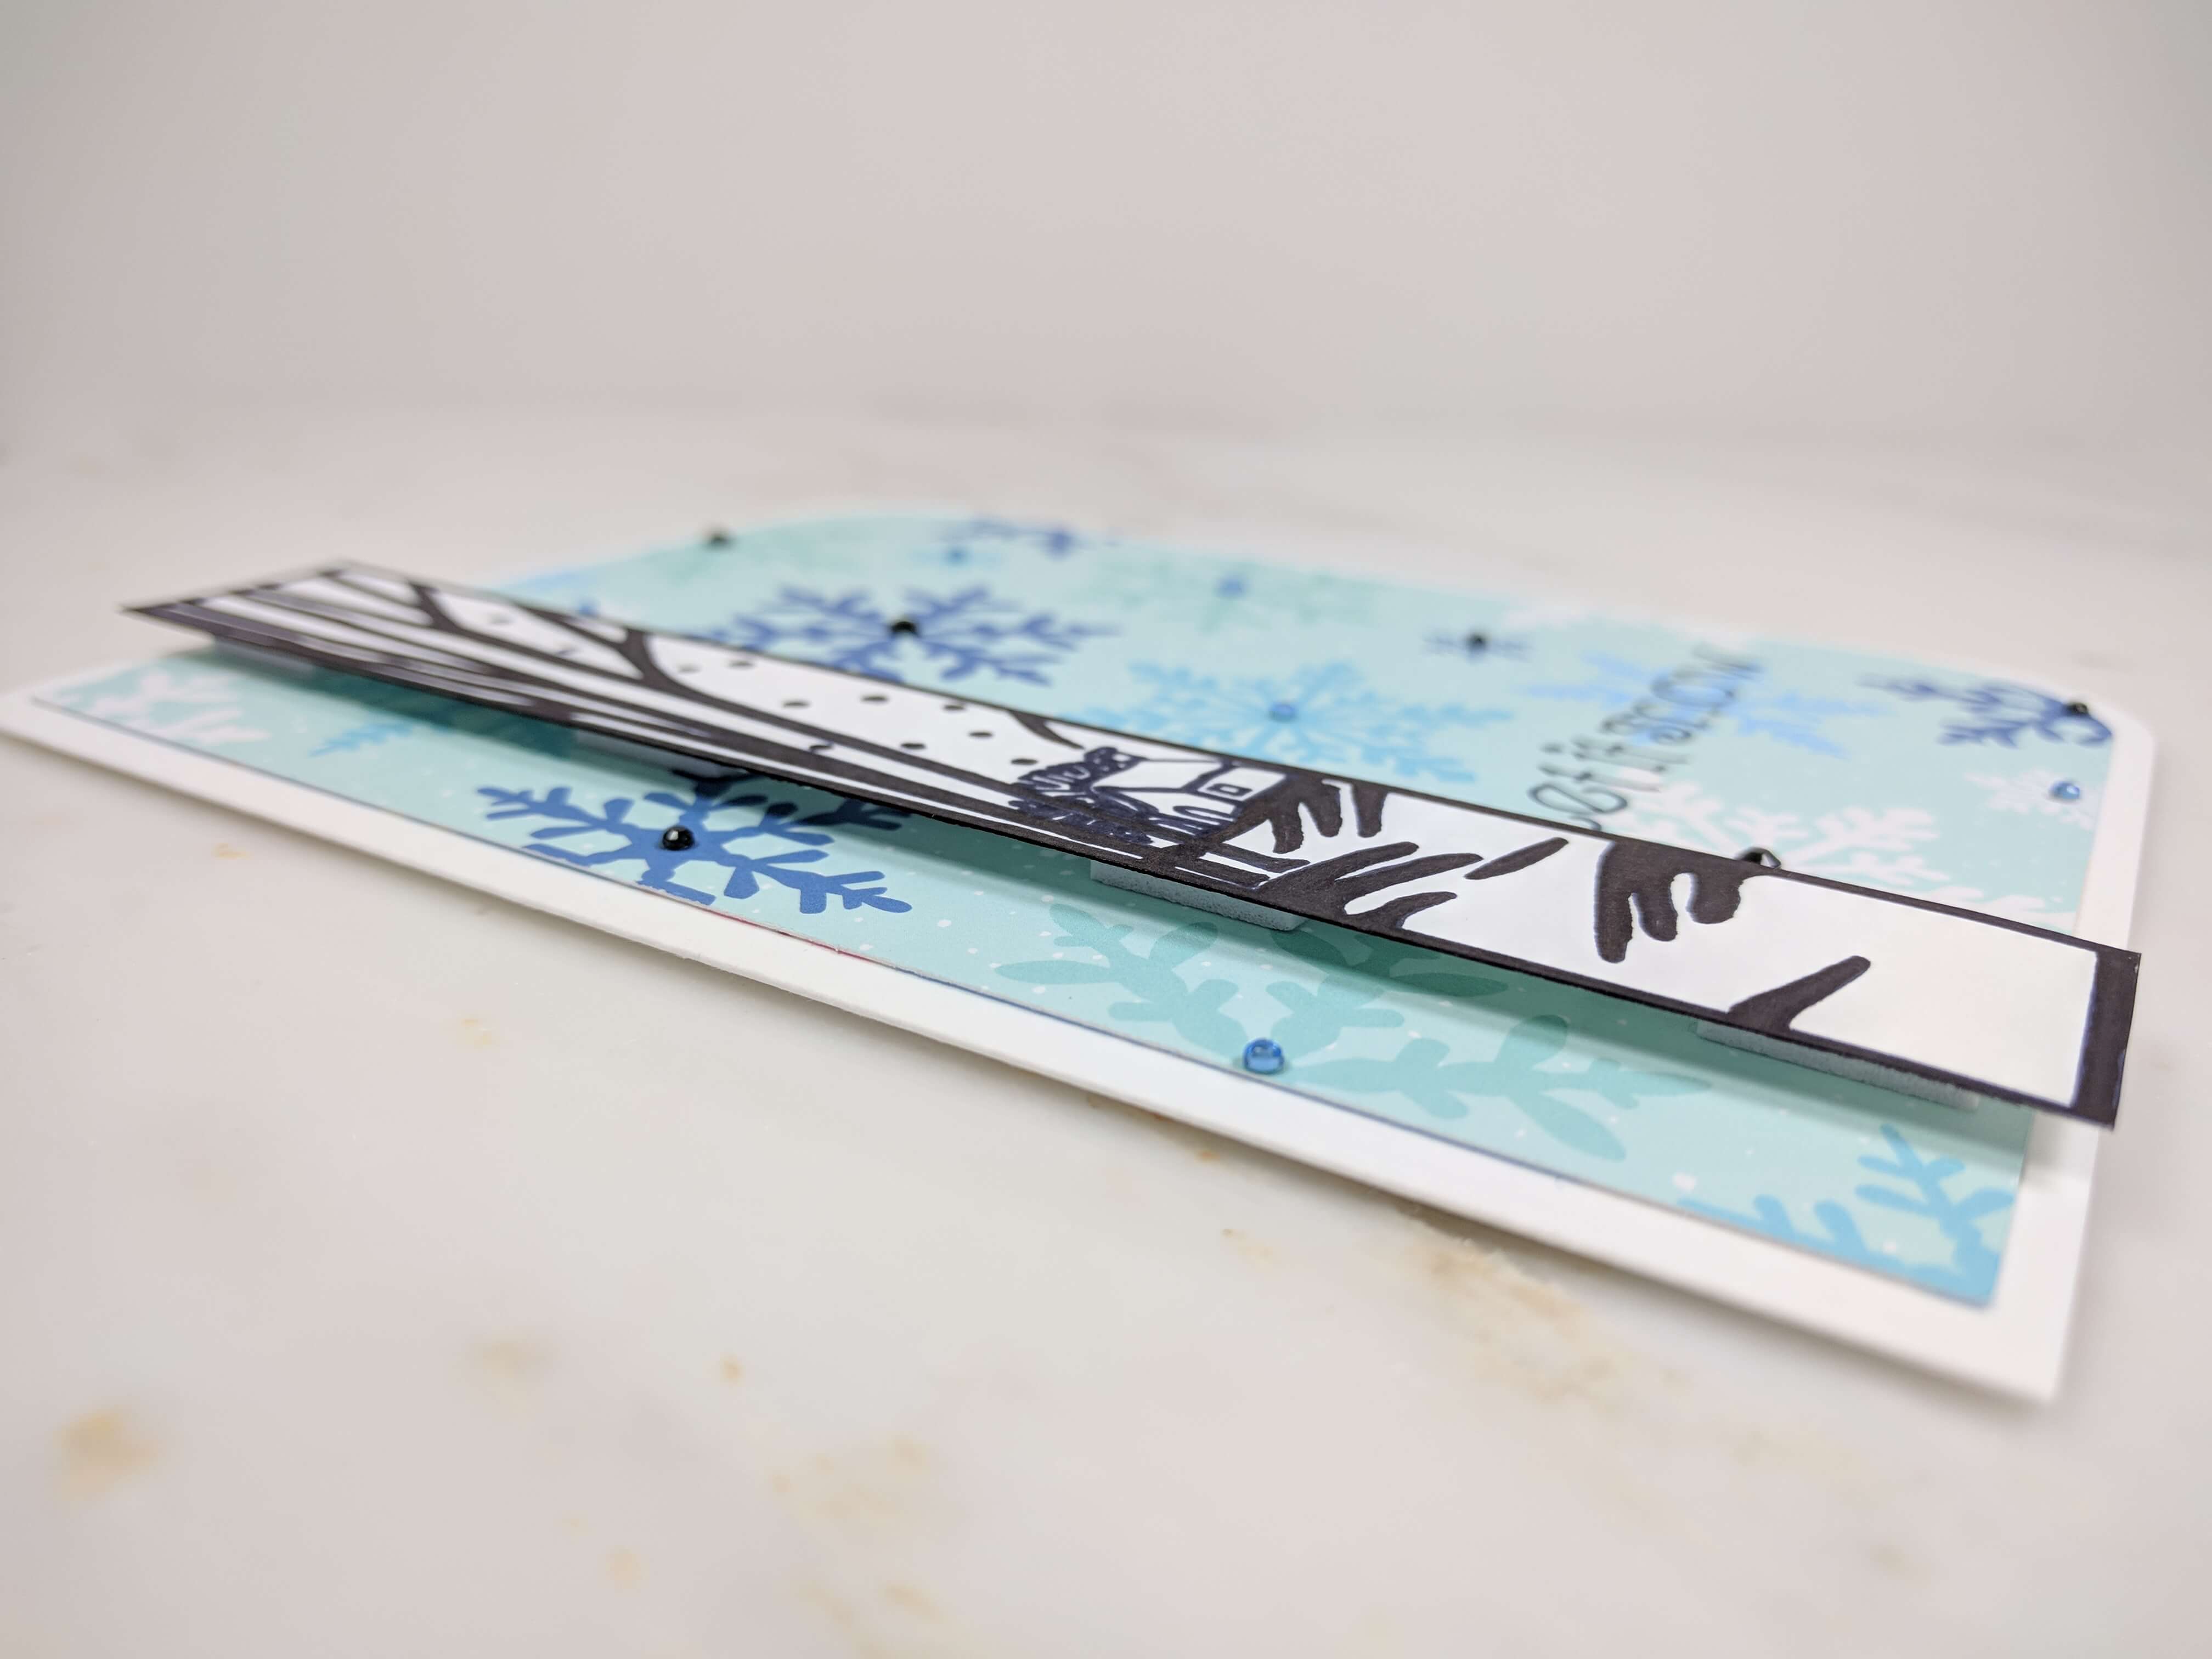
Forever In Time 3D Foam Squares really give the design a little extra flair. So, once I was all done coloring, and had trimmed my cabin down to size, I added them to the back of the paper. I also really love a rounded edge on a greeting card, so I used my Martha Stewart round corner punch at the top and bottom edges of the right side of the card base and background.
I used some Scrapbook Adhesives mounting squares on the back of the snowflake cardstock and placed it on the card base, and added my beautiful winter cabin over top of the snowflakes. Lastly, I added some black and light blue self-adhesive rhinestones in the center of the snowflakes to add a small touch of class.
I hope you enjoyed this tutorial! Please follow me on Facebook or Instagram, and leave a comment with any ideas or questions that you might have as your making your own greeting cards. Have a great New Year friends!