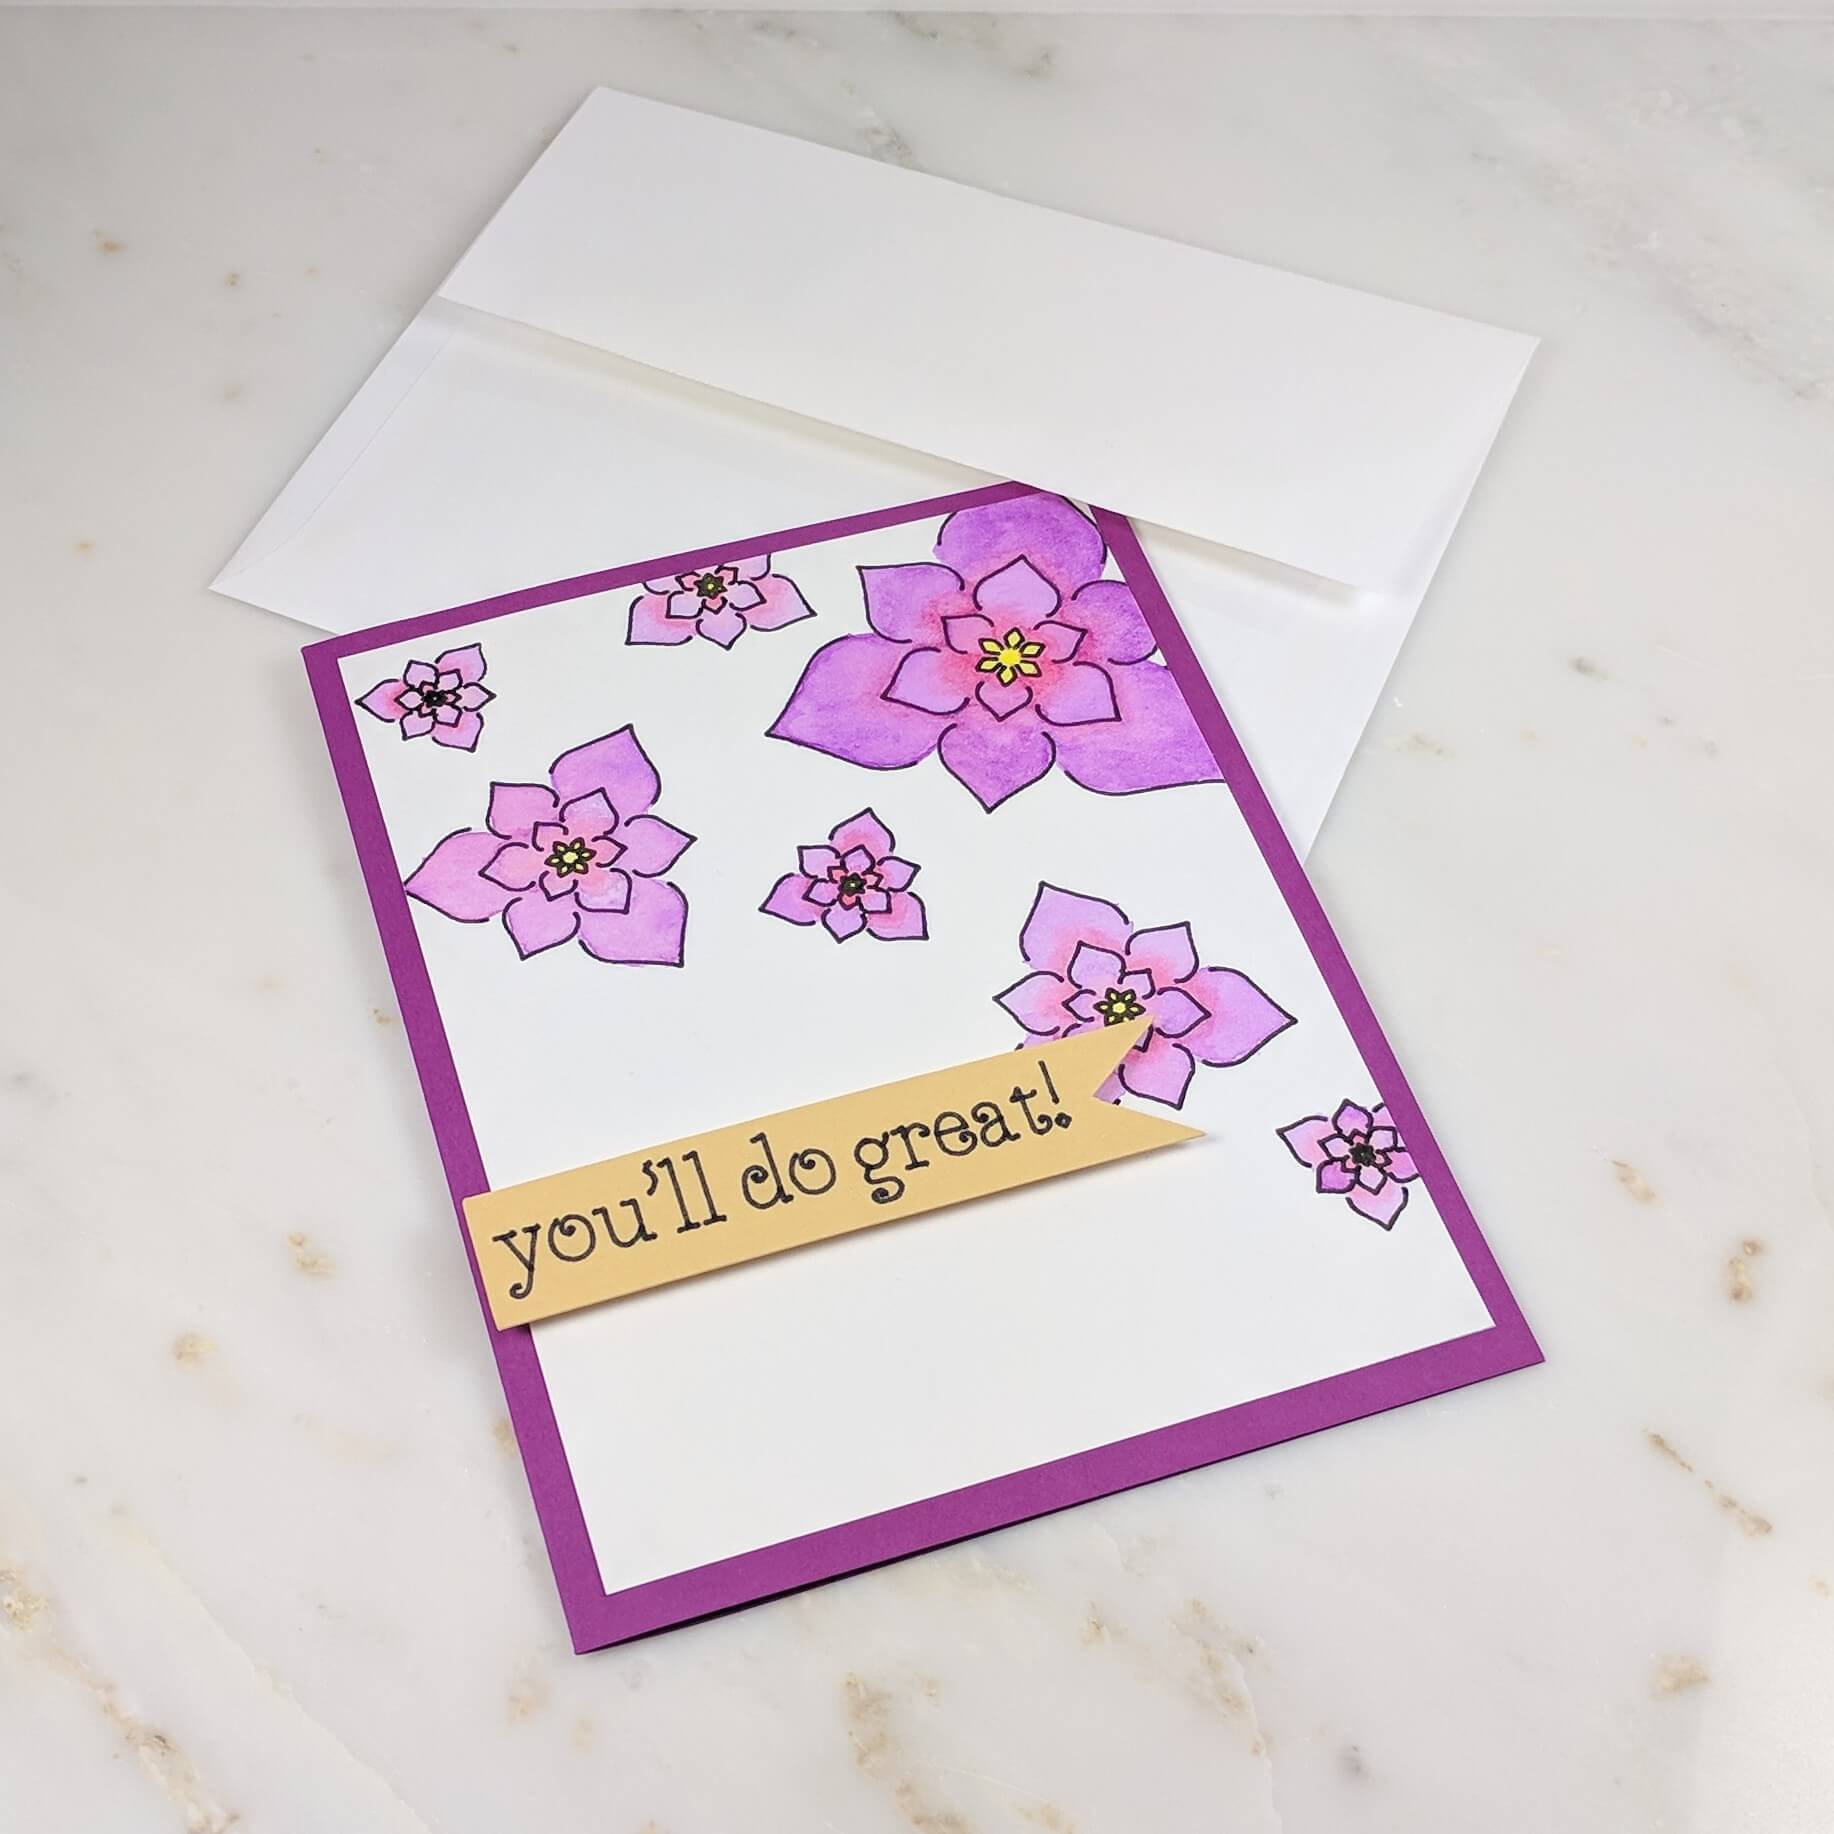
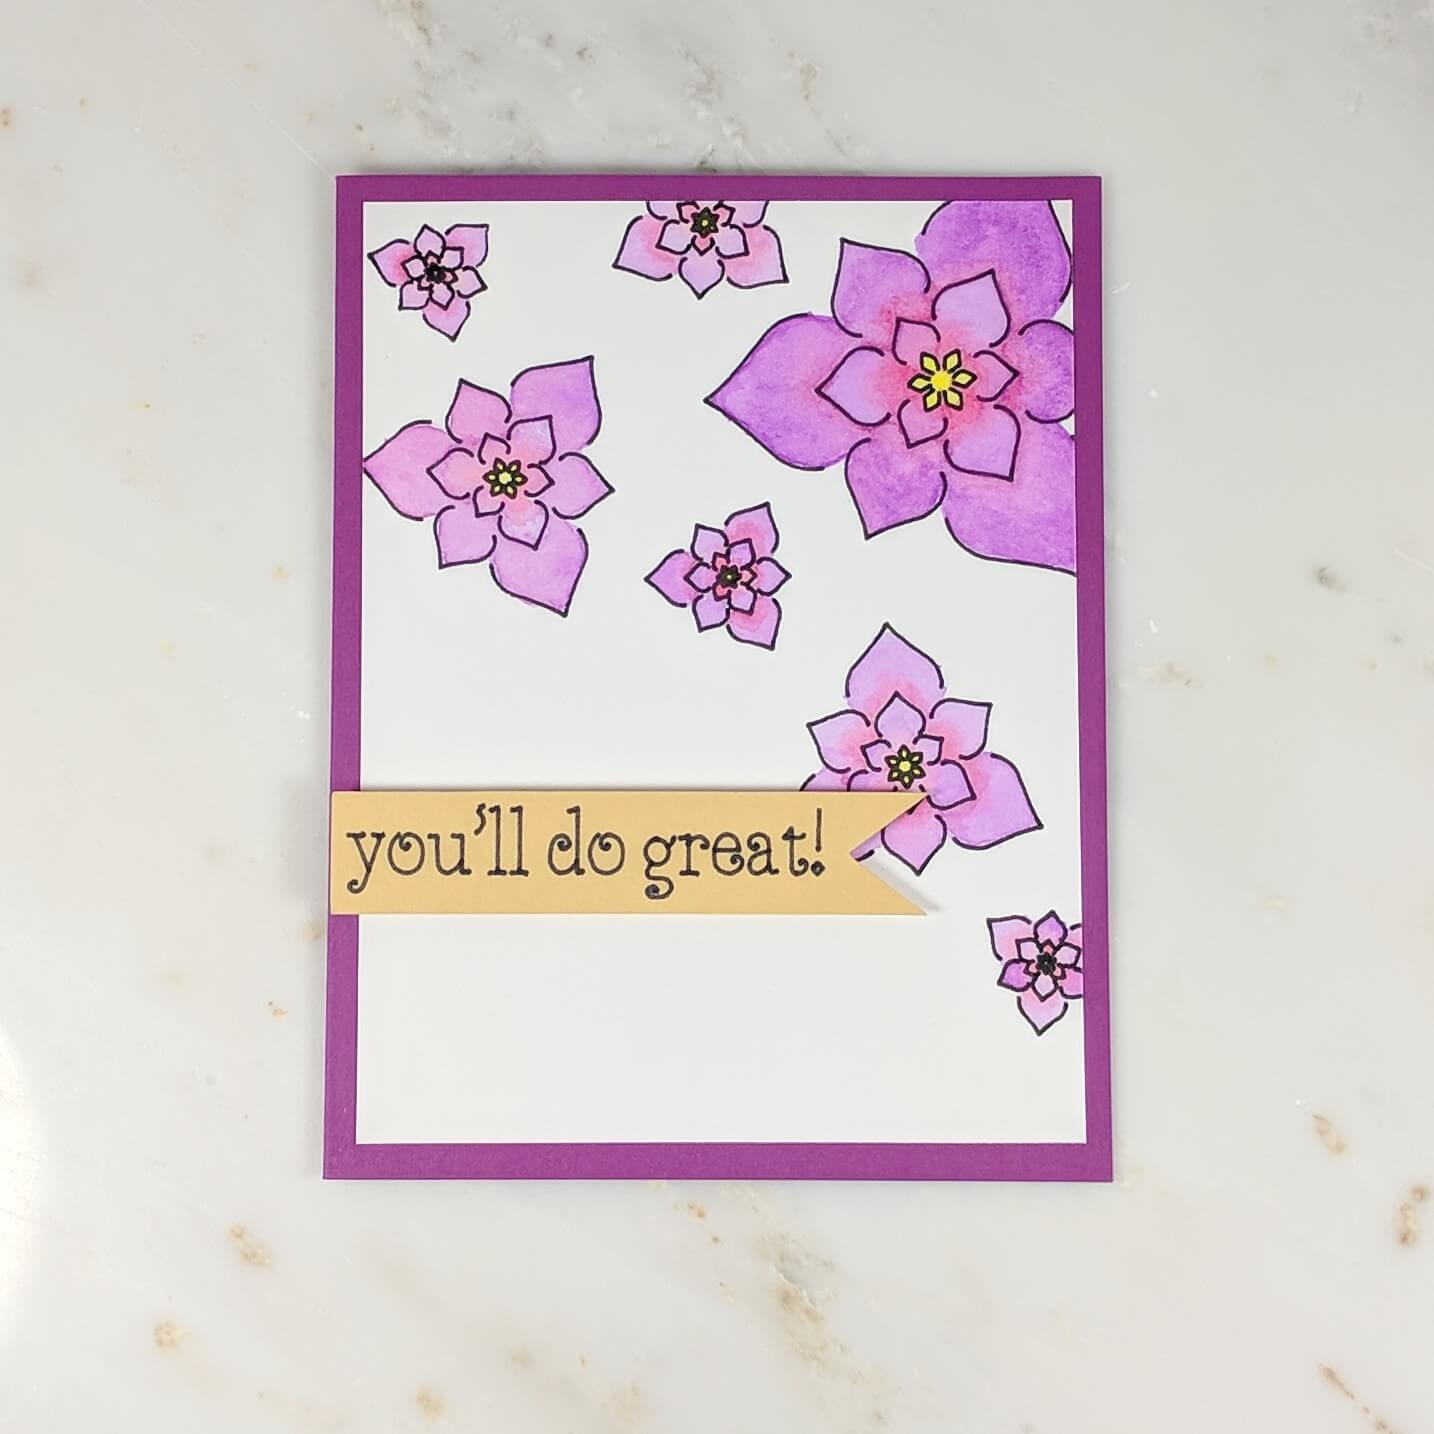
This card took a little more time than most of the other cards that I make, but I’m really happy with how it turned out. This is the type of design that I love getting lost in while I watch a movie (preferably one I’ve seen) or just listening to some really good music.
It look me about 2 hours to paint 4 of these designs, and each one turned out a little bit differently. That’s one of the things that I love the most about watercolors. The paint seems to act a little differently from day-to-day, and it always seems to look a bit different once it’s dry.
 View the exact specifications of this project in the Cricut Design Studio.
MATERIALS USED:
Please note: Other than the card base and interior insert, the cardstock sizes indicated are larger than what they will actually be on the card. This ensures that you have enough paper to put on the Cricut mat to cut the design accurately.
Cricut Explore Air 2 Machine
Cricut Adhesive Cutting Mat, Standard Grip
Cricut Basic Tool Set
Midnight Cricut Fine Point Marker –From: Cricut Antiquity Color Pen Set
Sakura Koi Watercolor Field 48 Color Sketch Set
Pastel Yellow cardstock (4’x2′) –From: Recollections Cardstock Paper, Sugar Candy
XL Mix Media Pad, 7″X10″ Side Wire – exterior (6’x5′)
Classic Crest Super Smooth Solar White – interior insert (5’x3.75′)
Purple Cardstock – card base (5.5’x8.5′ folded in half) –From: Recollections Cardstock Paper, Bright Essentials, 200 Sheets
ScotchBlue Painter’s Tape, Multi-Use, 1.88-Inch by 60-Yard, 1 Roll
Scrapbook Adhesives Initially Repositionable Mounting Squares
Forever In Time 3D Pop Dots Square Dual-Adhesive Foam Mount, 1/4-Inch
Scor-Pal Scor-Tape-1/8
Trim Slant Tip Tweezers
CRICUT IMAGES USED:
Banner (Bits and Pieces)
Water Lilly (Dimensional Paper Art)
Cinnamon Swirls Font
Standard Square
WALK THROUGH:
Step 1:
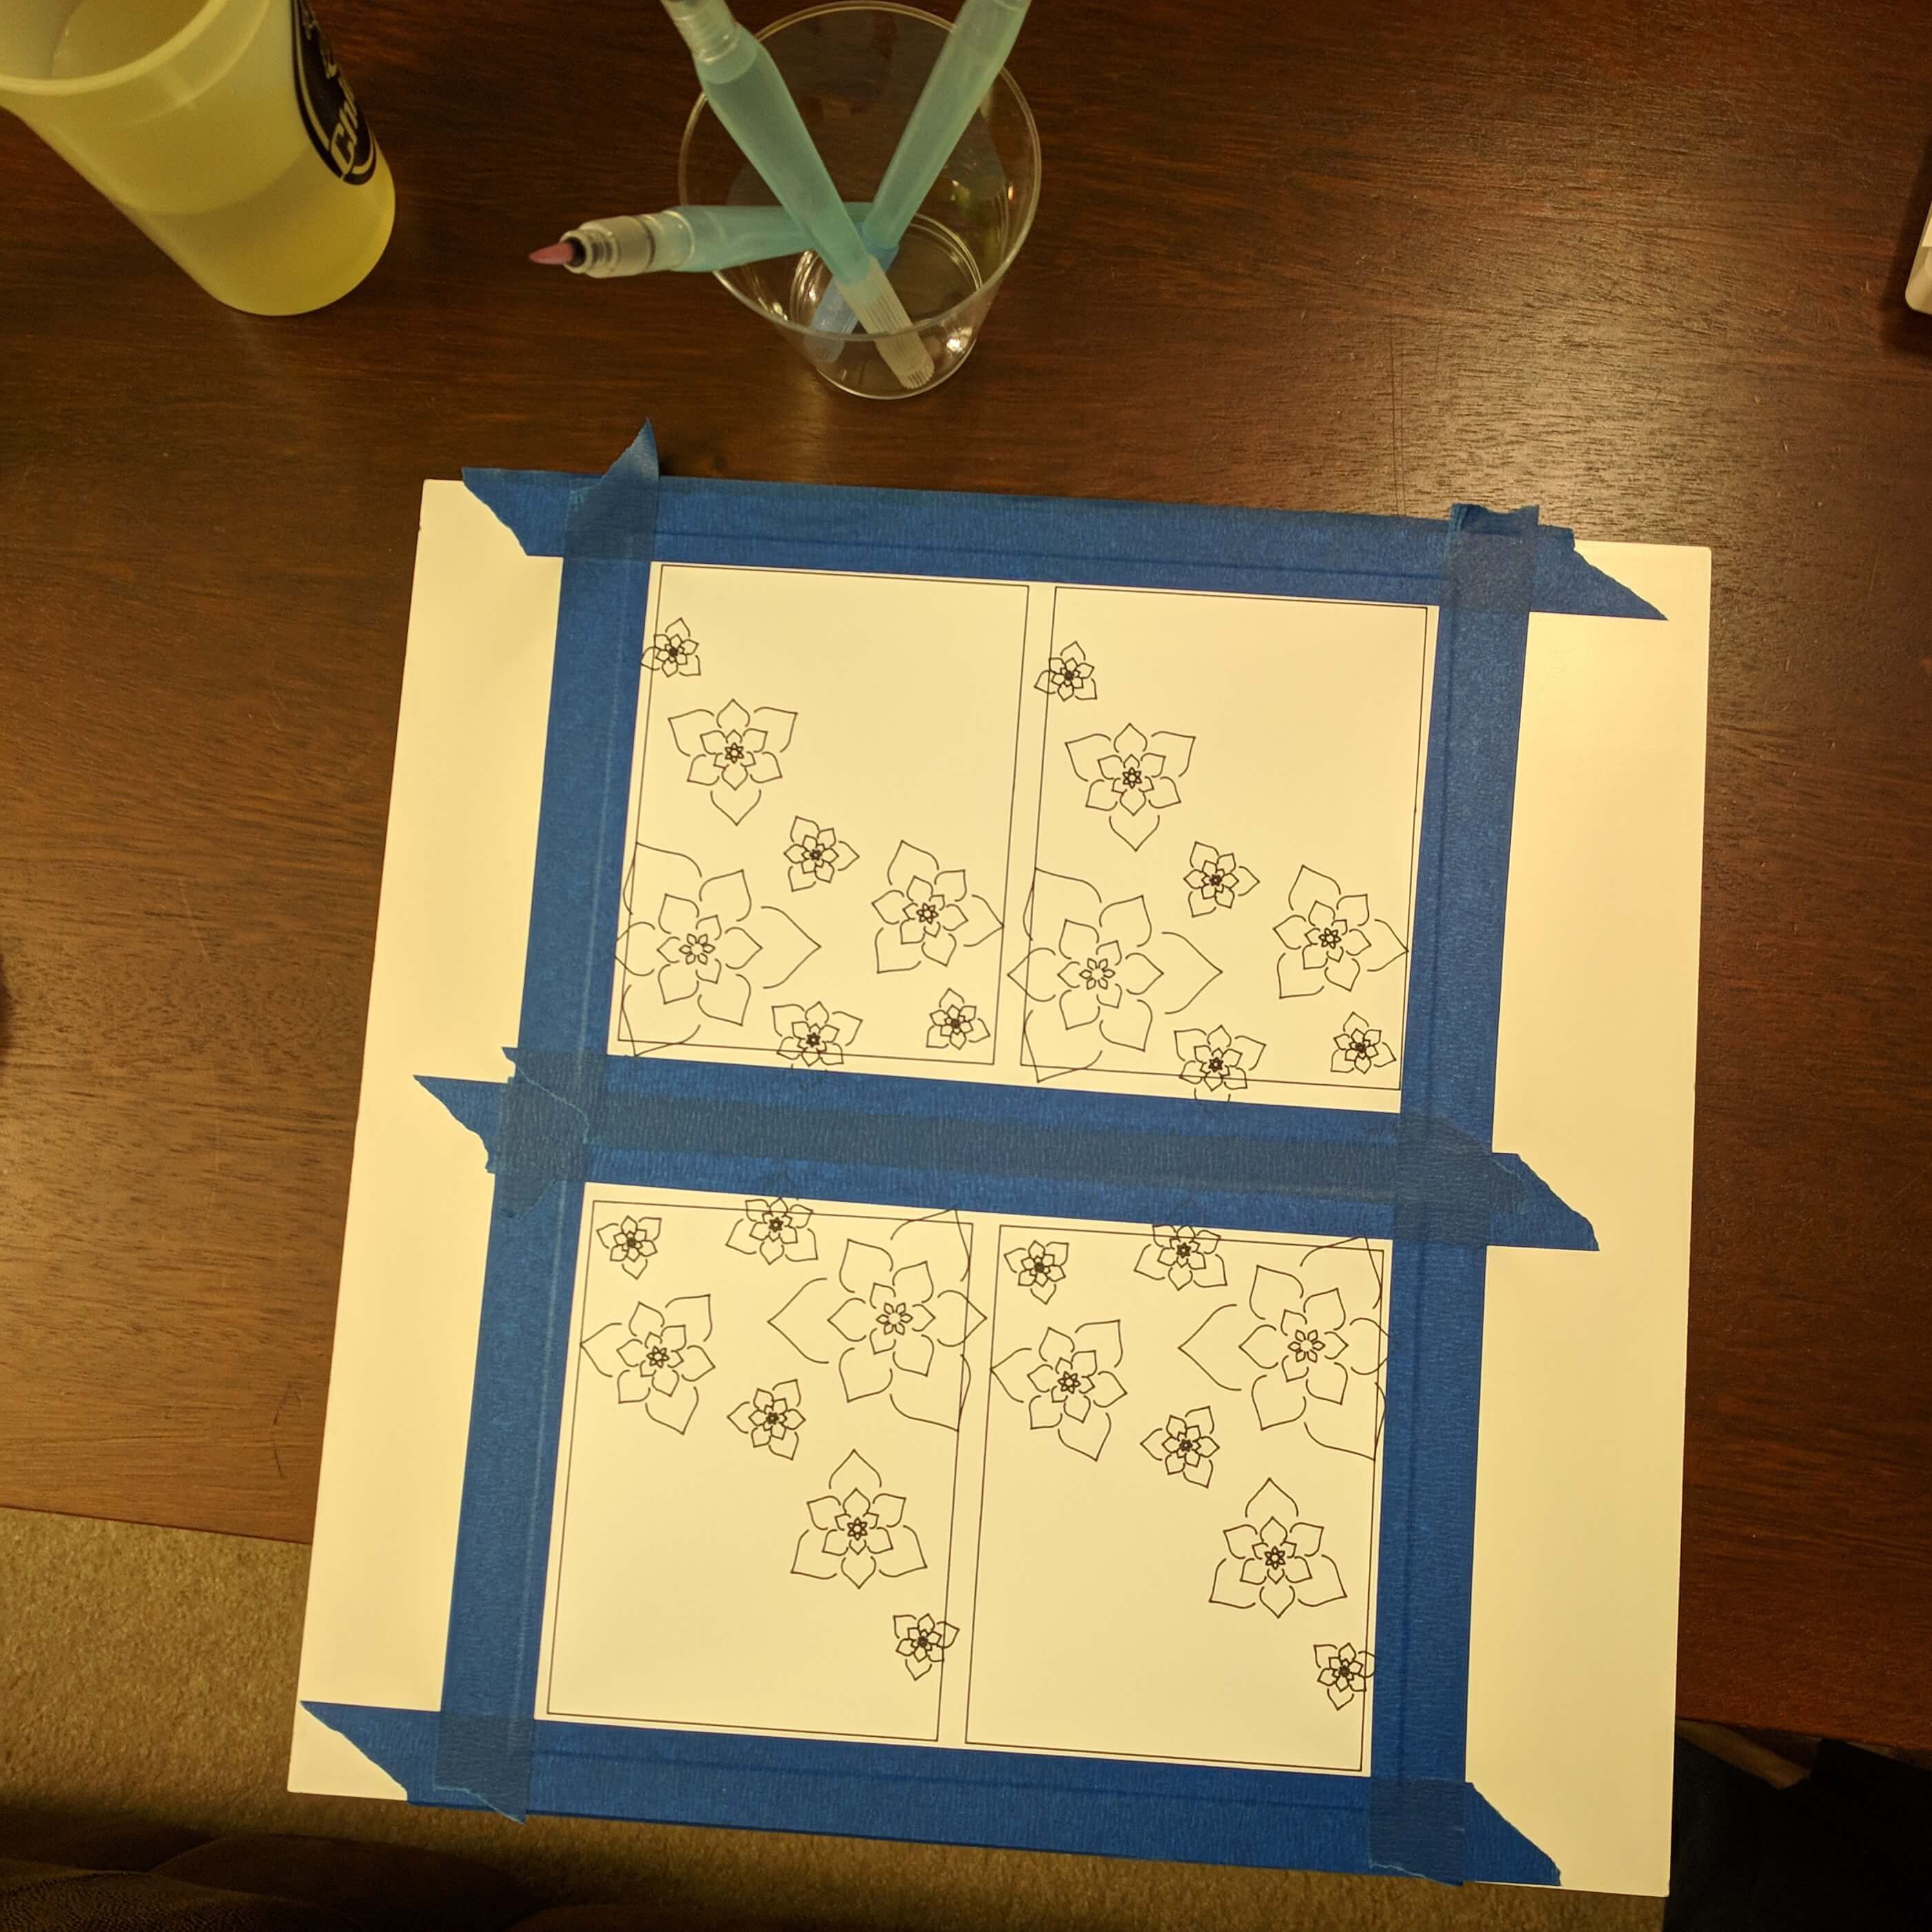
Place your sheet of 6’x5′ white mix media paper on a standard Cricut cutting mat, and insert your Midnight Cricut marker into your Cricut machine. Go to this card making project in the Cricut Design Space, and click “Make It”. Walk through the steps on your computer screen to draw out the floral design for this project using your Cricut machine. Let the machine draw out the border square as well, this will help you cut it out later.
Tip: You will need a Cricut machine, and access to the images used to make this card. I have a standard Cricut Access membership, that I pay approximately $7.99 a month to use their designs.
Step 2:
Once the design has been drawn, peel it off the Cricut mat, and set it on a smooth flat surface that you don’t mind getting a little damp. I like to use a small repositionable wooden shelf, but use a clip board or anything else that you have handy. You’ll also want to grab that masking tape and use it to outline the paper, sticking it to your flat surface. Keep the masking tape outside of the black border, just in case it rips the paper when you peel it off. This picture doesn’t have the best lighting, but will give you a good idea of what it should look like once taped down.
You’ll also want to prep your paint. I like the Sakura Koi Watercolor Field Sketch Sets because it comes with a mixing tray where you can add the colors you’re planning to use, along with a brush and small sponge. So if you’re new to the art, you can easily begin without spending too much money. I have the palette that has 48 colors, and for this project, and used: #176 (purple), #153 (light yellow), #020 (pink), #003 (Chinese white).
Step 3:
Begin painting! Get creative!
I started with the middle of each flower, painting the stigmas with the light yellow. I then chose to dilute the purple color with more water than I used with the yellow, so that it would look more like a pastel purple. I also mixed the pink with a very little bit of white in addition to the water because I wanted to slightly alter the shade of the pink.
When painting the petals, I used two paint brushes. One brush had purple paint, and would be used on the painted one petal at a time. I started with the purple around the exterior of the petal, then used brush strokes that would bring the color towards the center. Next I grabbed the brush that had the pink, started at the interior of the petal and brought the color out towards the middle.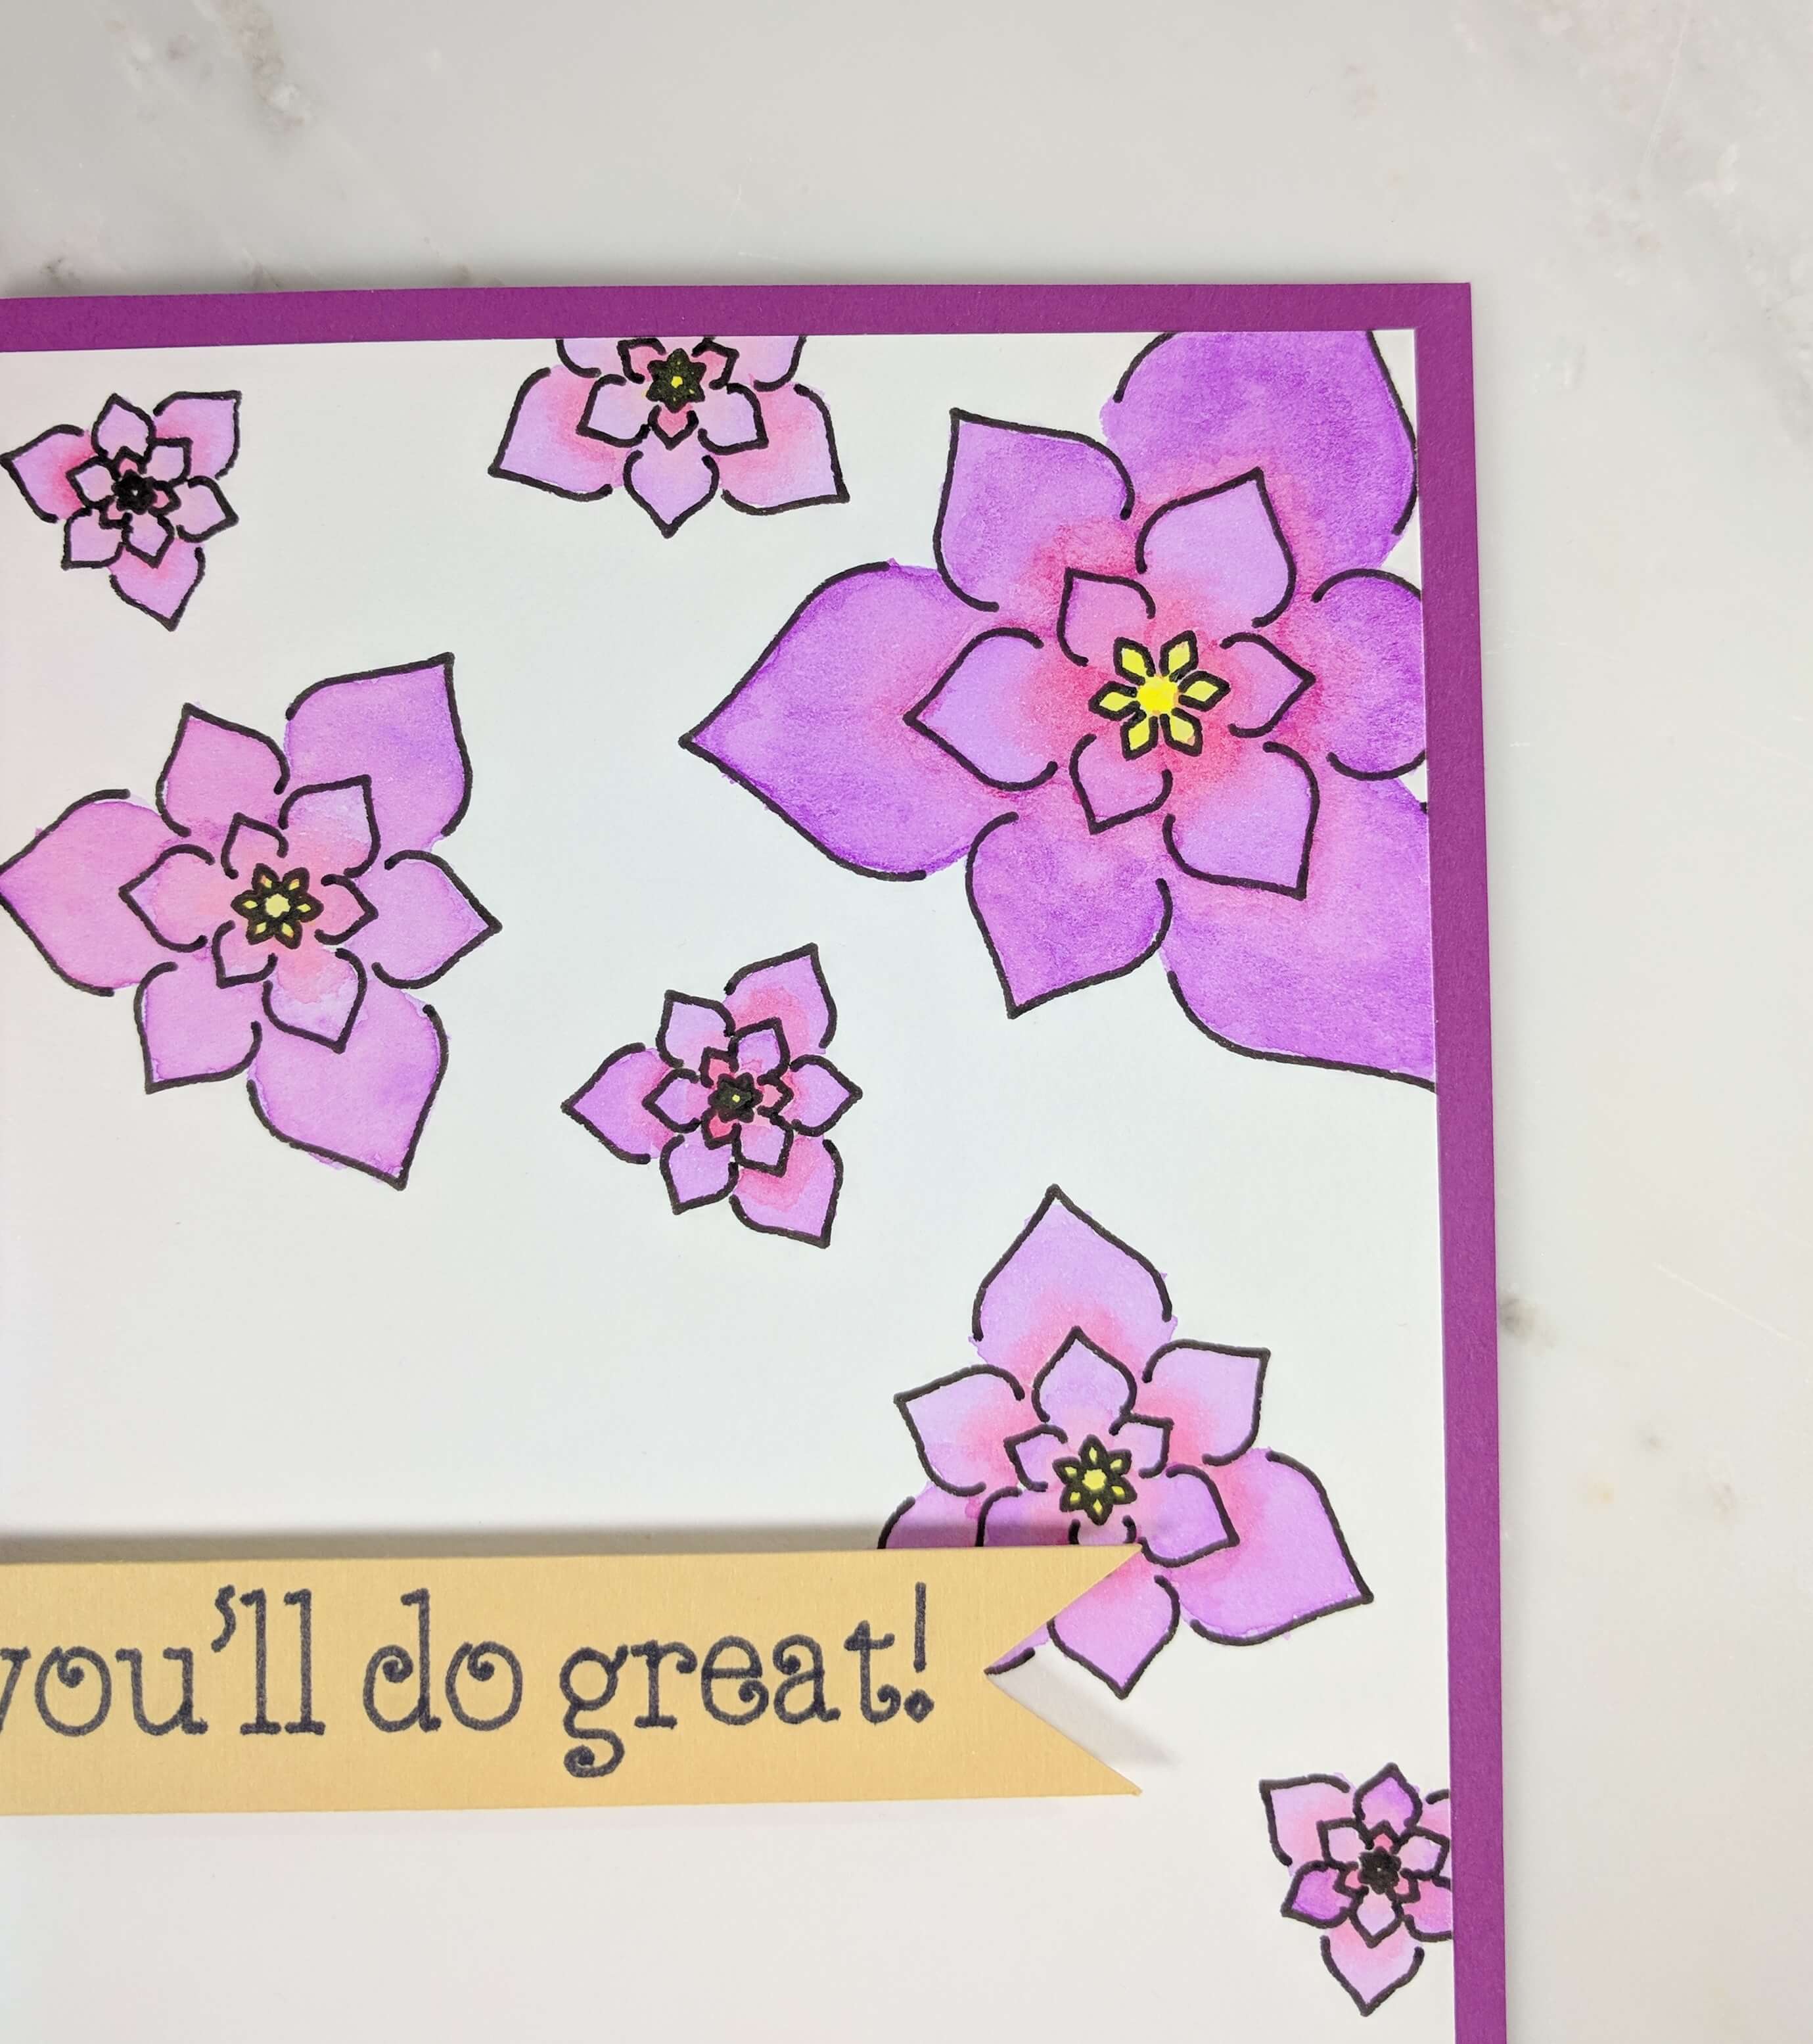
TIP: You can paint each petal 1 at a time if you’d like so that you can easily blend the two colors together without it drying too fast.
TIP: If you’re trying to make a very intricate design, it’s also helpful to avoid painting two petals next to each other. This keeps the various colors from on the different petals from bleeding together unintentionally.
Step 4:
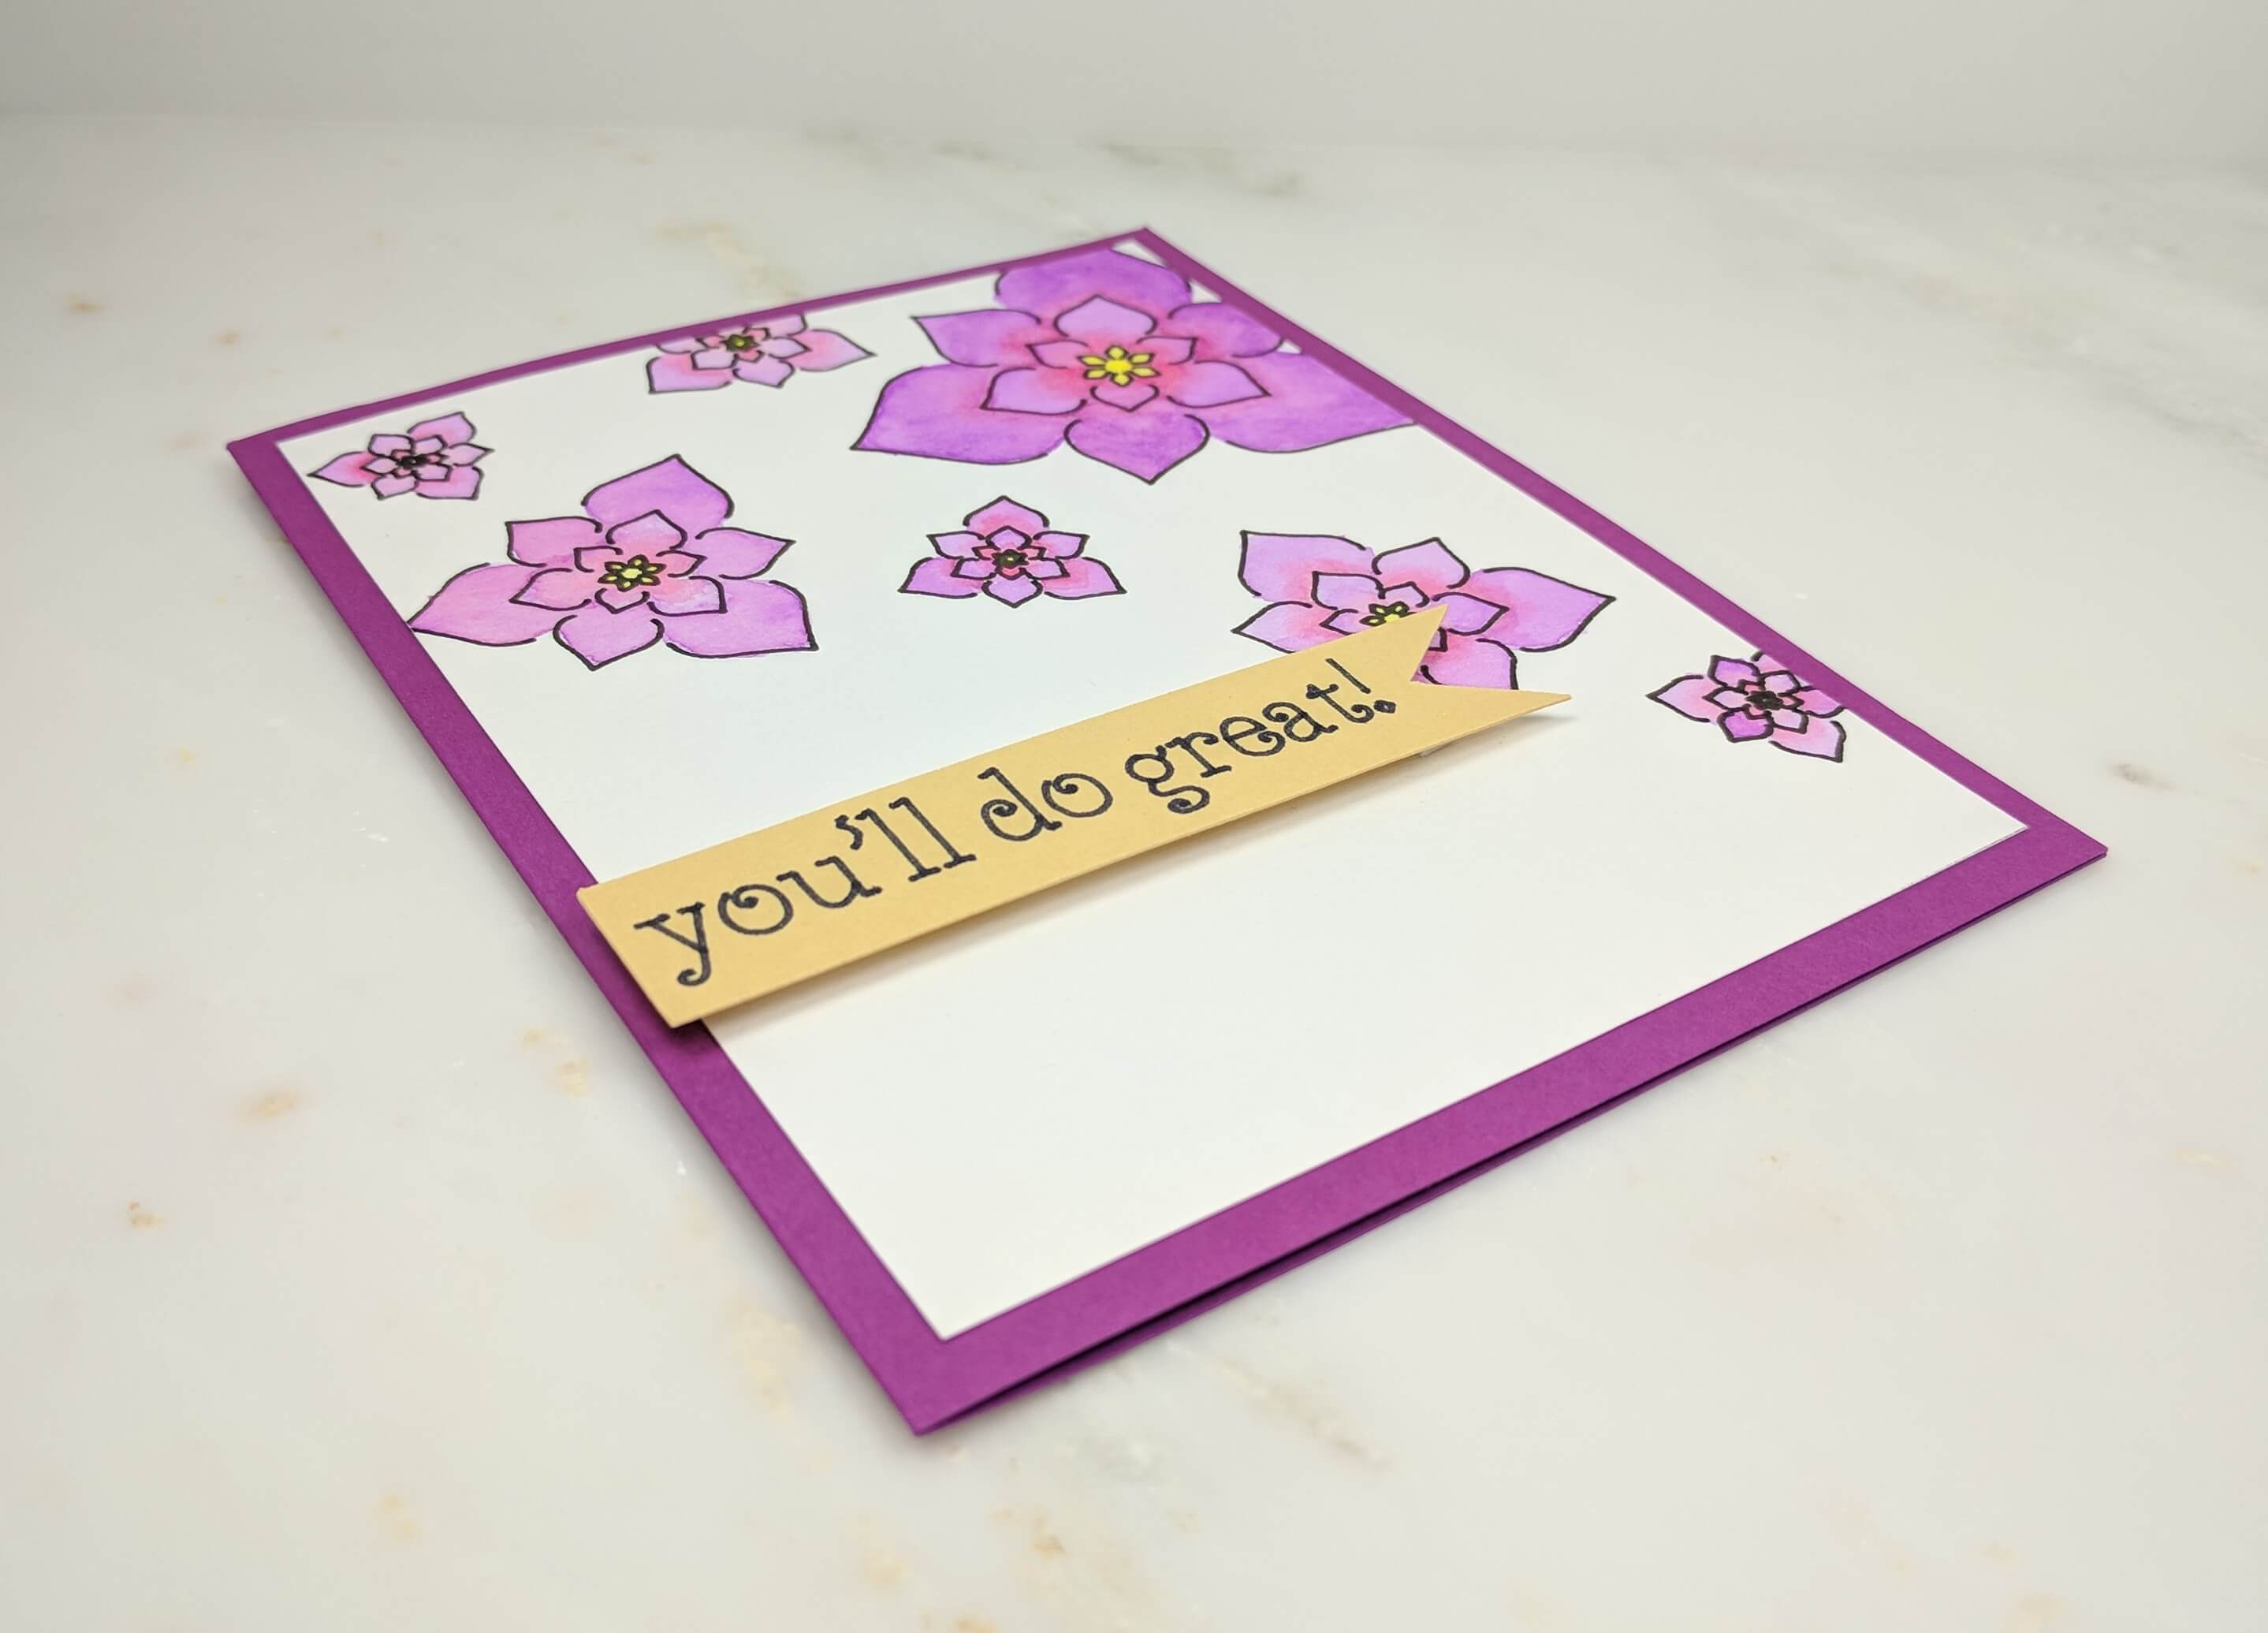
Once you’re done painting, be sure to give it plenty of time to dry. I let my design dry overnight. Peel the masking tape off of your design once it’s dry and start trimming it down! I fit this design on and A2 (4.25’x5.5′) card back, so I made the floral watercolor paper to be approximately 4’x5.25′ inches in size.
TIP: The paper will be slightly warped from the water, so make sure to use some strong double-sided sticky tape to keep the floral paper from peeling up. I used Scor-Pal Scor-Tape-1/8.
Step 5:
Place a banner with your sentiment on the lower left side of the card base. You may also want to put a white cardstock insert in the interior of the card, so that you have a clean spot on the card, to write your message.
This blog uses affiliate links when possible. If you choose to make a purchase through one of these links, I may receive a small commission (at no cost to you). I don’t make recommendations lightly, and only link to products that I know and trust. Thank you for your support.