
Hey everyone! Today I want to share a card with you that I made using a bunch of supplies that I bought from Michael’s on Black Friday. I was really surprised that I was able to find such trendy stamps there, and I was really happy with the way this card turned out. Keep reading to find out how I designed it. And, before we get any further, this post is not sponsored in any way by Michael’s.
Sleigh Rides and Hot Cocoa Materials Used:
Additional Materials Not Shown Above:
Recollections Sleigh Rides and Hot Cocoa Sentiment Stamp – From Michael’s
Recollections Cocoa Mug Stamp – From Michael’s
Red Alcohol Based Markers
Black and White Plaid Cardstock
Sleigh Rides and Hot Cocoa Walkthrough:
Step 1.
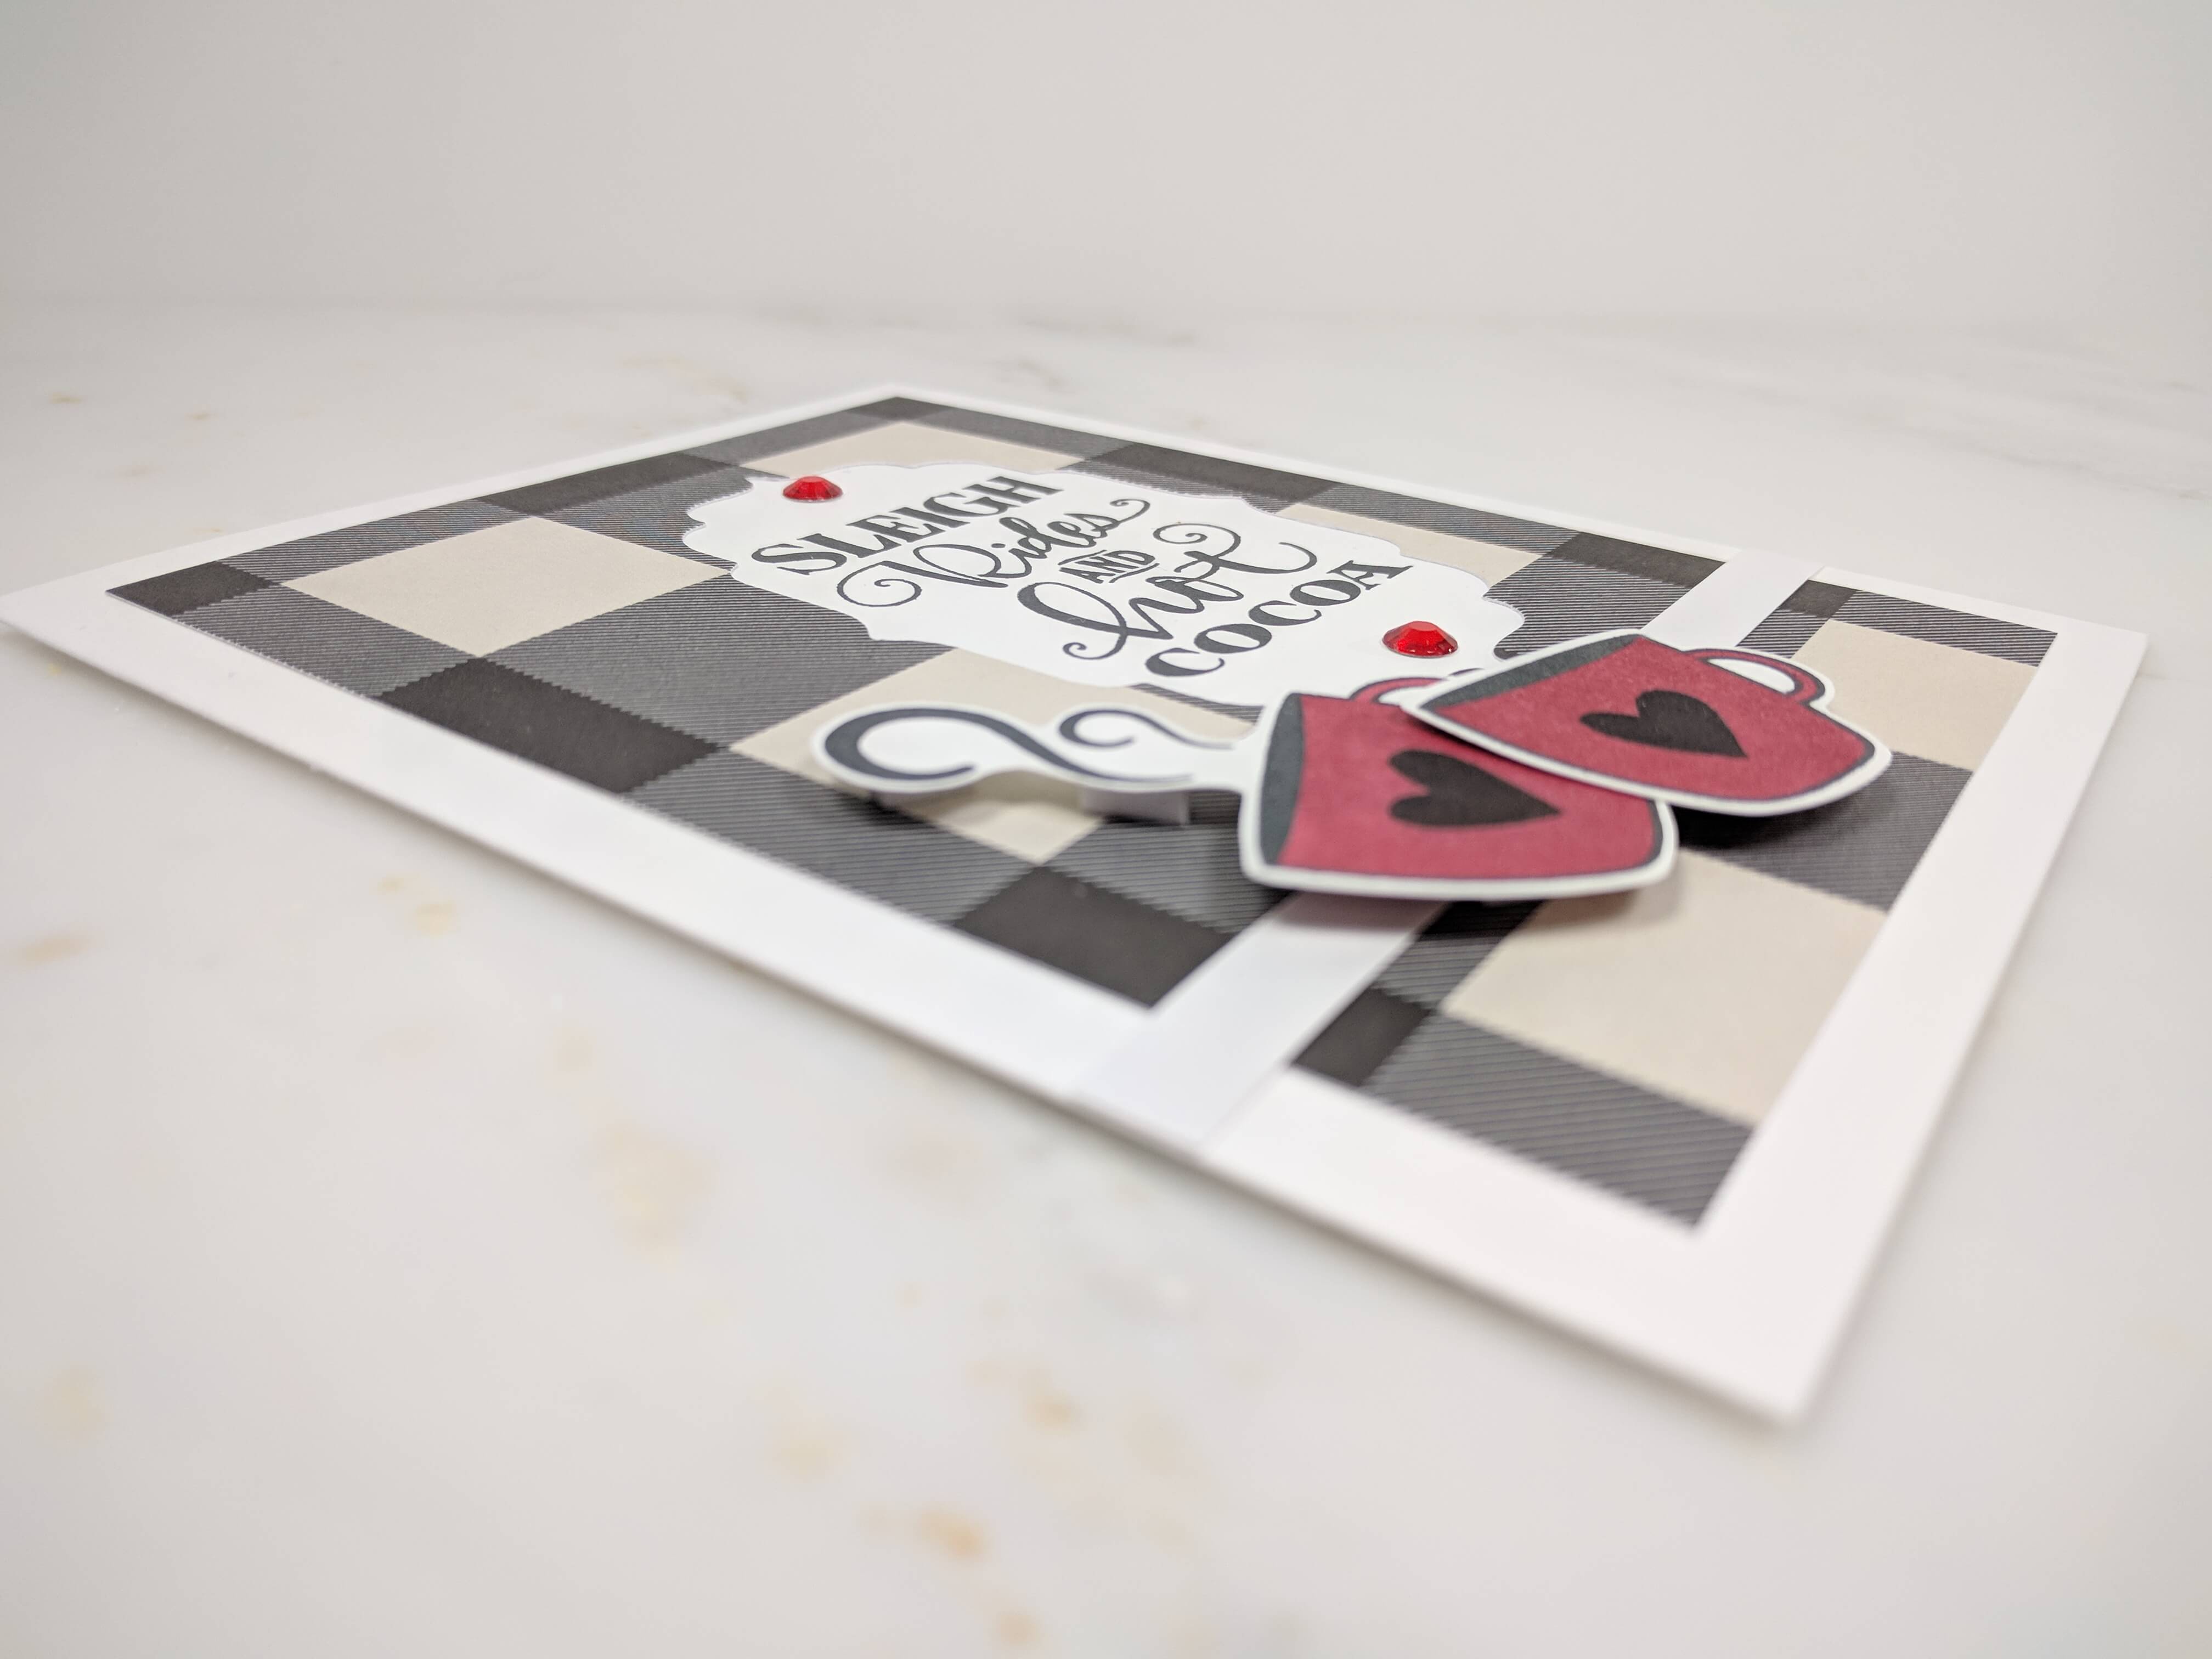
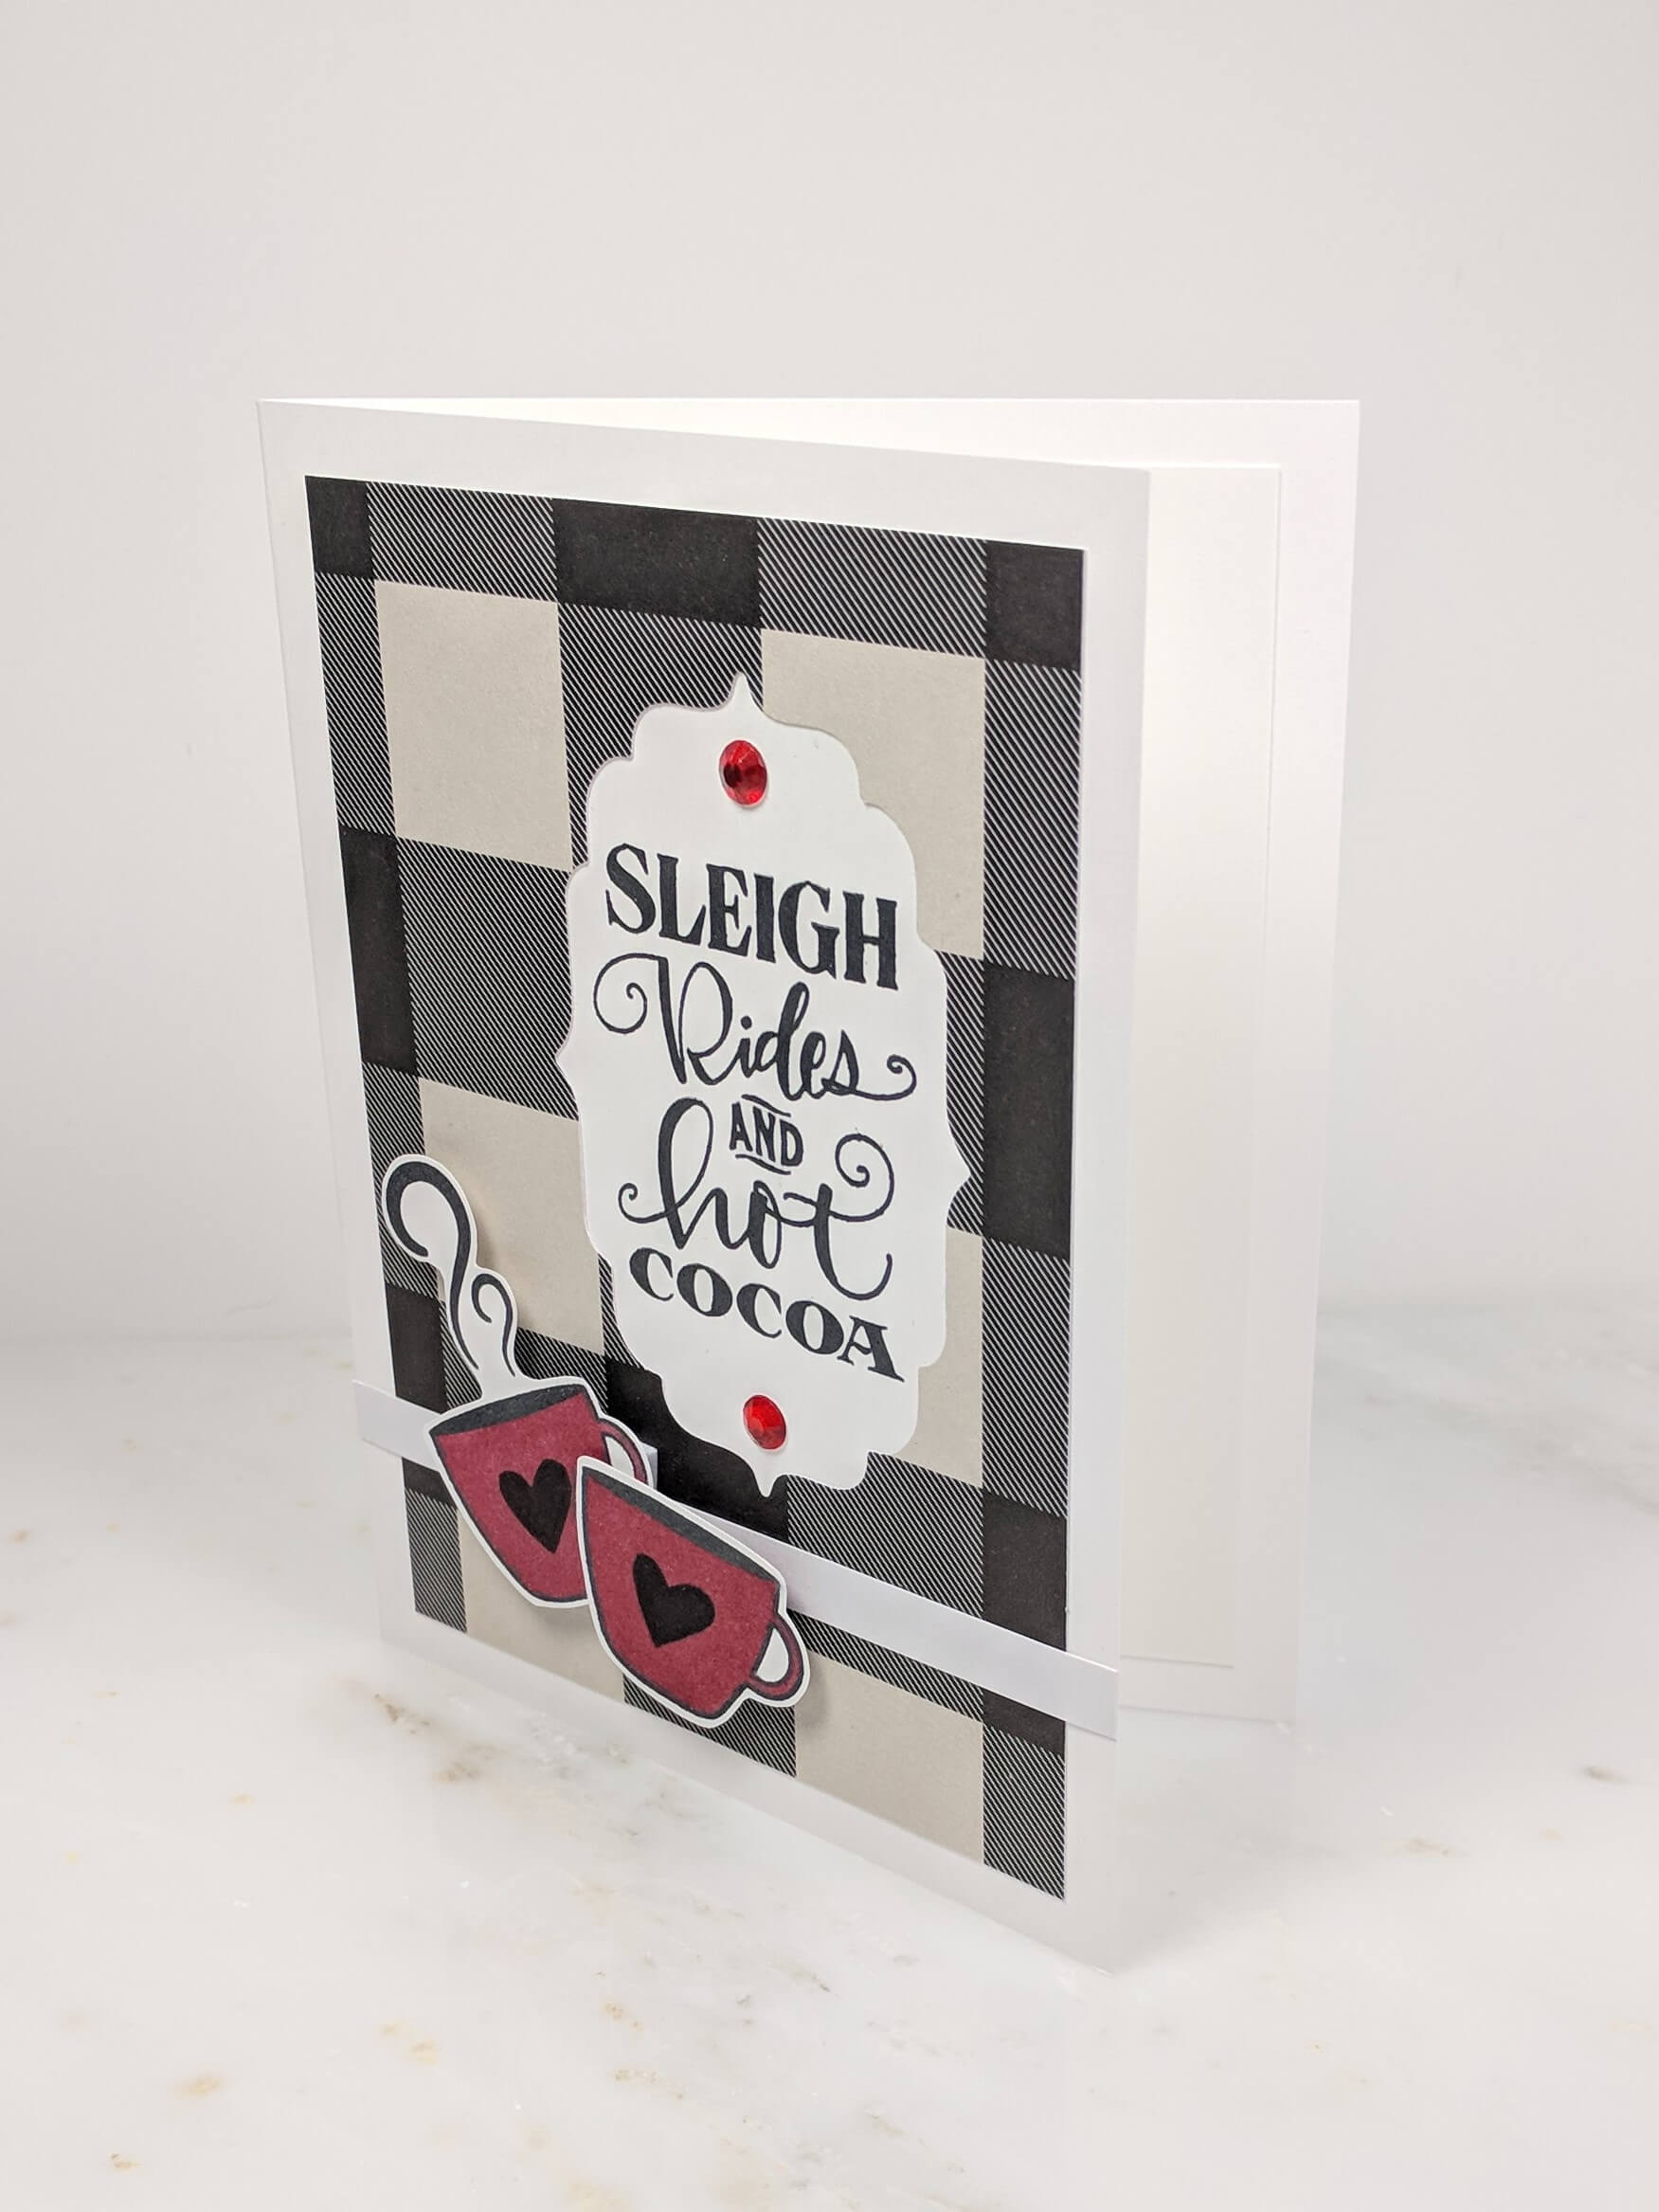
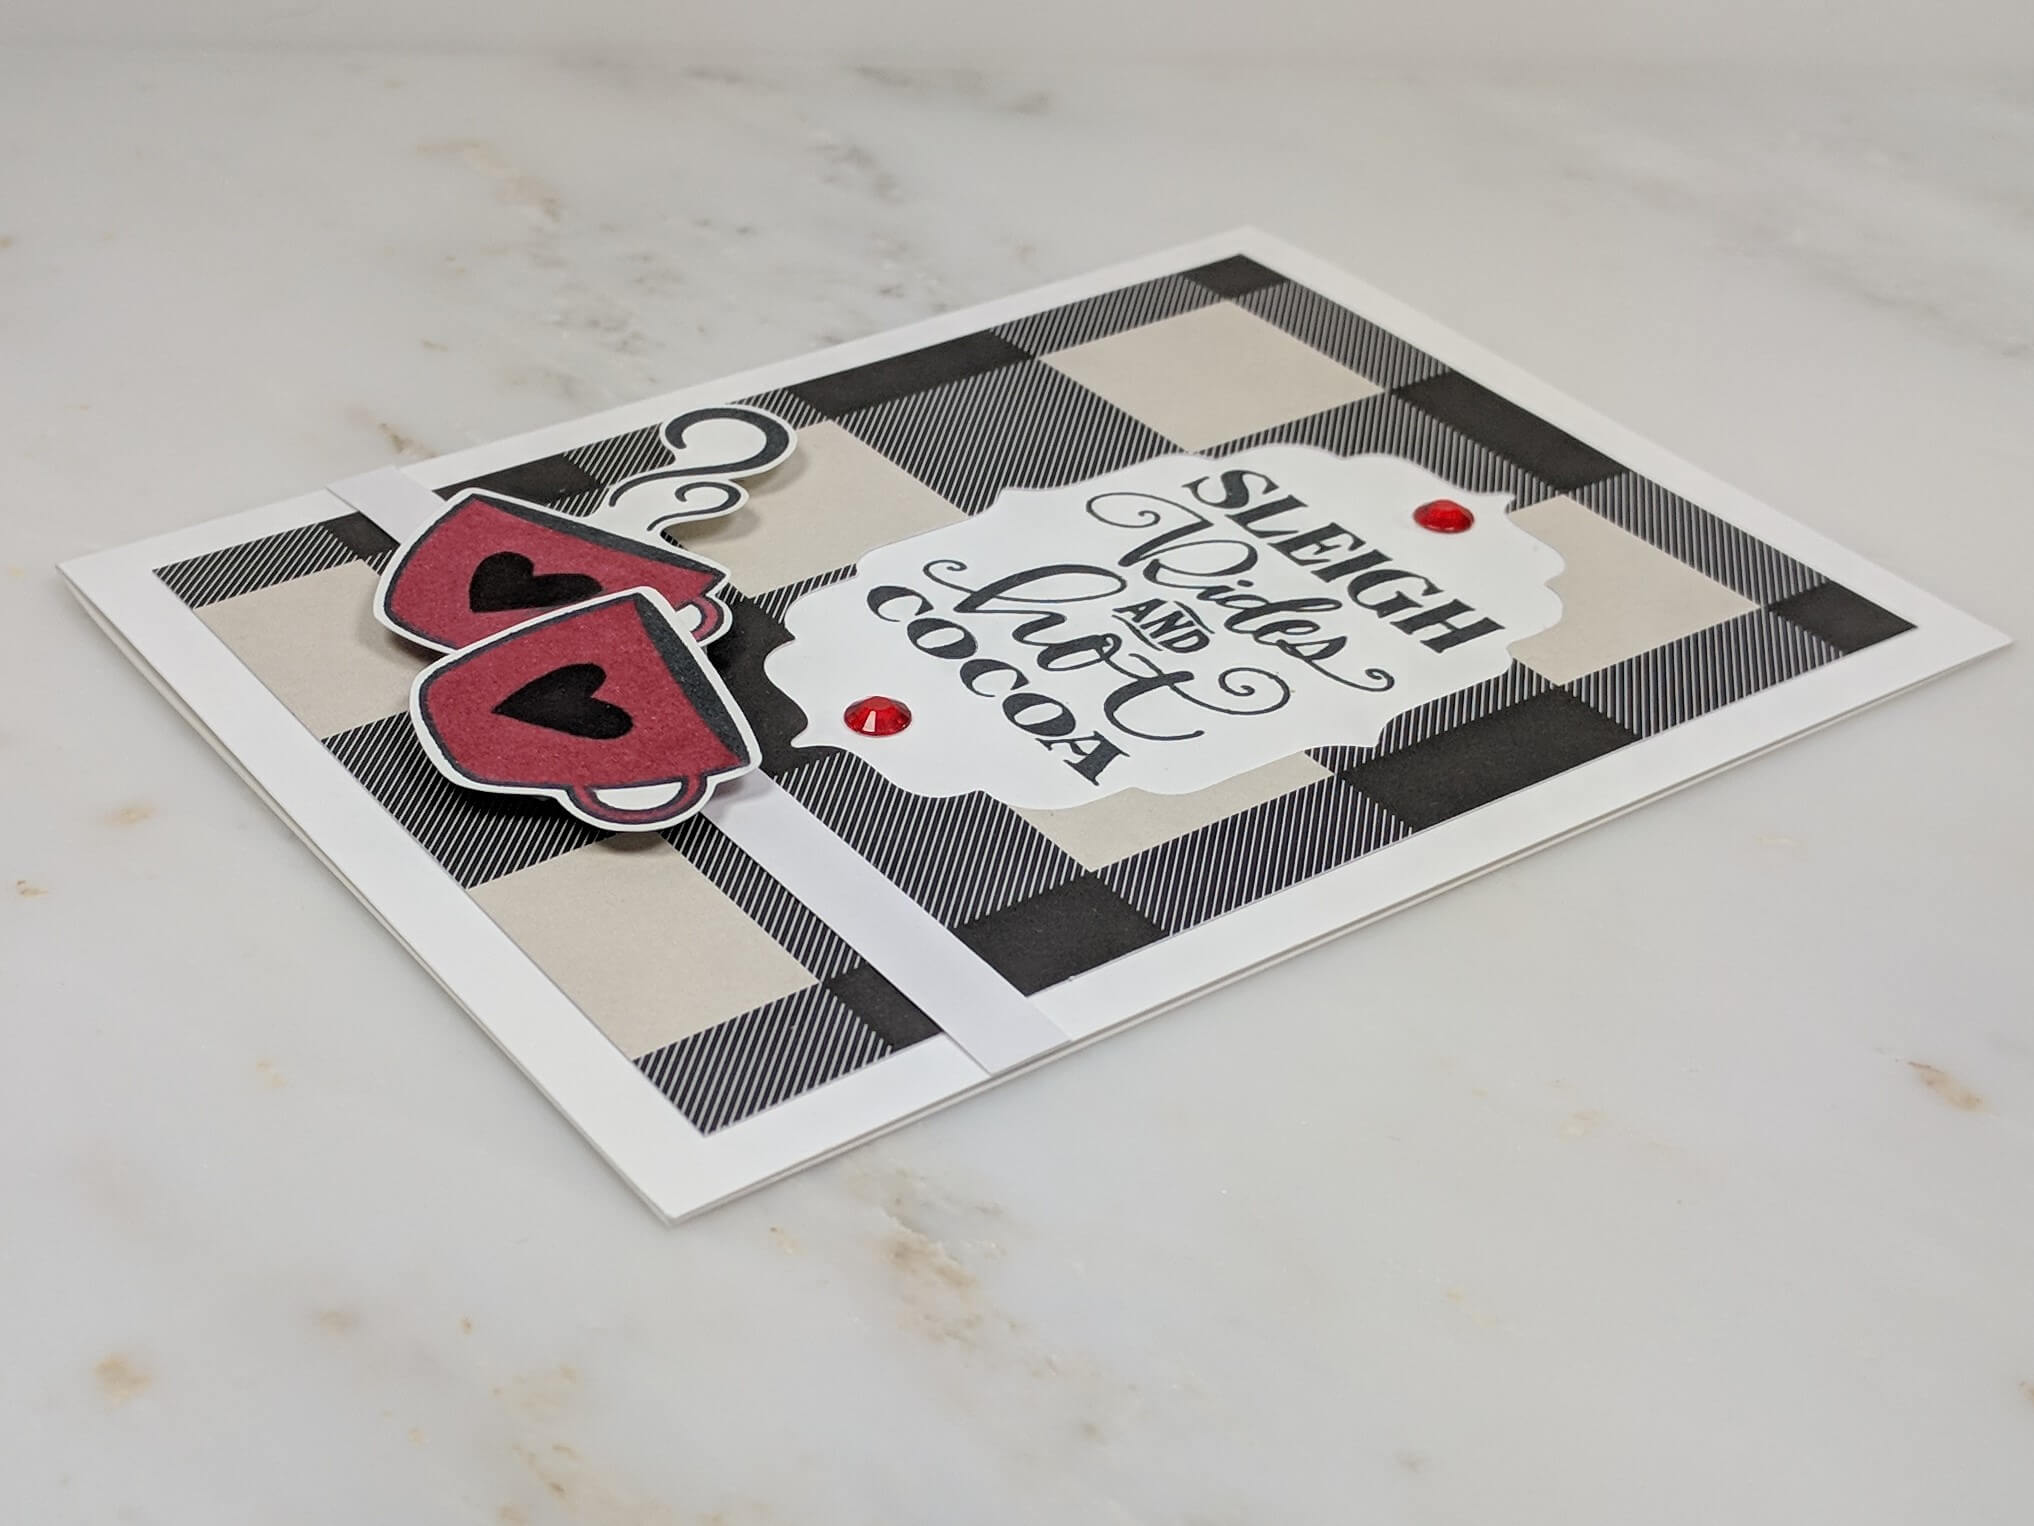
When creating this card the first thing you want to do is cut your card base. I used Solar White Cardstock by Neenah and I cut it into a 5.5 x 8.5 sheet. I then folded it in half using a scoreboard to make a nice clean fold. Next, find a patterned sheet of cardstock. Cut it to be 3.75 x 5 inches tall. I used black and white plaid Recollections cardstock from the Black Friday sale at Michael’s for my design. This would be the backdrop for my little cocoa mug scene.
Step 2.
Normally, I’ll place a sentiment on a separate piece of cardstock to stamp it, but I wanted to make this one a little differently. So instead of the normal routine, I decided to cut into the plaid cardstock directly. I used a Sizzix Framelits Die to cut a space where I would eventually stamp the sentiment. I placed the plaid paper and the die in my Sizzix BIGkick machine and ran it through.
Once you’ve taken the steps above, go ahead and stick the plaid paper to the card base. Use regular mounting tape to stick the plaid paper to the card base. This will allow you to still stamp directly onto the card base without the plaid paper getting in the way.
Tip: Use regular mounting tape to stick the plaid paper to the card base. This will allow you to still stamp directly onto the card base without the plaid paper getting in the way.
Step 3.
Go ahead and choose the stamp and ink that you’d like to use for the design. You can try to heat emboss the design if you’d like to, but I found it difficult to get all of the embossing powder off of the card because of the frame. I chose to use wicked black archival ink.
Place your sentiment stamp on a clear block or position your card on a Misti stamping tool. Ink it up, and press it down onto the card. If you have a Misti and you don’t get a perfect stamped sentiment the first time, you can always reink, and stamp it down a second time.
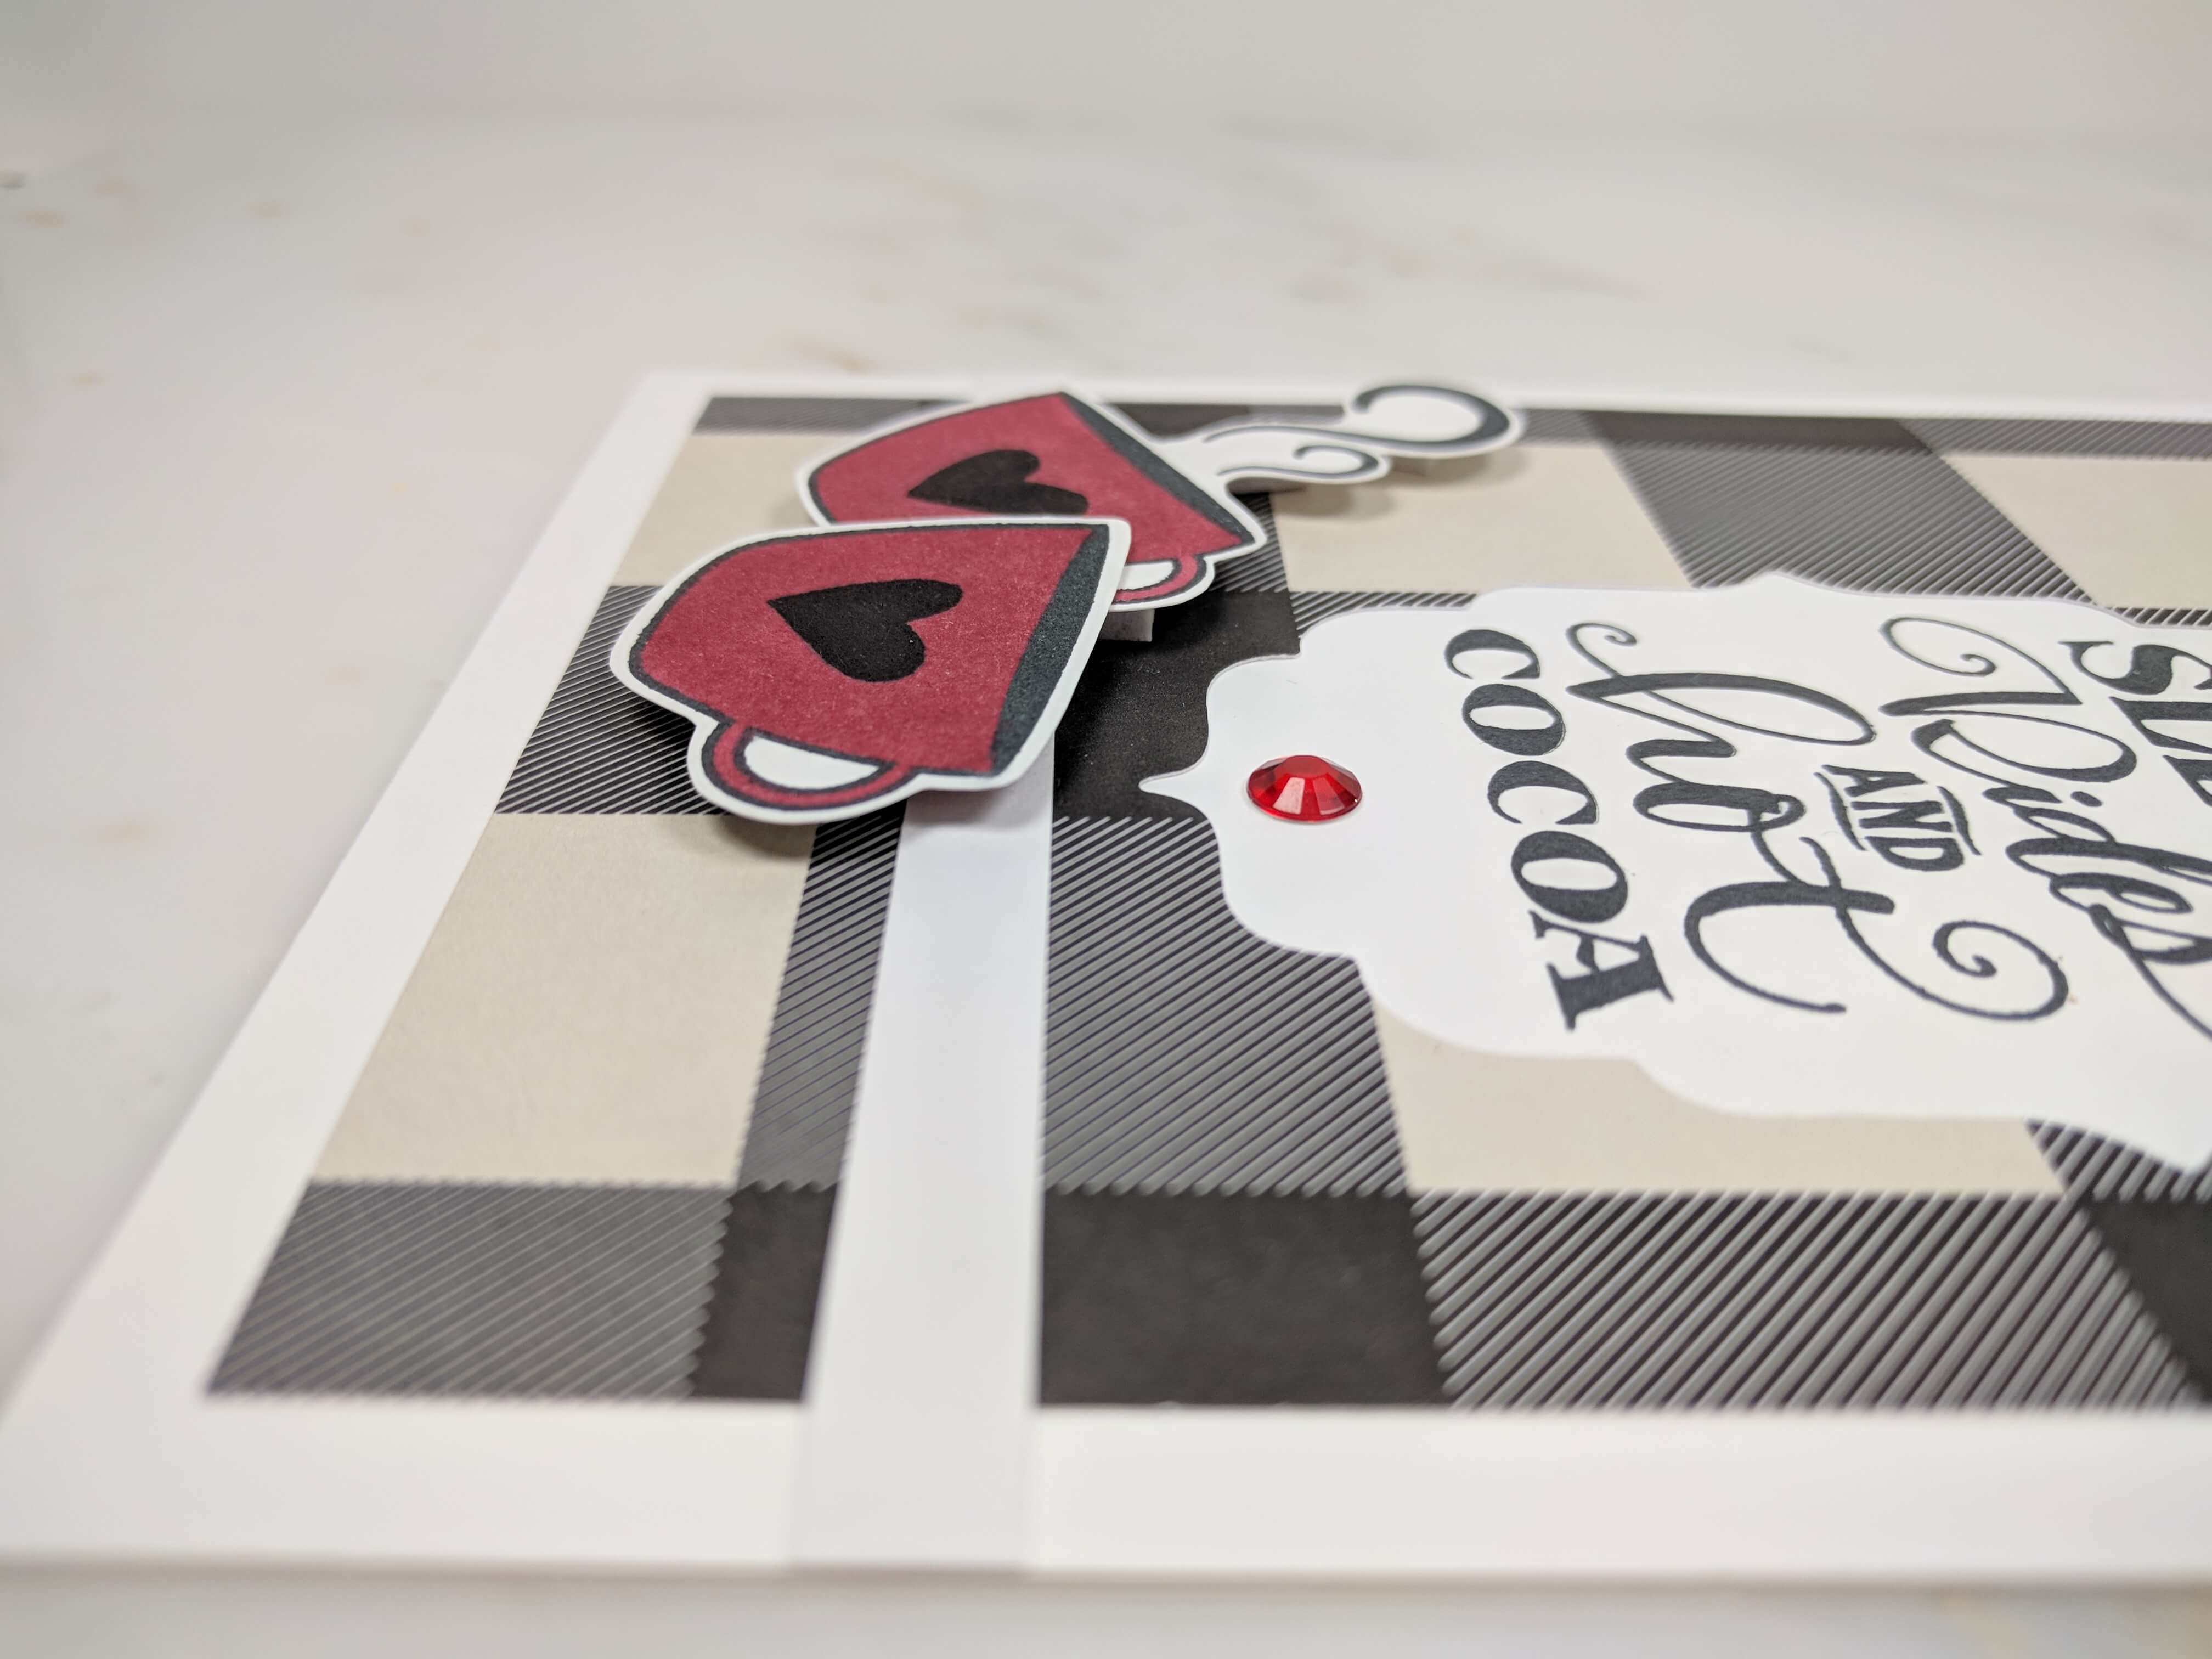
Before you put your ink away choose one last stamp. This time, instead of choosing a sentiment, pick an image. Something that will help to accent the sentiment. I chose a cocoa mug with a little heart in the center. I stamped two of those little cocoa mugs, and then I was ready for the next step.
Step 4.
This next part is optional, but if you’d like to color in the image that you stamped feel free to do so. I used a red alcohol-based marker to color in my mugs. Alcohol markers are also a really great way to add depth. If you have a few different shades of the same color you can make it look like you have a shadow in certain areas of your design. Copic Markers are some of the most popular alcohol based markers. Whatever you decide, play around with it a little bit and just have fun.
Tip: Alcohol markers are also a really great way to add depth to your design. Here’s a really great video to give you some tip and trick when it comes to shading.
After you’ve colored in your stamped image, go ahead and cut it out. If you have a matching die, run it through your die cutting machine. If you don’t have a die, just go ahead and cut it out by hand.
Step 5.
Next, cut a small strip of white cardstock. This will preferably be the same color cardstock you used for your base. It should be about 2 centimeters wide and 5 inches in length. Put some mounting tape on the back of that strip and lay it across the card base about 1.5 inches from the bottom.
Next, grab your little coffee mugs, throw some 3D foam tape on the back, and lay them down over top of the white strip closer to the left-hand side of the design. Placing the mugs on the left-hand side and the sentiment closer to the right-hand side helps to balance out the card overall.
Put some final touches on your card by adding some rhinestones above and below the sentiment. You can also add an optional interior insert inside the card if you wish.
Well, that’s it for today. Thanks for stopping by! I hope you enjoyed this post. If you have any questions or feedback go ahead and leave a comment below. You can also follow me on Instagram for the latest One Paper Street project updates or subscribe to my email newsletter. Take care and happy holidays!