
Have you ever wondered how to use your Cricut machine to do more than just cut out simple images? A Cricut machine can offer a wide variety of uses. In this article, I’m sharing just how easy it is to create a Cricut thank you card using its drawing feature. Keep reading to learn how you can create a lovely thank you card using your Cricut machine.
Watch my Cricut Thank You Card YouTube short here!
Need more ways to master your Cricut machine? Find them here.
Materials Used:
This blog may use affiliate links when they’re available. If you choose to make a purchase through one of these links, I may receive a small commission at no cost to you. I don’t make recommendations lightly, and will only link to products I know and trust.
- Cricut Explore Air 2 Machine [Cricut] [Amazon]
- Adhesive Cricut Cutting Mat, Standard Grip [Scrapbook.com] [Cricut] [Amazon]
- Basic Tool Set – Cricut [Amazon]
- Ultimate Fine Point Pen Set – Cricut [Cricut] [Amazon]
- Neenah Classic Crest Solar White 80lb Cardstock [Scrapbook.com] [Amazon]
- Essentials 20 Colors Cardstock Paper – Recollections [Amazon]
- G02 Spectrum Green Copic Sketch Marker [Blick]
- G09 Veronese Green Copic Sketch Marker [Blick]
- R46 Strong Red Copic Sketch Marker [Blick]
- E18 Copper Copic Sketch Marker [Blick]
- Y02 Canary Yellow Copic Sketch Marker [Blick]
- Y19 Napoli Yellow Copic Sketch Marker [Blick]
- Scrapbook Adhesives Initially Repositionable Mounting Squares [Scrapbook.com] [Amazon]
- Scor-Pal Scor-Tape – 1/8″X27 Yards [Amazon]
- No.55 Switch-Blade Shear, 5.5 Inch – Feather [Amazon]
- 12×12 Scoring Board – EK Tools [Amazon]
- Fiskars Recycled Bypass Trimmer, 12 Inch [Amazon]
Cricut Images Used:
- Thank You Overlay (Photo Fun – Celebrations)
- Standard Square
Cricut Thank You Card Tutorial:
Step 1. Create and cut your design idea.
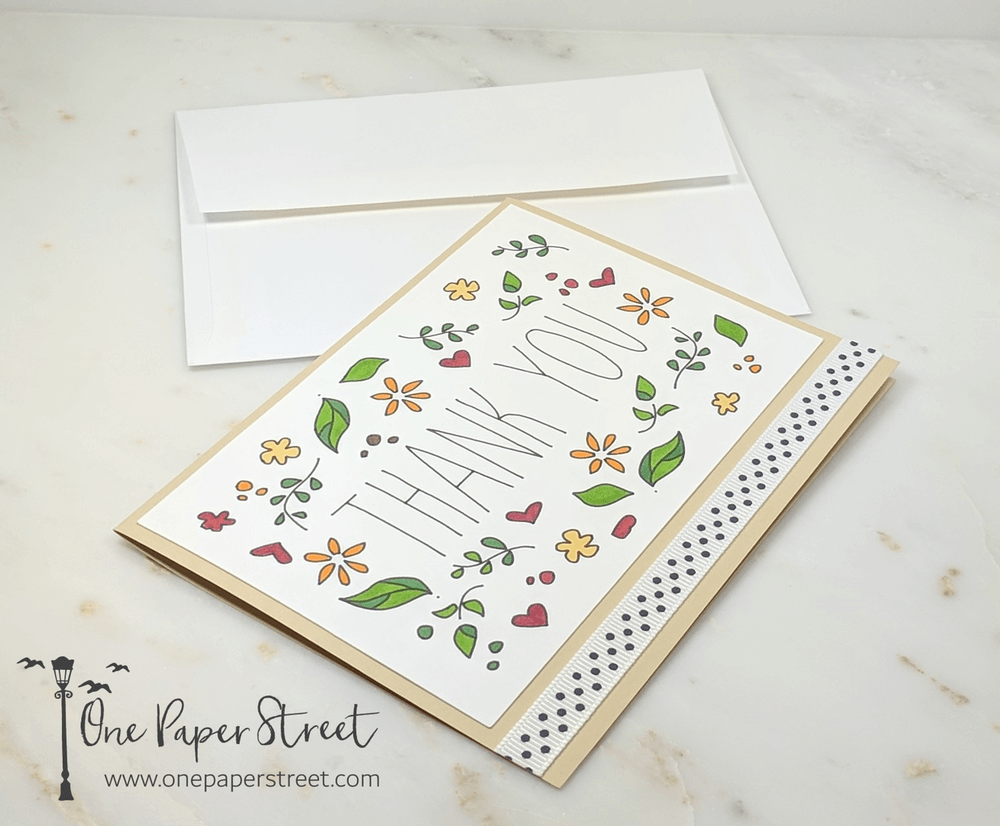
Create the design that you want to use in the Cricut Design Space. For example, I used the Thank You Overlay from their image library, then outlined it using the standard square. After that, I attached the two images, so that I could draw and cut the images out all at once. Once you’ve created your thank you card design, place your paper on a Cricut mat, insert your pen into compartment A and feed the paper through your machine.
Step 2. Color your thank you card.
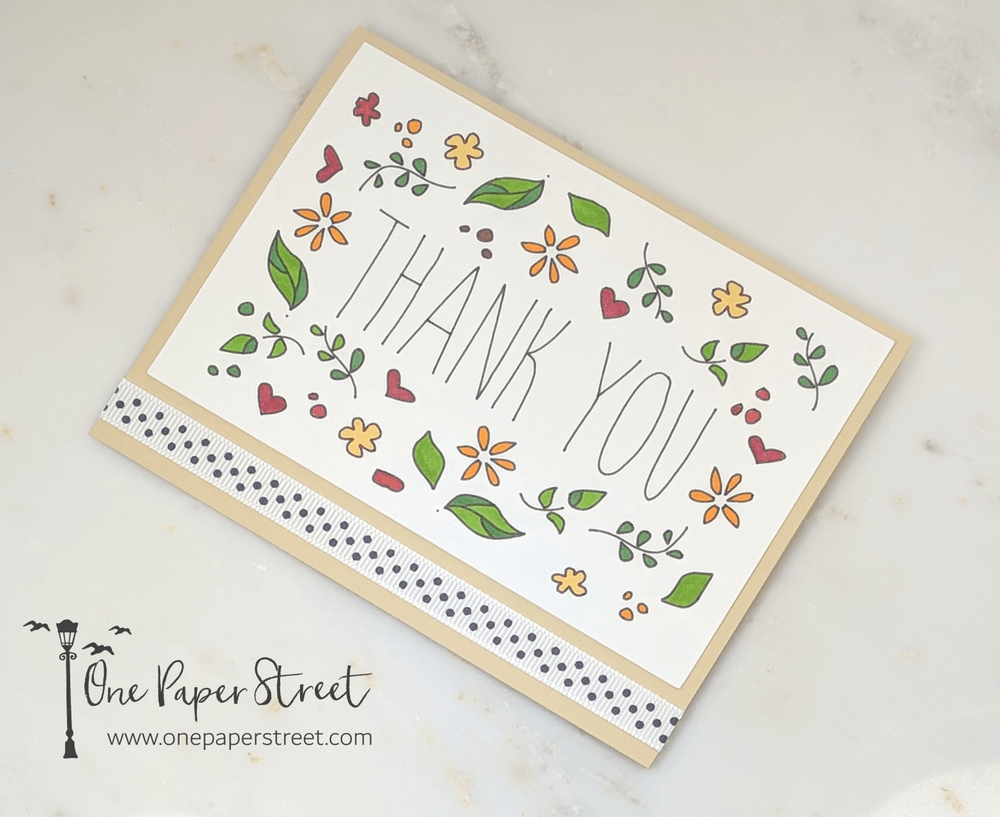
Peel the thank you design off of the Cricut mat and begin coloring the flowers. You can use any markers that you have handy. I used Copic markers because that’s really all I have! First, I used G02 and G09 for the leaves. Then I colored the flowers using Y02 and Y19. Lastly, I used R46 for the hearts and E18 for the little dots around the paper.
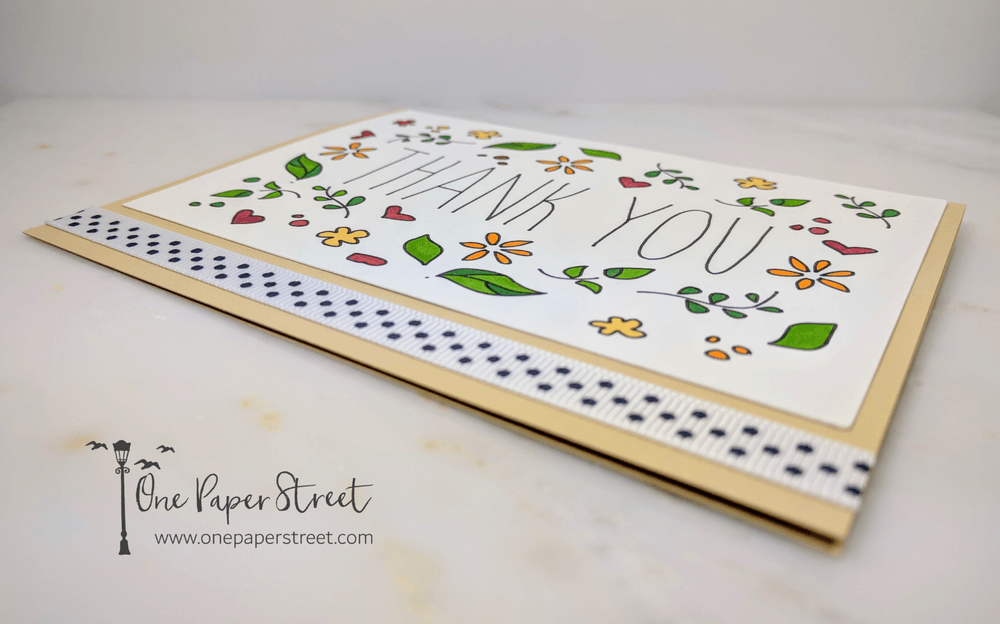
Step 3. Apply your design to the card base.
Once your image is colored, cut and score your card base. I used beige cardstock to make an A2-sized greeting card, so I cut my card to be 8.5 x 5.5 inches, then scored it at 4.25 inches and folded it in half.
Add mounting tape on the back of your colored Thank You design. Place the overlay design on the front of the card so that there is the same amount of space visible on the top and two sides of the card. The bottom should have much more space to fit the ribbon.
Step 4. Apply ribbon to the bottom of the thank you card.
Add some Scor-Pal adhesive to the back of your ribbon. Cut your ribbon to be a little longer than the width of your card base. I cut mine to be about 6 inches for my A2 card base. Place the ribbon on the lower portion of the card and make sure it’s secure, and cut the edges off. And that’s all there is to it!
I hope enjoyed this tutorial! Looking for more elaborate ways to draw with a Cricut? Check out this Mother’s Day card to get inspired. Check it out, and follow me on Instagram, or Pinterest for the latest updates! You can also shop all the handmade cards that I’ve designed here.