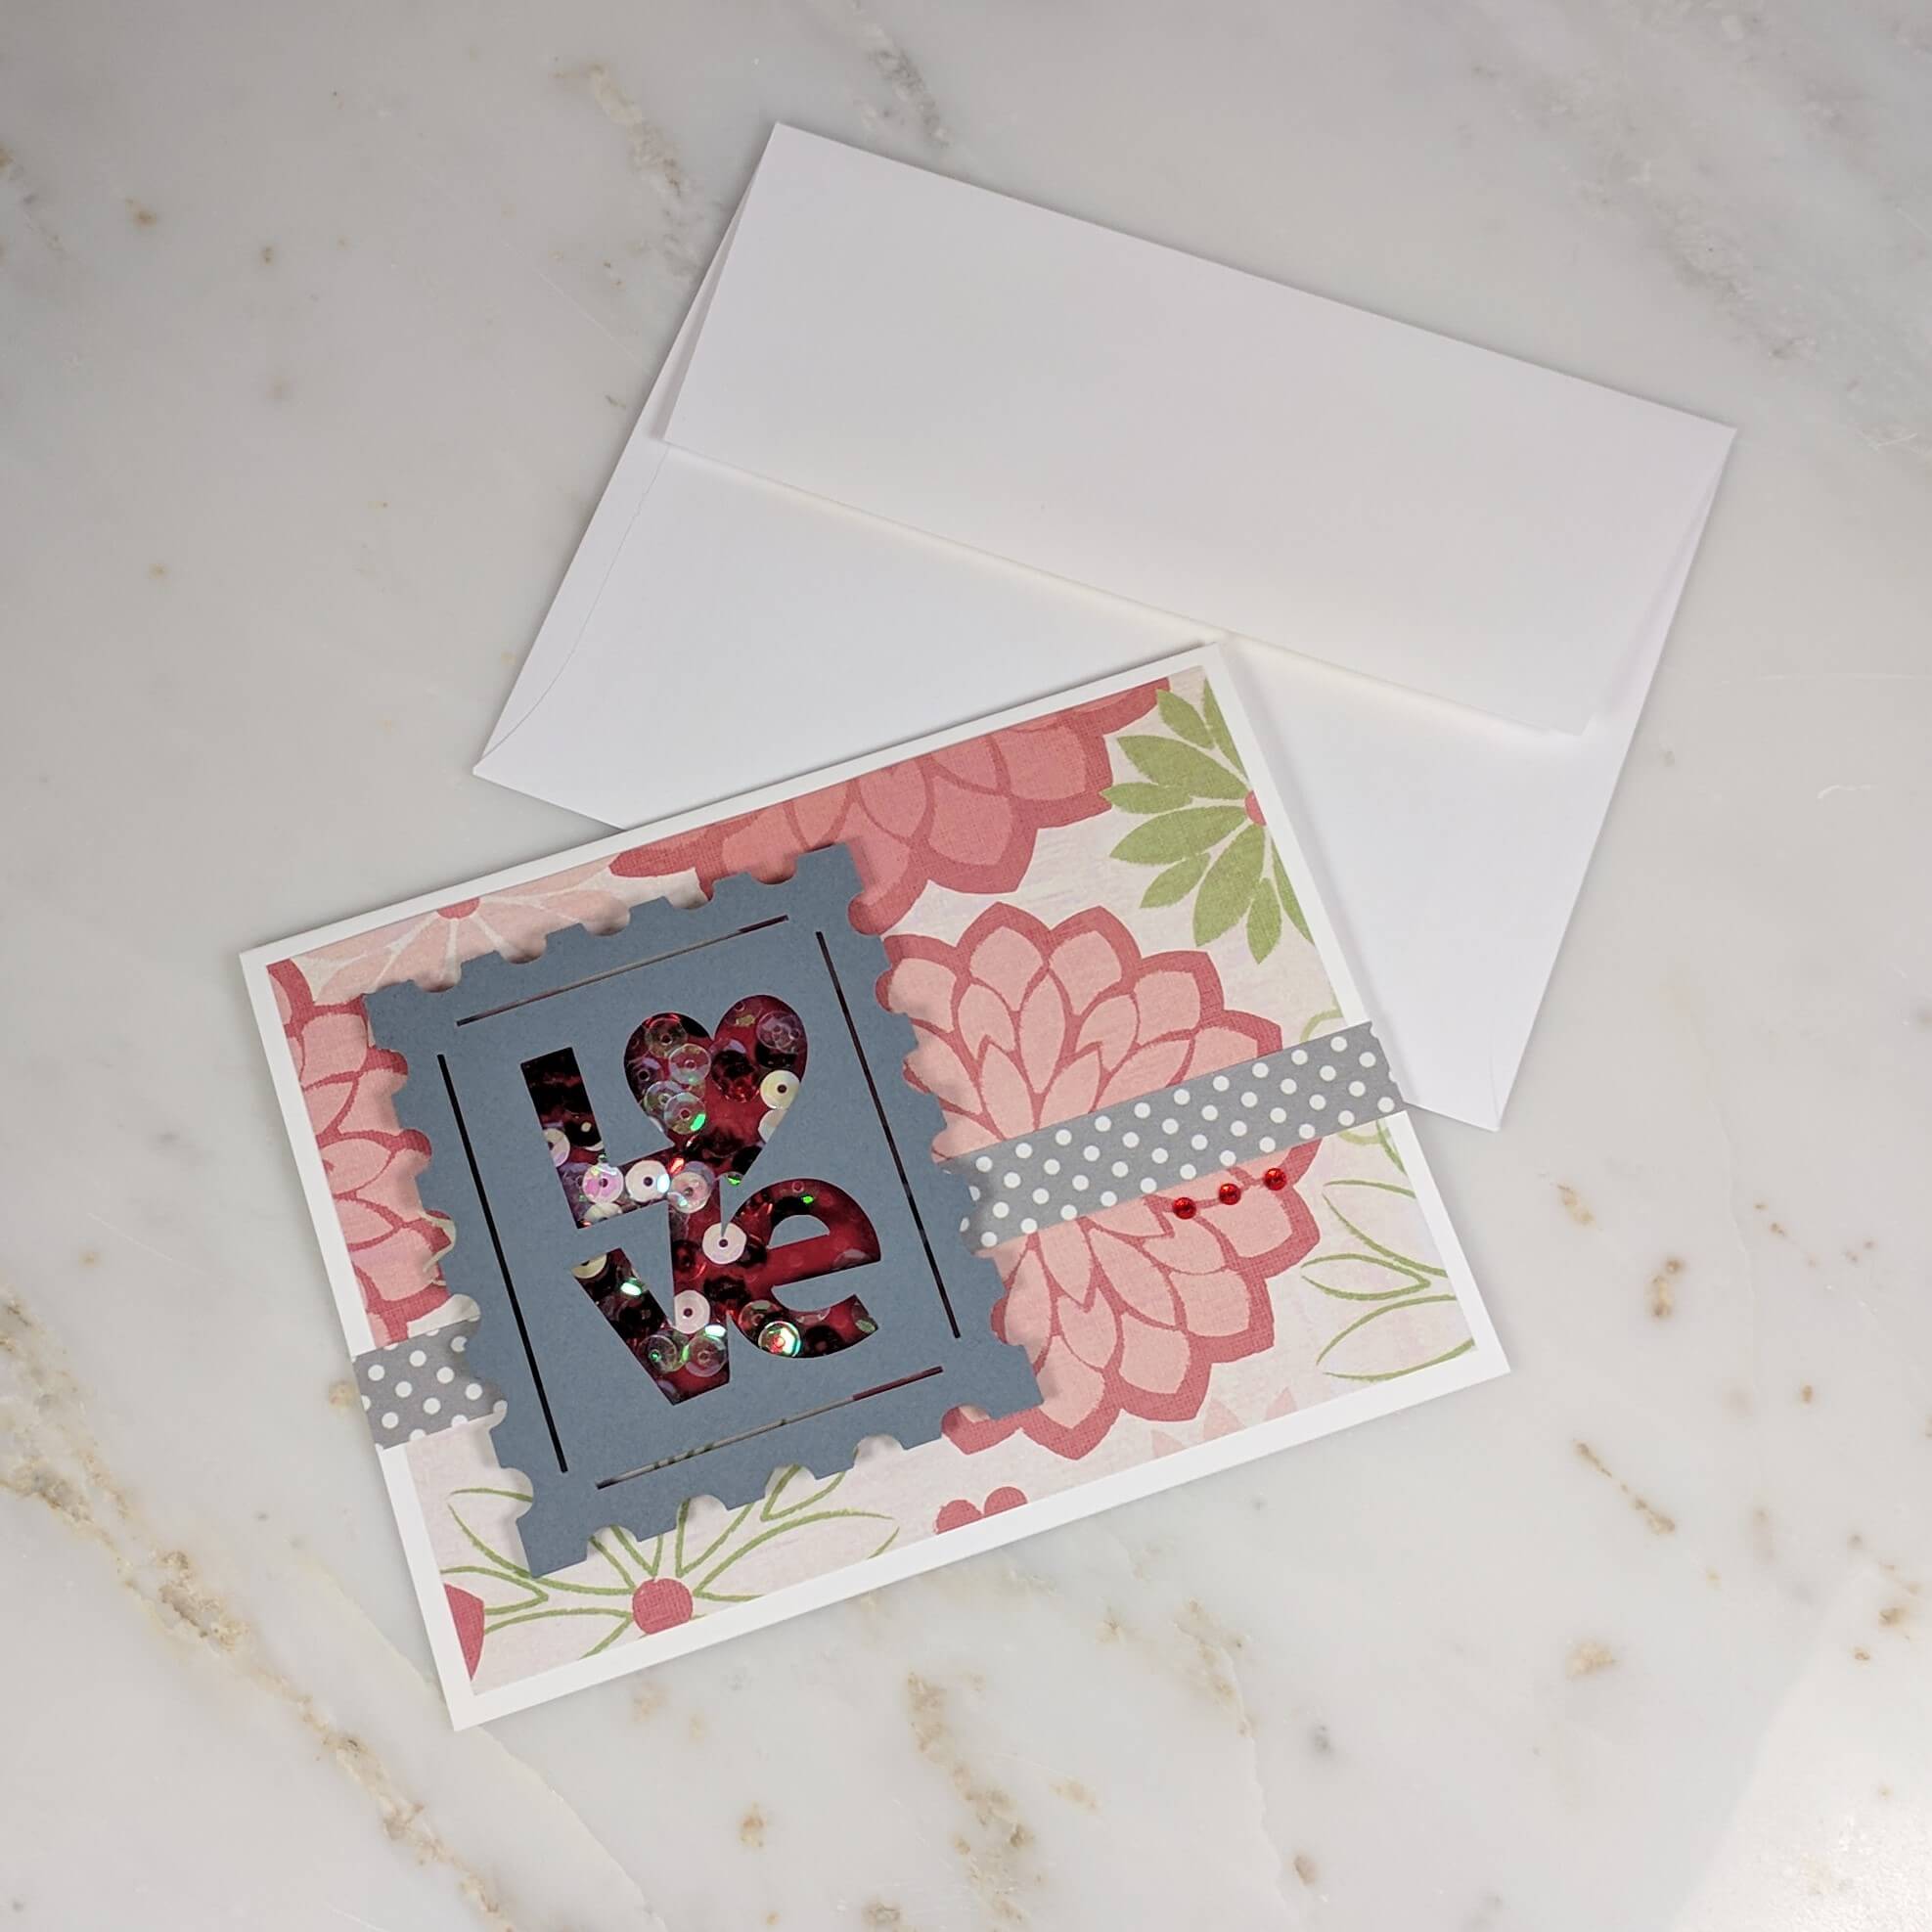
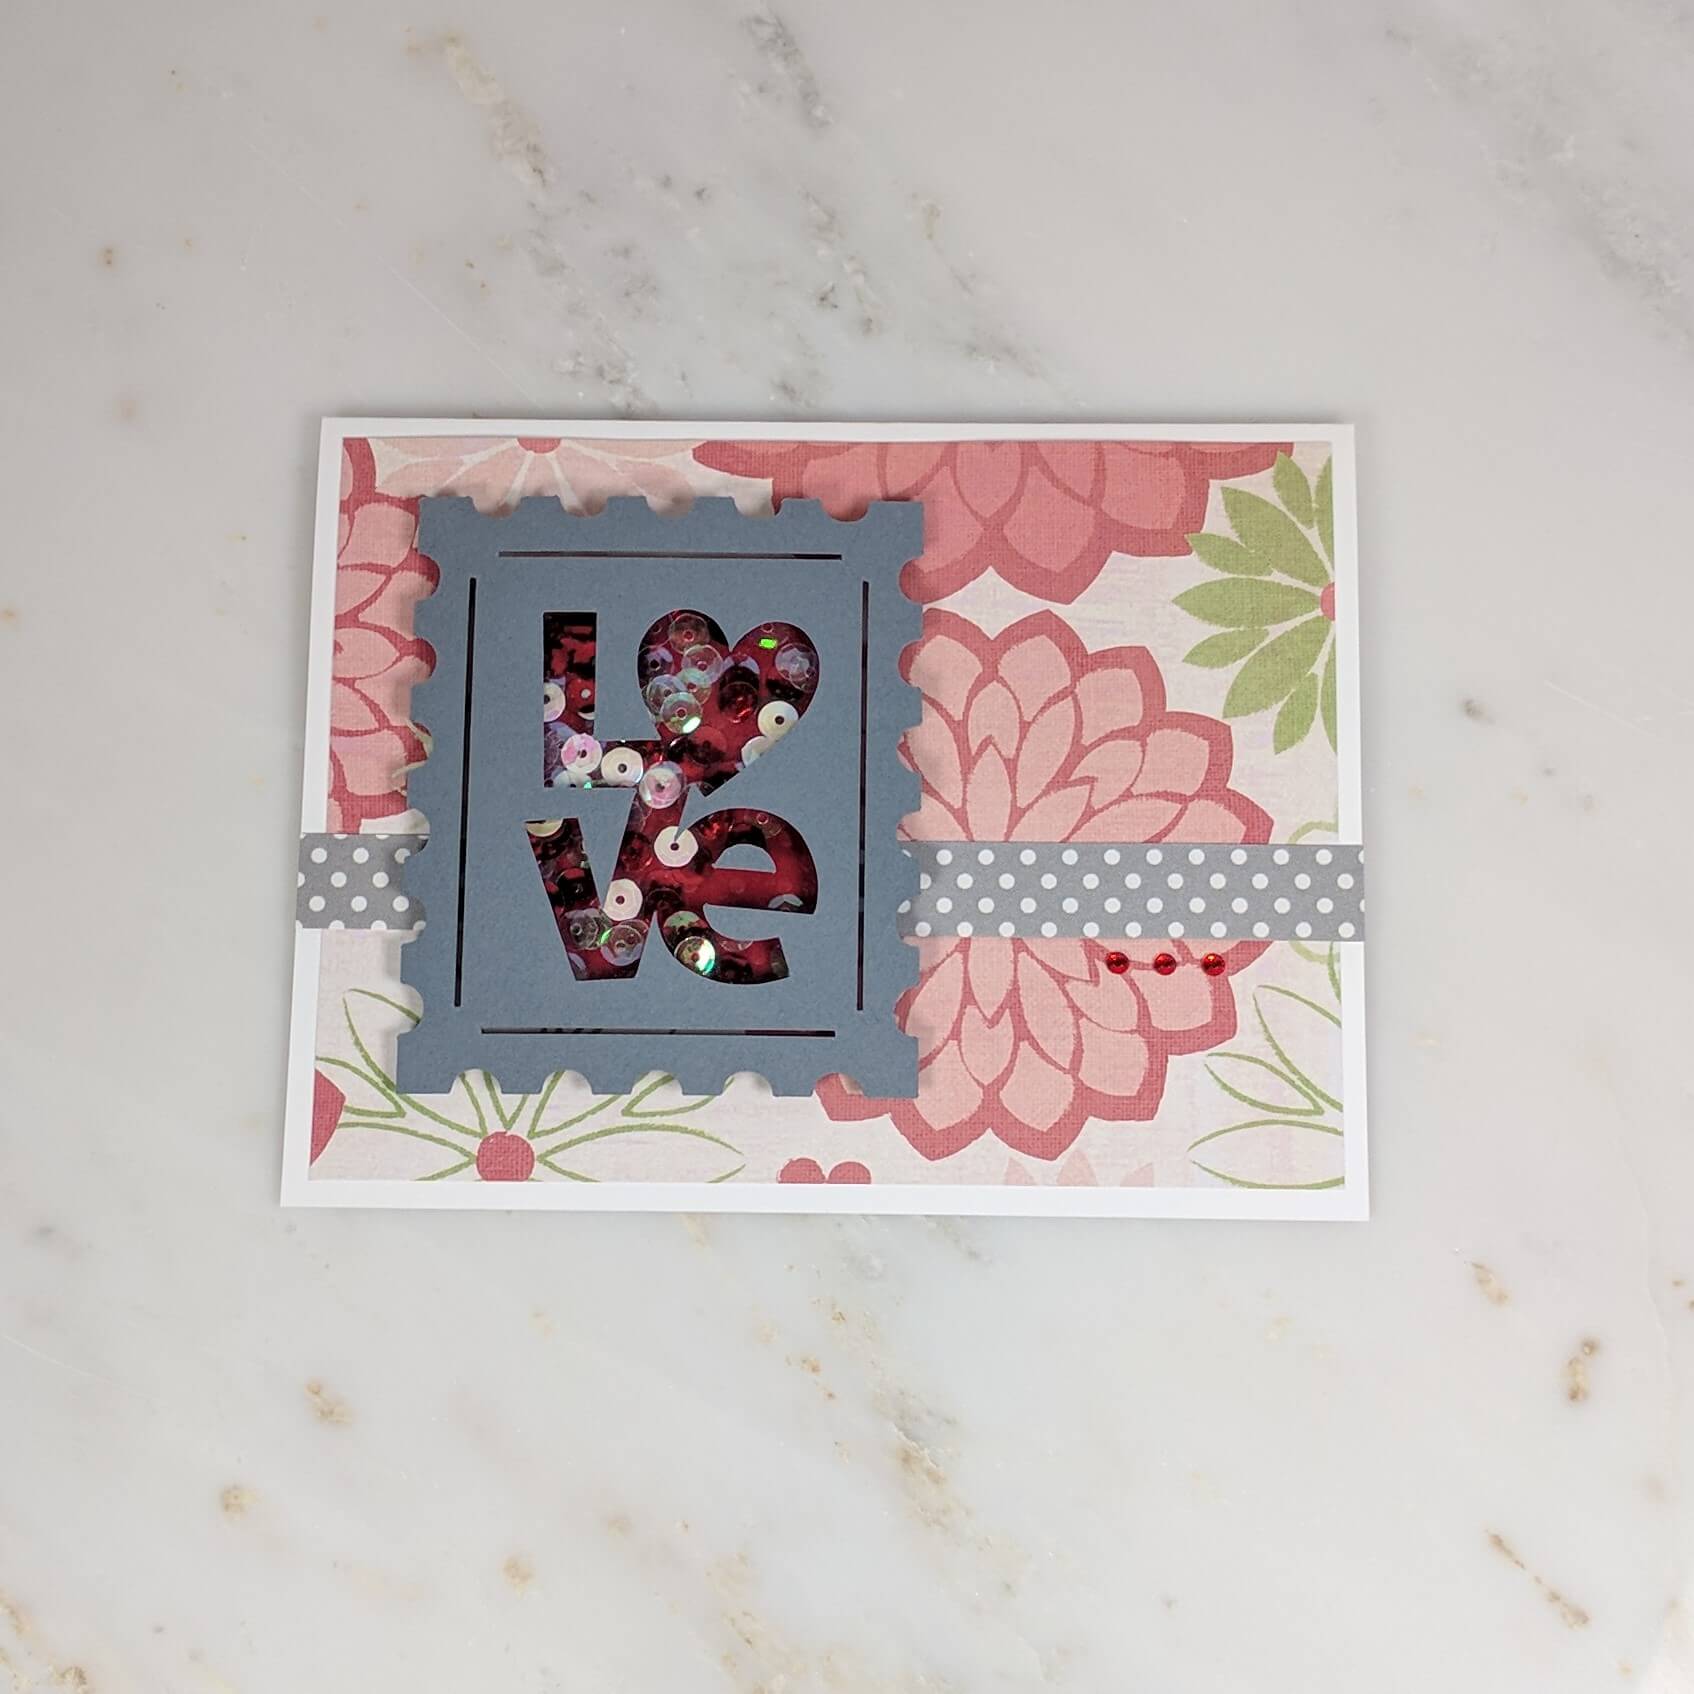
Lately, I’ve been all about some shaker cards. They’re super fun, interactive and I just love how they move and glimmer in the light. This Love Stamps Valentine’s Day shaker card might be my favorite Valentine’s Day card that I’ve made yet. I used a combination of techniques, and I’ll walk you through them here! Keep reading for a full tutorial and to view a list of the supplies I used.
Valentines Day Shaker Card Materials Used:
This blog may use affiliate links when they’re available. If you choose to make a purchase through one of these links, I may receive a small commission at no cost to you. I don’t make recommendations lightly, and will only link to products I know and trust.
- Sticro 5 Sizes Self-adhesive Rhinestone Sticker 4950 Pieces [Amazon]
- Scrapbook Adhesives Initially Repositionable Mounting Squares [Amazon]
- Trim Slant Tip Tweezers [Amazon]
- Feather No.55 Switch-Blade Shear, 5.5 Inch [Amazon]
- Fiskars Recycled Bypass Trimmer, 12 Inch [Amazon]
- Cricut Explore Air 2 Machine [Cricut] [Amazon]
- Adhesive Cricut Cutting Mat, Standard Grip [Scrapbook.com] [Cricut] [Amazon]
- Basic Tool Set – Cricut [Cricut] [Amazon]
- Neenah Solar White Cardstock [Amazon] [Scrapbook.com]
- EK Tools EK Scoring Board 12×12 [Amazon]
- Scor-Pal Scor-Tape – 1/8″X27 Yards [Amazon]
- 5mm Mix 15 Colors Rainbow Cup Sequin [Amazon]
- Grafix Acetate Pad, Clear [Amazon]
- Bazzill Swiss Dot Cardstock Paper – Phoenix Red [Amazon]
- EK Tools Powder Tool [Amazon] [Scrapbook.com]
- Floral Red Cardstock – Recollections Garden Florals Paper Pad (Retired)
- Gray polka dot cardstock
- Recollections Cardstock Paper, Essentials 20 Colors [Amazon]
- Craft Specialties Double Sided White Foam Tape – 1/2″ X 36 Yards – 1/16″ Thick [Amazon]
Cricut Images Used:
Love Stamp (Create a Critter cartridge)

View the exact specifications of this project in the Cricut Design Space.
Love Stamp Valentine’s Day Shaker Card Tutorial:
Step 1. Cut the card base and prep background.
This is an A2 sized greeting card, so I cut my base to be 5.5 x 8.5-inches using my Fiskars bypass trimmer. Next, I scored my card bade down the middle so it would be a 4.25 x 5.5-inch greeting card once folded. I chose some red and green floral cardstock for my background.
At first, I was worried that it would be a little busy, but I ended up really liking it. Lastly, I chose a strip of grey polka dotted paper to run along the middle of the card. I trimmed a 6 x .75-inch strip and set it aside. typically, I’ll prep my materials then put everything together in the end, so that’s what I did here as well.
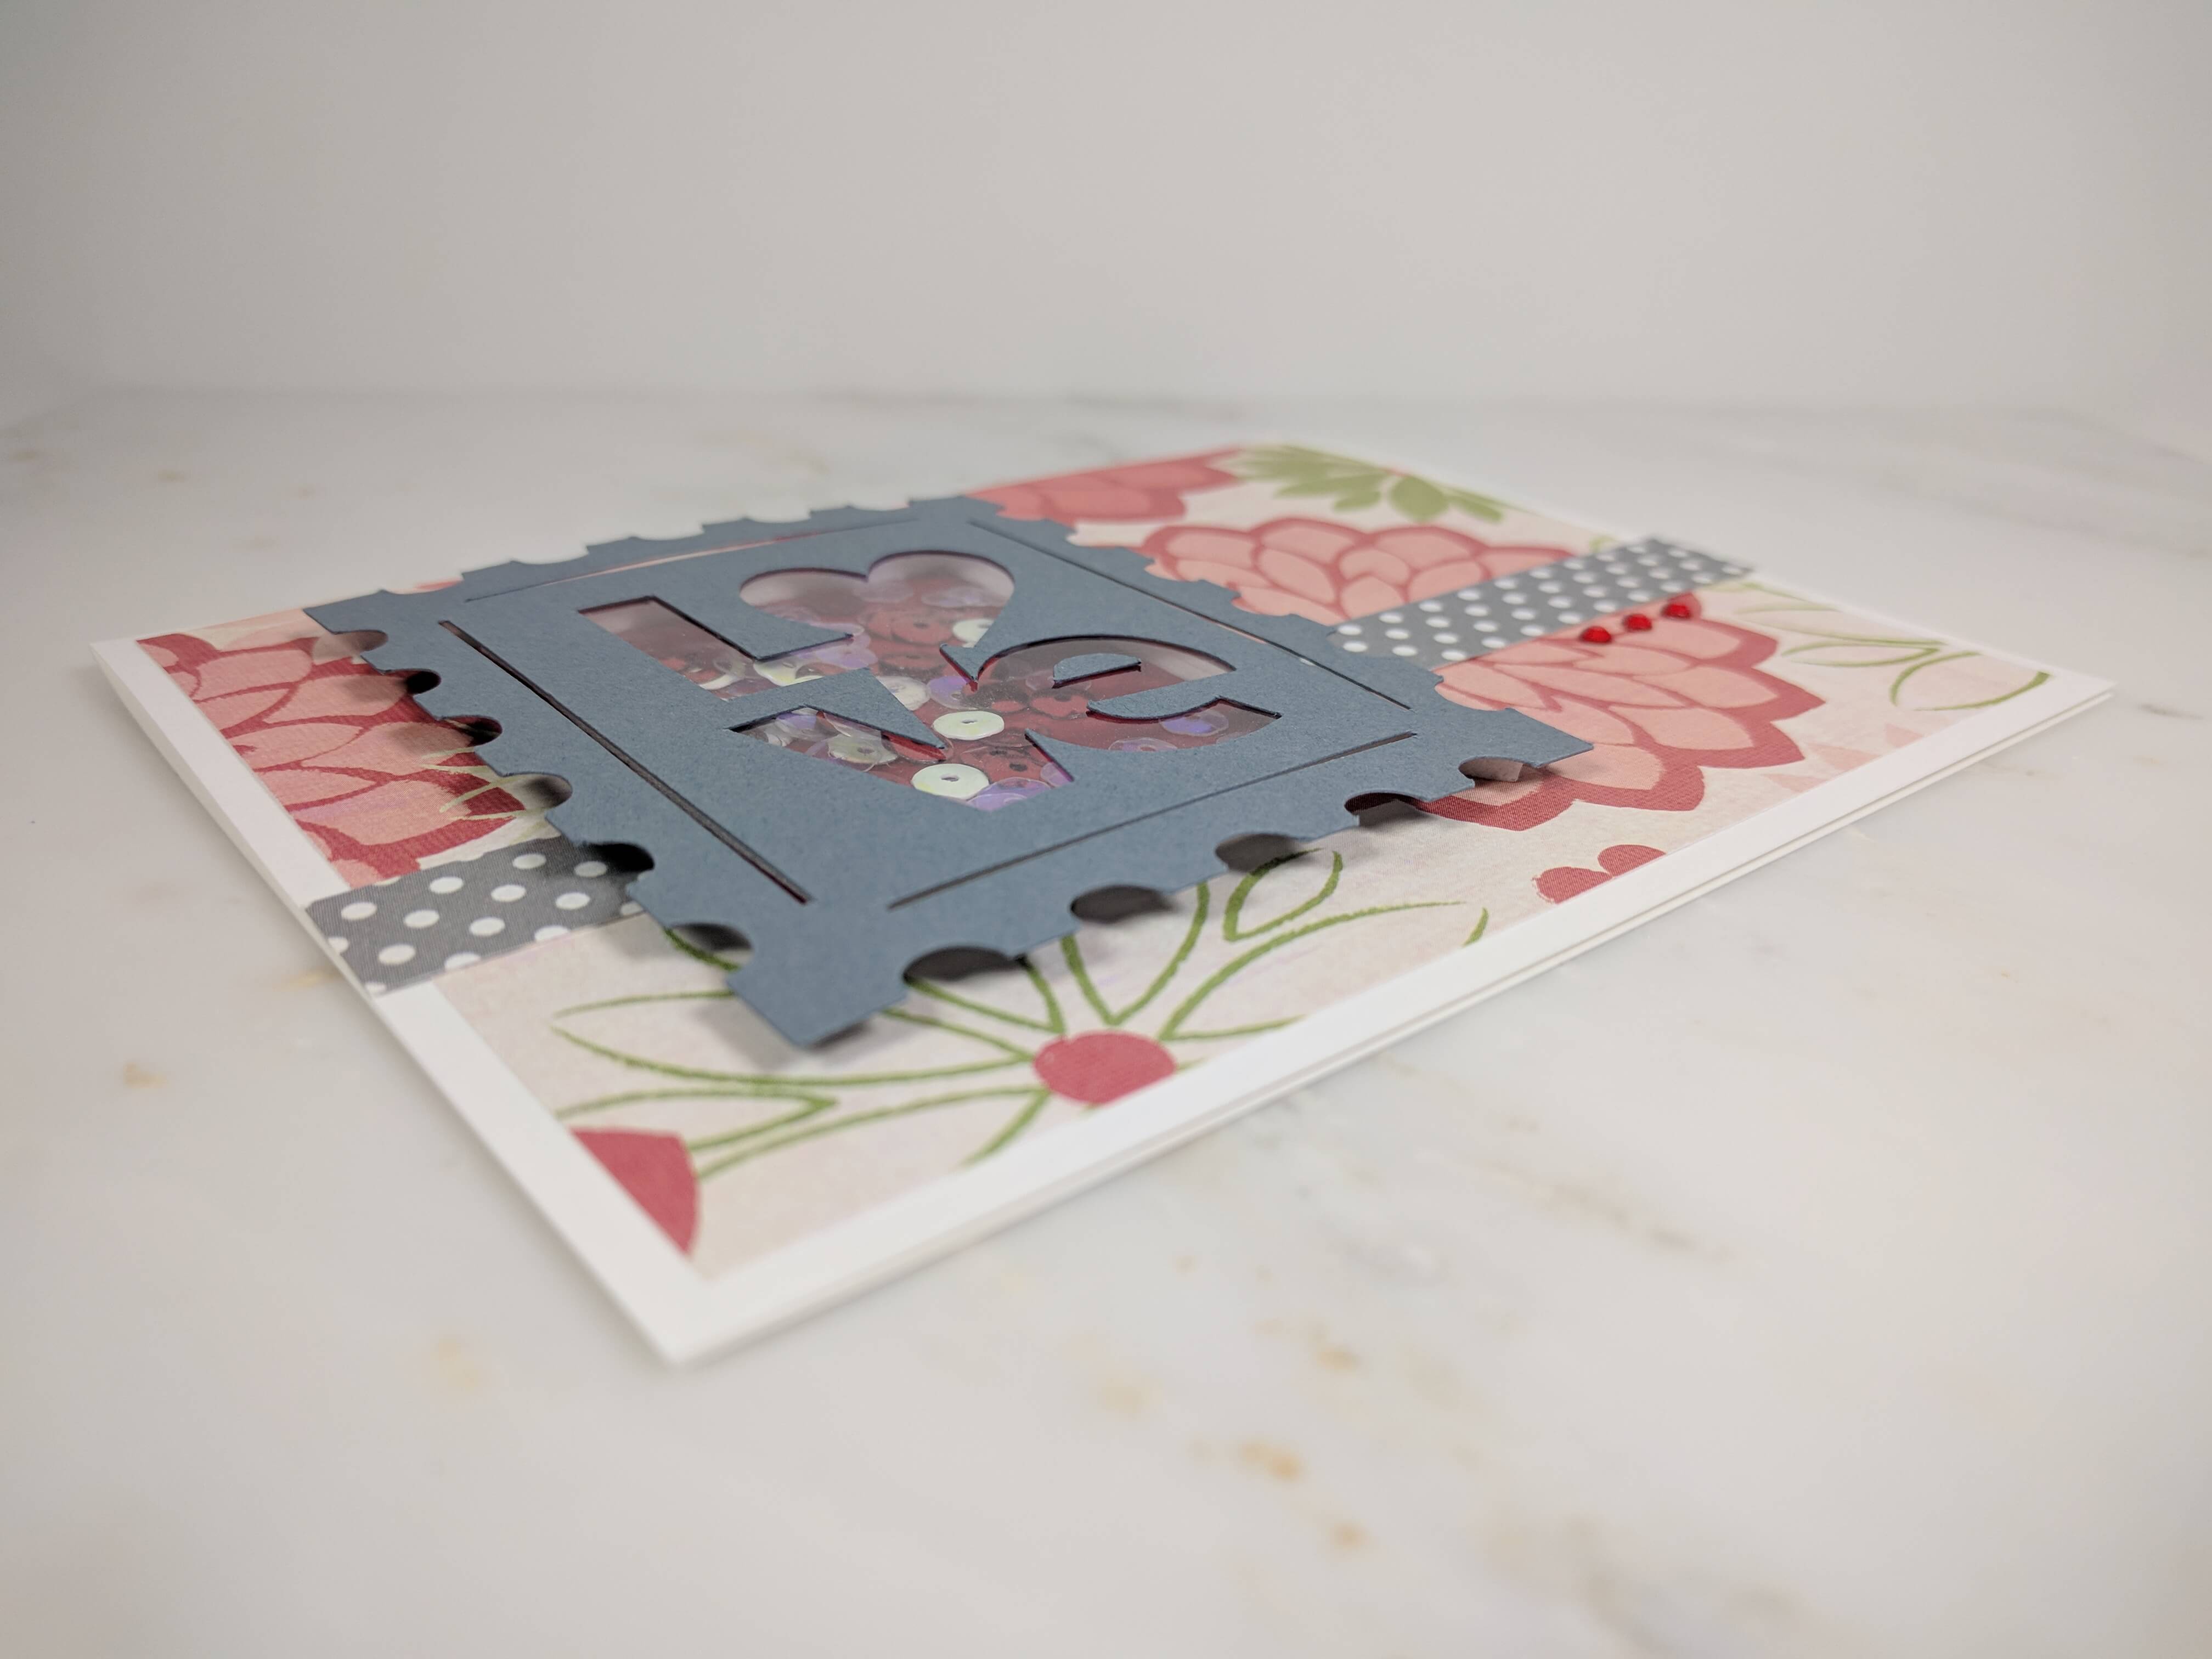
Step 2. Cut out the shaker card design.
The love stamp design is a Cricut image, so I made it large enough to work as a shaker and also fit the card base. Click here to see the specs of the image that I used. Once I was ready to cut the image out, I followed the instructions to the image out using my Cricut Explore Air 2 machine. If you’re looking for more Cricut projects, check out these popular projects here!
I then trimmed a small sheet of Grafix acetate to be a bit smaller than the stamp. This acetate is clear and sits just behind the stamp, keeping the sequin in place. A sheet of Bazzill Swiss Dot Phoenix Red cardstock was also cut out to be the same size as the acetate.
Tip: The Grafix acetate that I used in this project is NOT heat resistant and is not recommended for embossing. It can, however, be used with StazOn inks.
Step 3. Assemble the shaker.
Now that I’ve prepped all my materials, I began putting the shaker together. Grabbing my Scor-Pal Scor-Tape, I used it to line the back of my love stamp. Then, I placed the acetate over the tape. I also cut three long strips of Craft Specialties double-sided foam tape that were about the same length then layered each strip on top of each other. Some people prefer using two layers, but I think that three layers give it a little more space.
Since the tape was too wide to use as is, I then cut it into strips that were each only a few centimeters wide. I lined the inside edges of my stamp with the foam tape, to shape the four walls of the shaker. Next, I ran my EK Tools powder tool along the inside of the walls of my shaker and the acetate to remove any stickiness that would otherwise stick to the sequin. I added a mix of pink, red and white sequin to the shaker and closed it up using Bazzill swiss dot cardstock.
Step 4. Assemble the card and add finishing touches.
Finally, it was time to put the card together. I applied the background to the card base using Scrapbook Adhesives mounting squares then added the strip of polka-dot cardstock over the top of the background. Lastly, I positioned the shaker to the left side of the card and add 3 tiny self-adhesive rhinestones to the right side of the card just under the gray stip of paper. Make sure everything is secure, and give your card a little shake!
If you’d like to find more Valentine’s Day cards, I recommend these posts. They range from simple to more complex, and are a ton of fun to make! And follow me on Instagram, Facebook or Pinterest for the latest updates on what’s new with One Paper Street!