
This is a really easy Christmas card to make, and I’m really excited to share it with you. A couple weeks back, I posted a card making tutorial about making Christmas cards using left over ribbon. Since I used the negative design of a Christmas tree in the last card, I still had the unused positive Christmas tree cut out left. See below, to find out more about how I used that cutout to make this fun new design!
MATERIALS USED:
Bazzill Swiss Dot Cardstock Paper – Phoenix Red (4’x5.25’)
White Textured Cardstock (for tree)
Green Cardstock (8.5’x5.5’) – From: Recollections Cardstock Paper Pack – Feathered Greens
Green and Gold Sequin-From: 5mm Mix 15 Colors Rainbow Cup Sequin
Recollections White Heavyweight (3.75’x5’)
Any Christmas Sentiment (for card interior)
Green & Red Ribbon (6 inches – ¼ inch wide)
Scrapbook Adhesives Initially Repositionable Mounting Squares
Forever In Time 3D Pop Dots Square Dual-Adhesive Foam Mount, 1/4-Inch
Red Royal Ink Pad –From: Hero Arts AF361 Yana’s Sunset Layering Stamp Pad Set
Clear Stamping Block – From: Inkadinkado Clear Small And Medium Blocks
Tacky Glue –From: Aleene’s Trial Tacky Pack
Cricut Adhesive Cutting Mat, Standard Grip
CRICUT IMAGES USED:
Christmas Tree (Tablescraps Fall & Winter)
View the exact specifications of this project in the Cricut Design Studio.
WALK THROUGH:
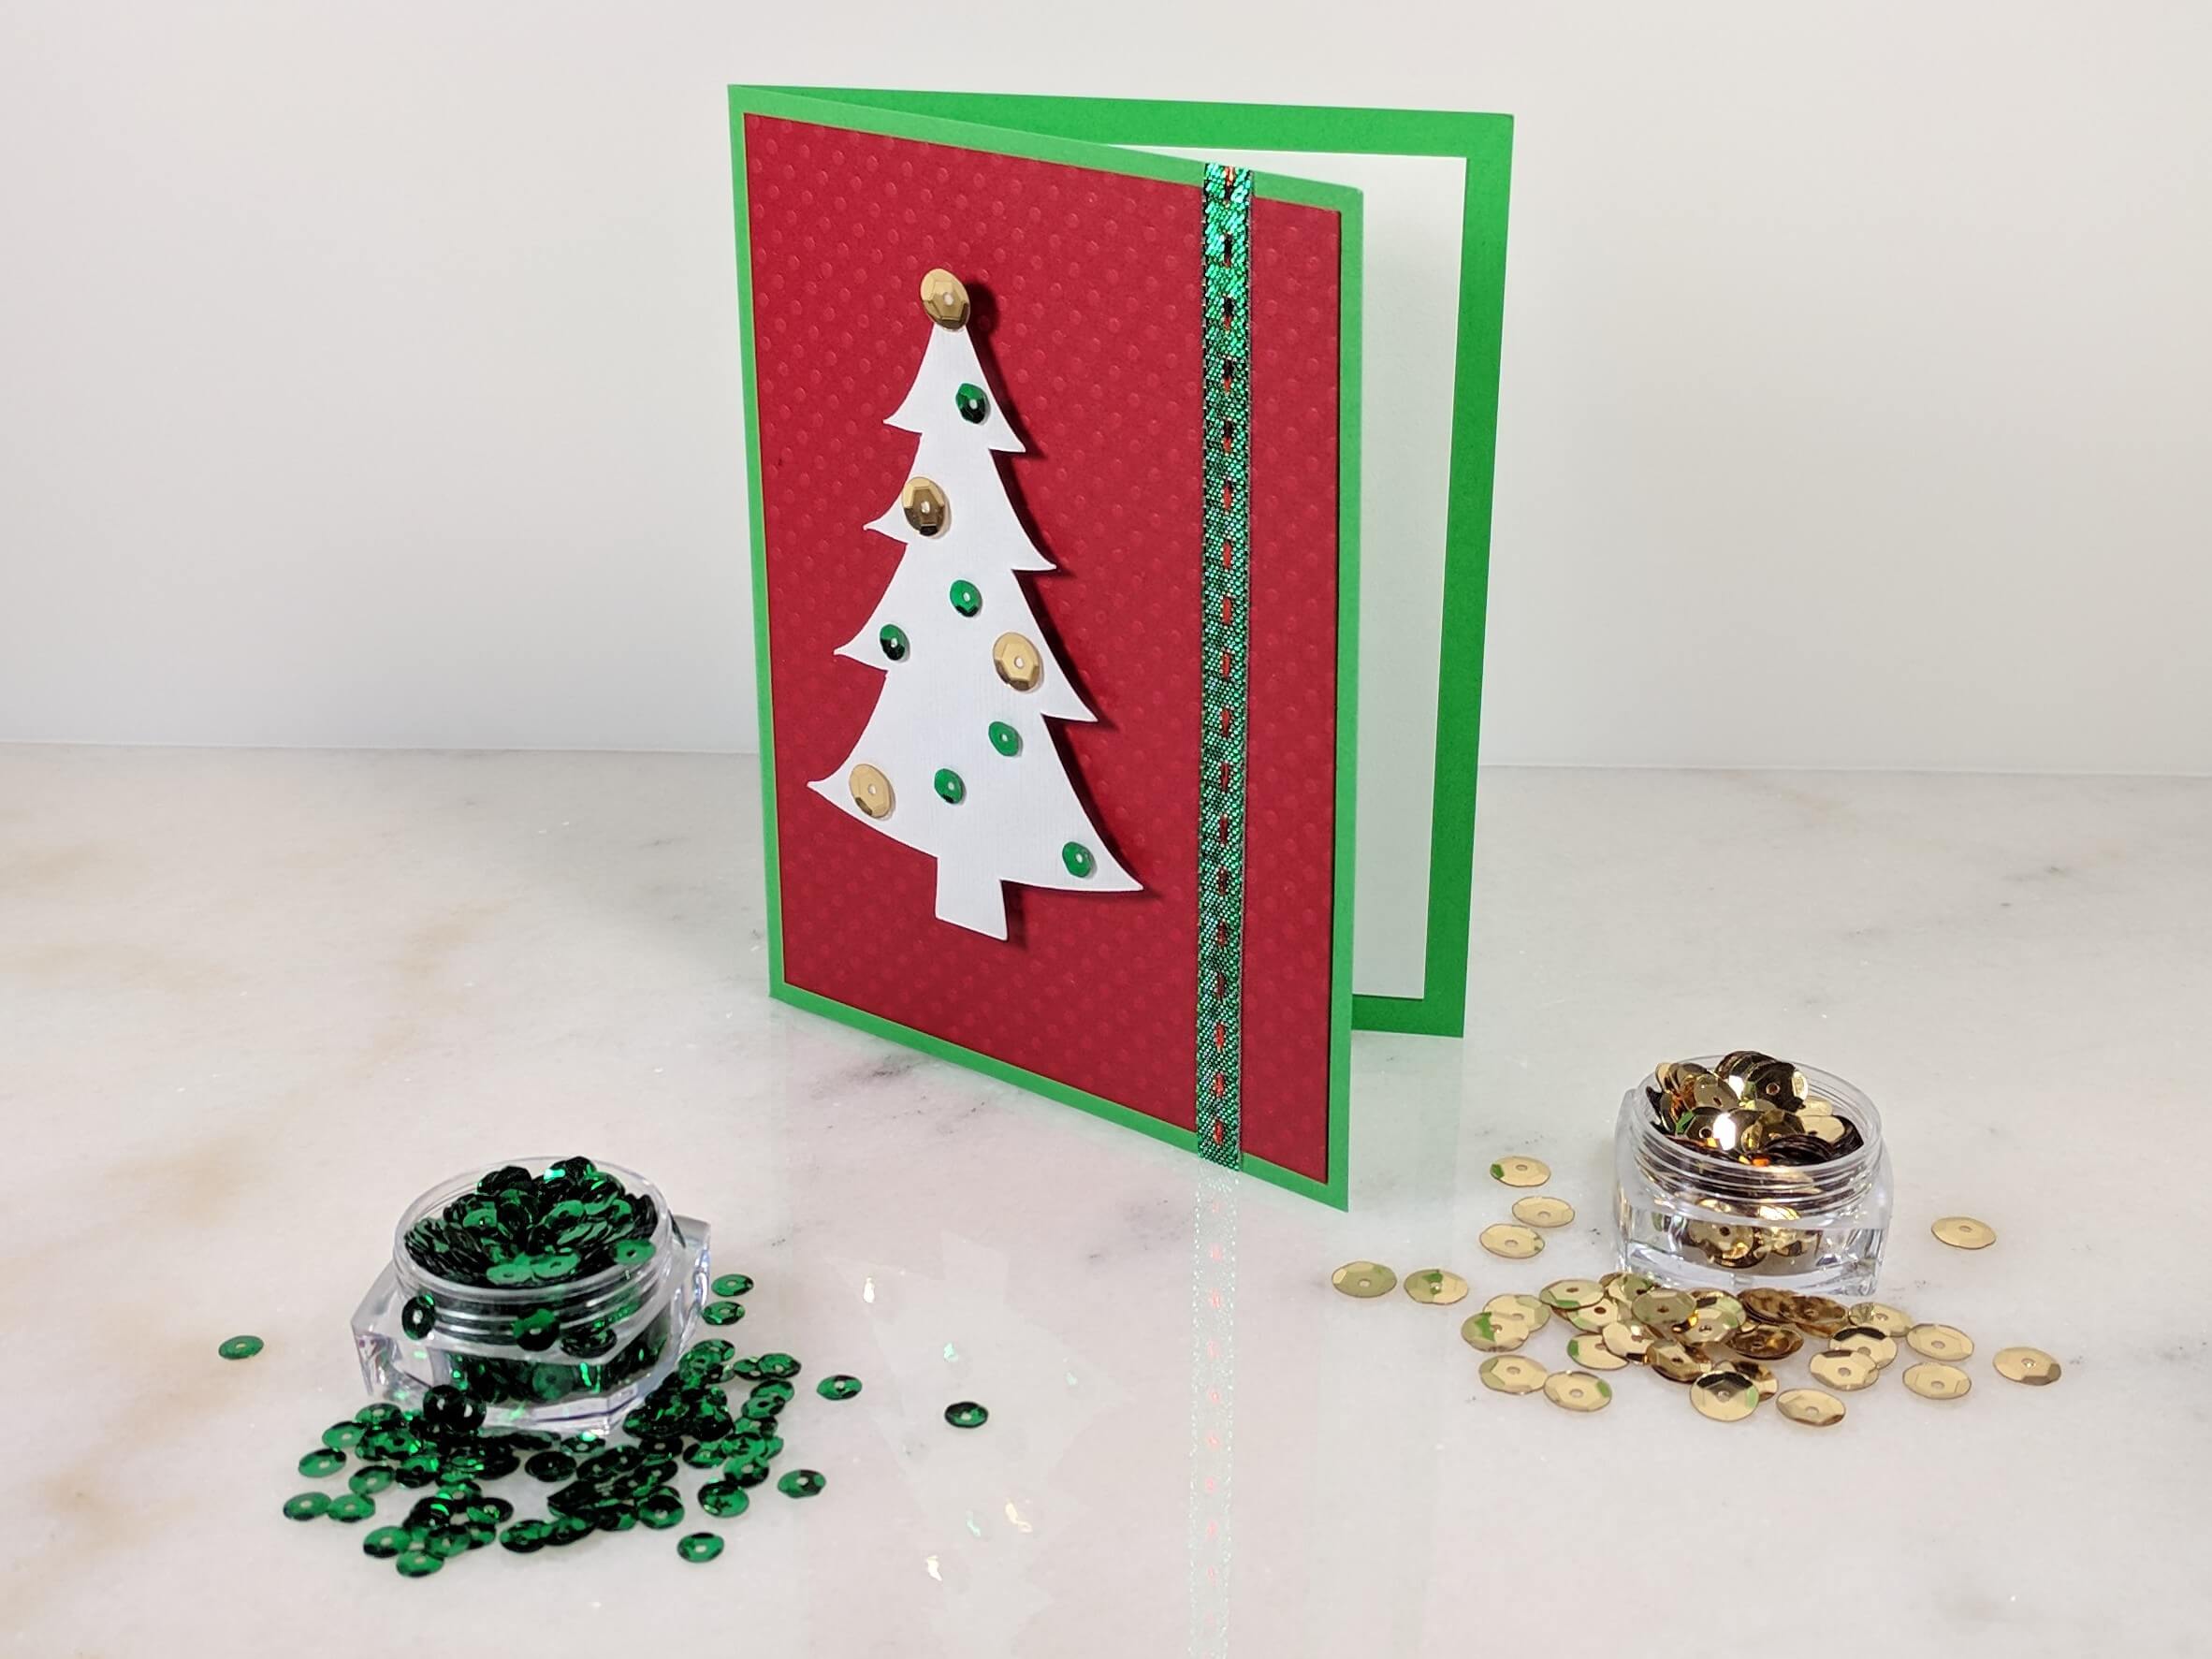
I started this card by taking the cutout of the Christmas tree that I already had from a previous project, and adding some gold and green sequin to it. I arranged all of the sequin on the tree, then one by one I dipped the sequin into tacky glue and placed it back on the tree. Once that was done, I set the finished tree aside to dry.
Tip: Make sure you use enough glue on the sequin to keep it in place during transit. Too little glue, and the sequin will fall off with the slightest bit of pressure. Too much, and the glue will seep out around the edges.
Next I cut some green cardstock in half to make a 5.5’x8.5’ sized piece of cardstock. I then folded it in half to make the card base and set it aside. After that, I took the Phoenix Red Bazzill paper and cut it down to a 4’x5.25’ sheet of cardstock to make the background of the tree. I then flipped over that Bazzill cardstock and placed mounting tape on the back to stick it to the card base.
After that, I took my Scor-Pal Scor-Tape and cut off a piece about 5.75 inches long. I positioned it down the right side of the card, then pressed down firmly to set the adhesive in place. Once in place, I peeled the protective layer from the Scor-Tape and placed the ribbon over top of the adhesive. Even though I made the card 5.5 inches tall, I intentionally made the ribbon 6 inch long so it could hang off the ends of the card. This makes it easier to position and once I put it in the right place, I can simply snip the edges off.
Tip: When you cut the edges of the ribbon off, make sure to use really sharp scissors to get a clean edge.
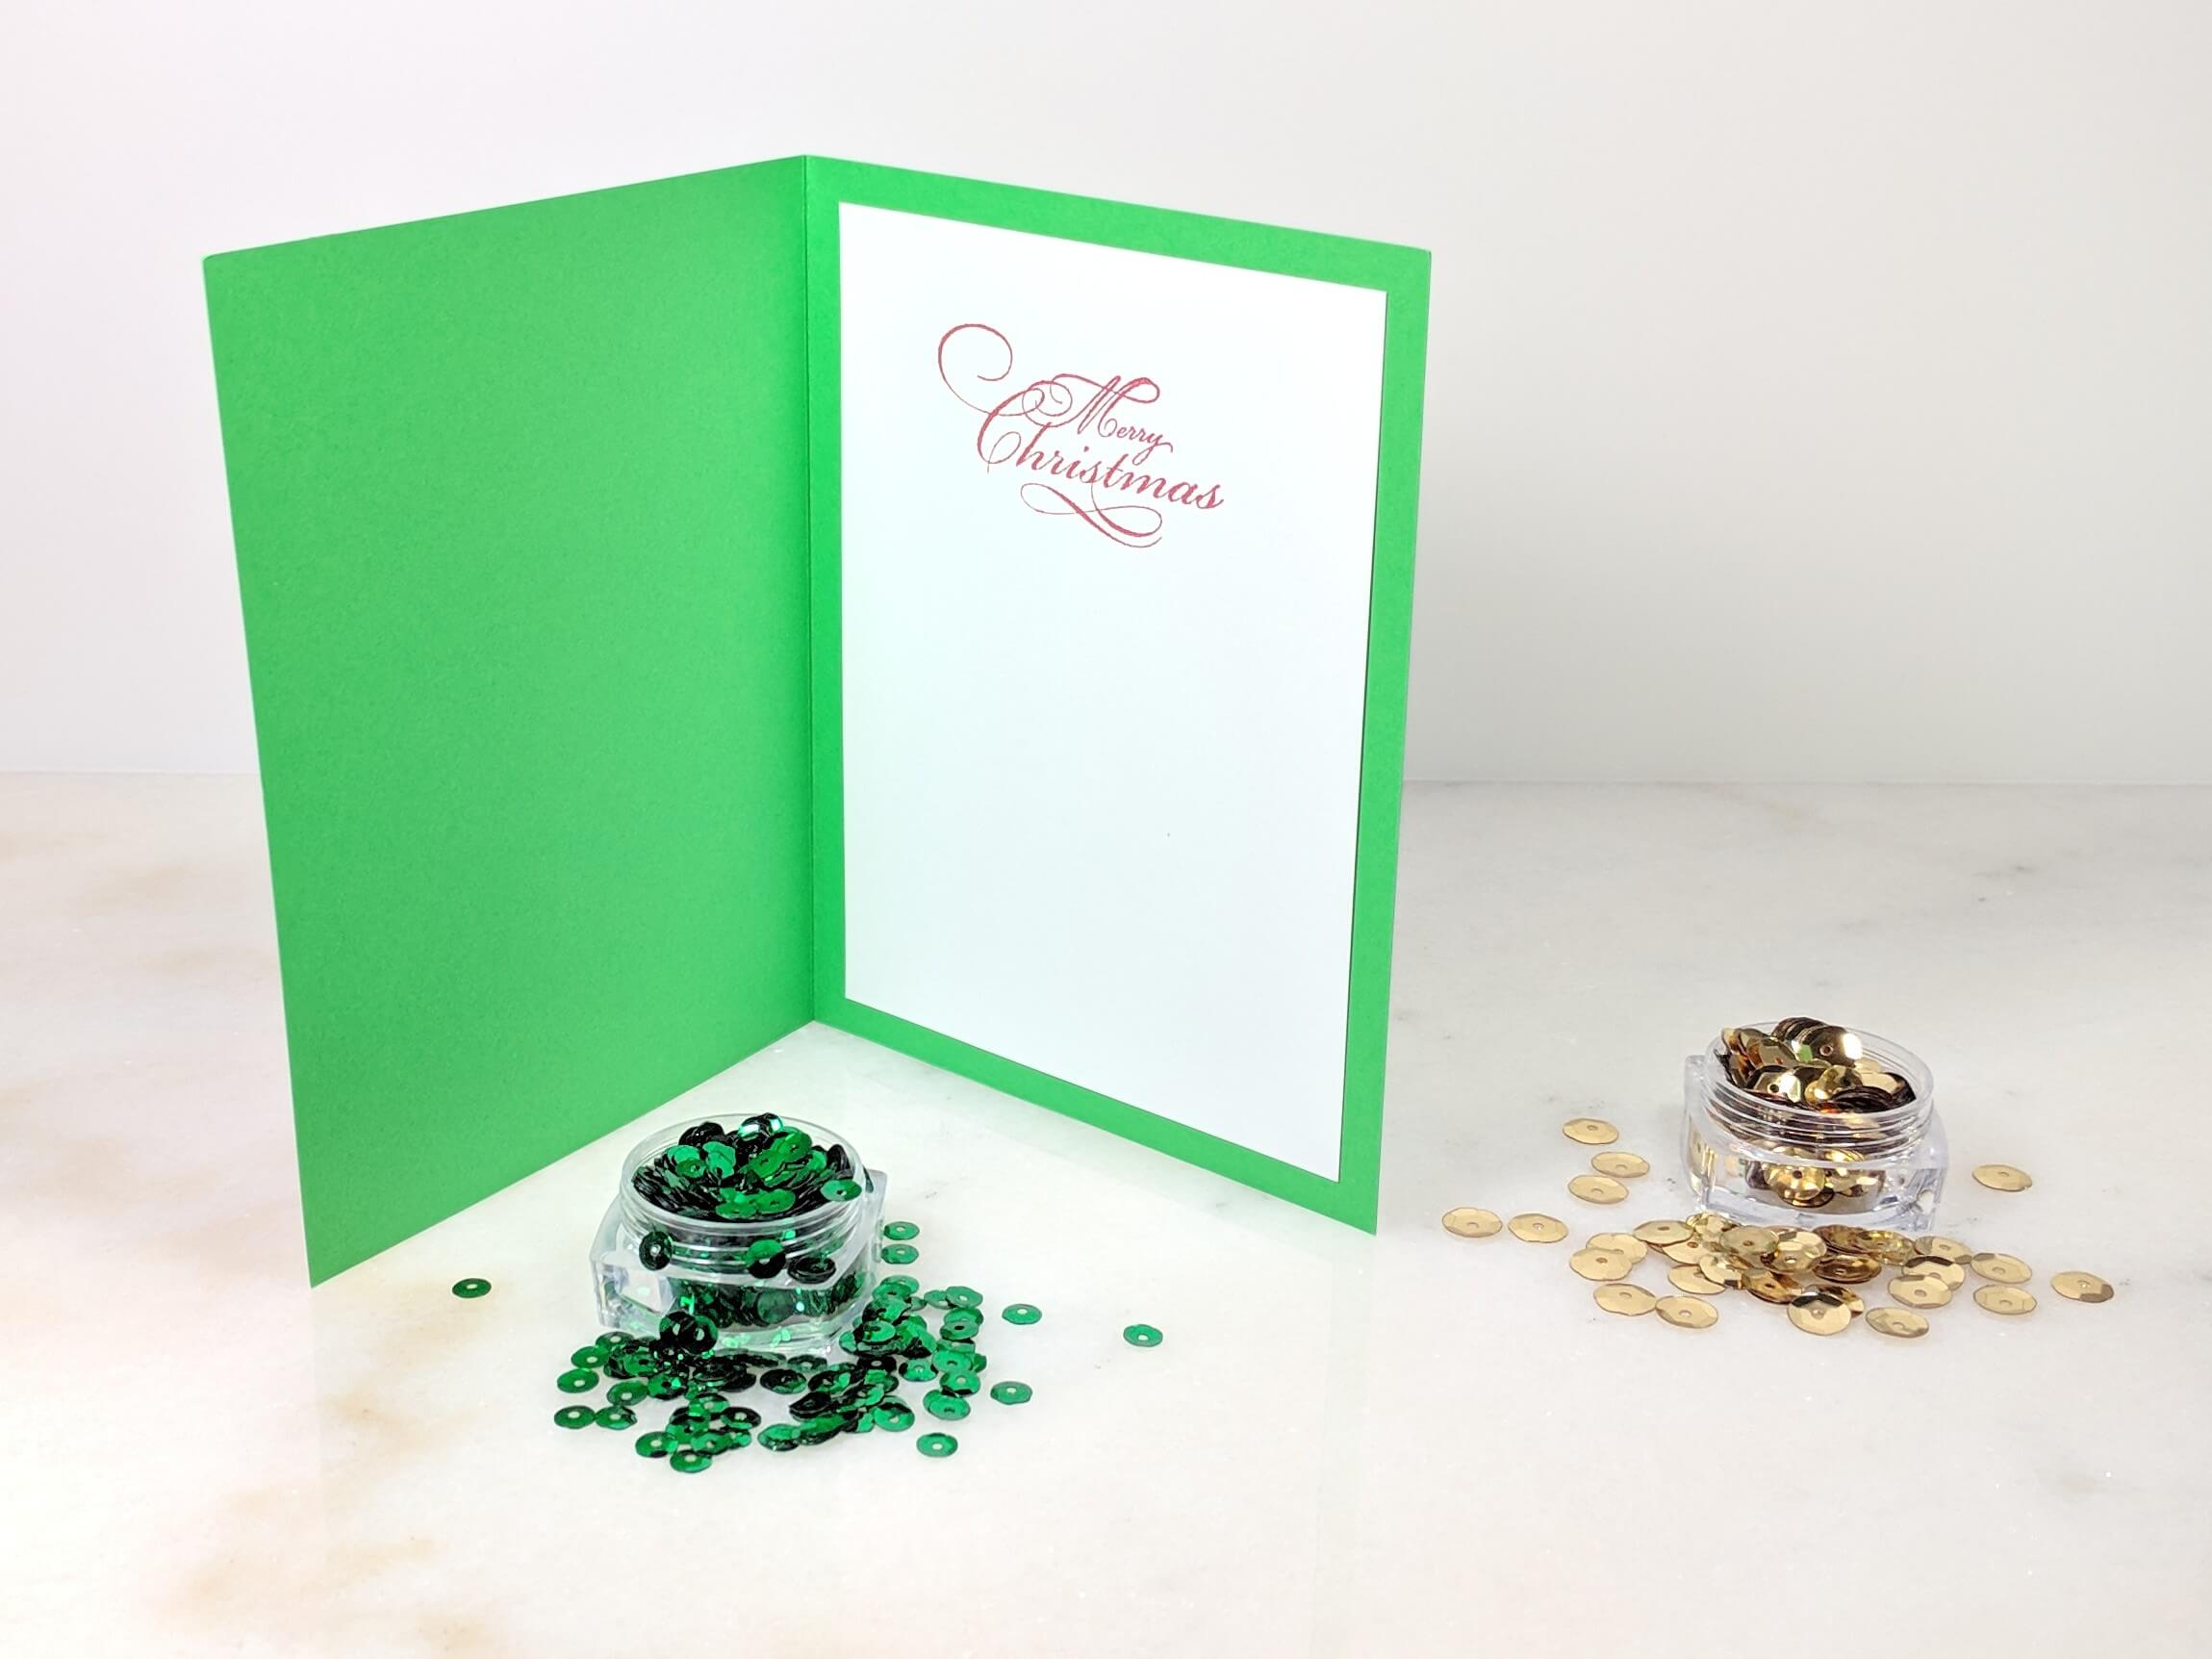
By the time you’ve done all this, your tacky glue should be close to being dry. If it is, turn it upside down and gently place some 3D Pop Dots on the back of the tree. This foam adhesive will allow your tree to really stand out. Peel the backing off of the Pop Dots and position it on the Bazzill cardstock. I placed mine a little off center, but you can choose any position you’d like. Once the front is all done, you may place a piece of 3.75×5 white cardstock in the interior of the card and stamp a sentiment inside. I used a “Merry Christmas” sentiment with Red Royal layering ink from Hero Arts.
I started this card by taking the cutout of the Christmas tree that I already had from a previous project, and adding some gold and green sequinto it. I arranged all of the sequin on the tree, then one by one I dipped the sequin into tacky glue and placed it back on the tree. Once that was done, I set the finished tree aside to dry.
This blog uses affiliate links when possible. If you choose to make a purchase through one of these links, I may receive a small commission (at no cost to you). I don’t make recommendations lightly, and only link to products that I know and trust. Thank you for your support.