
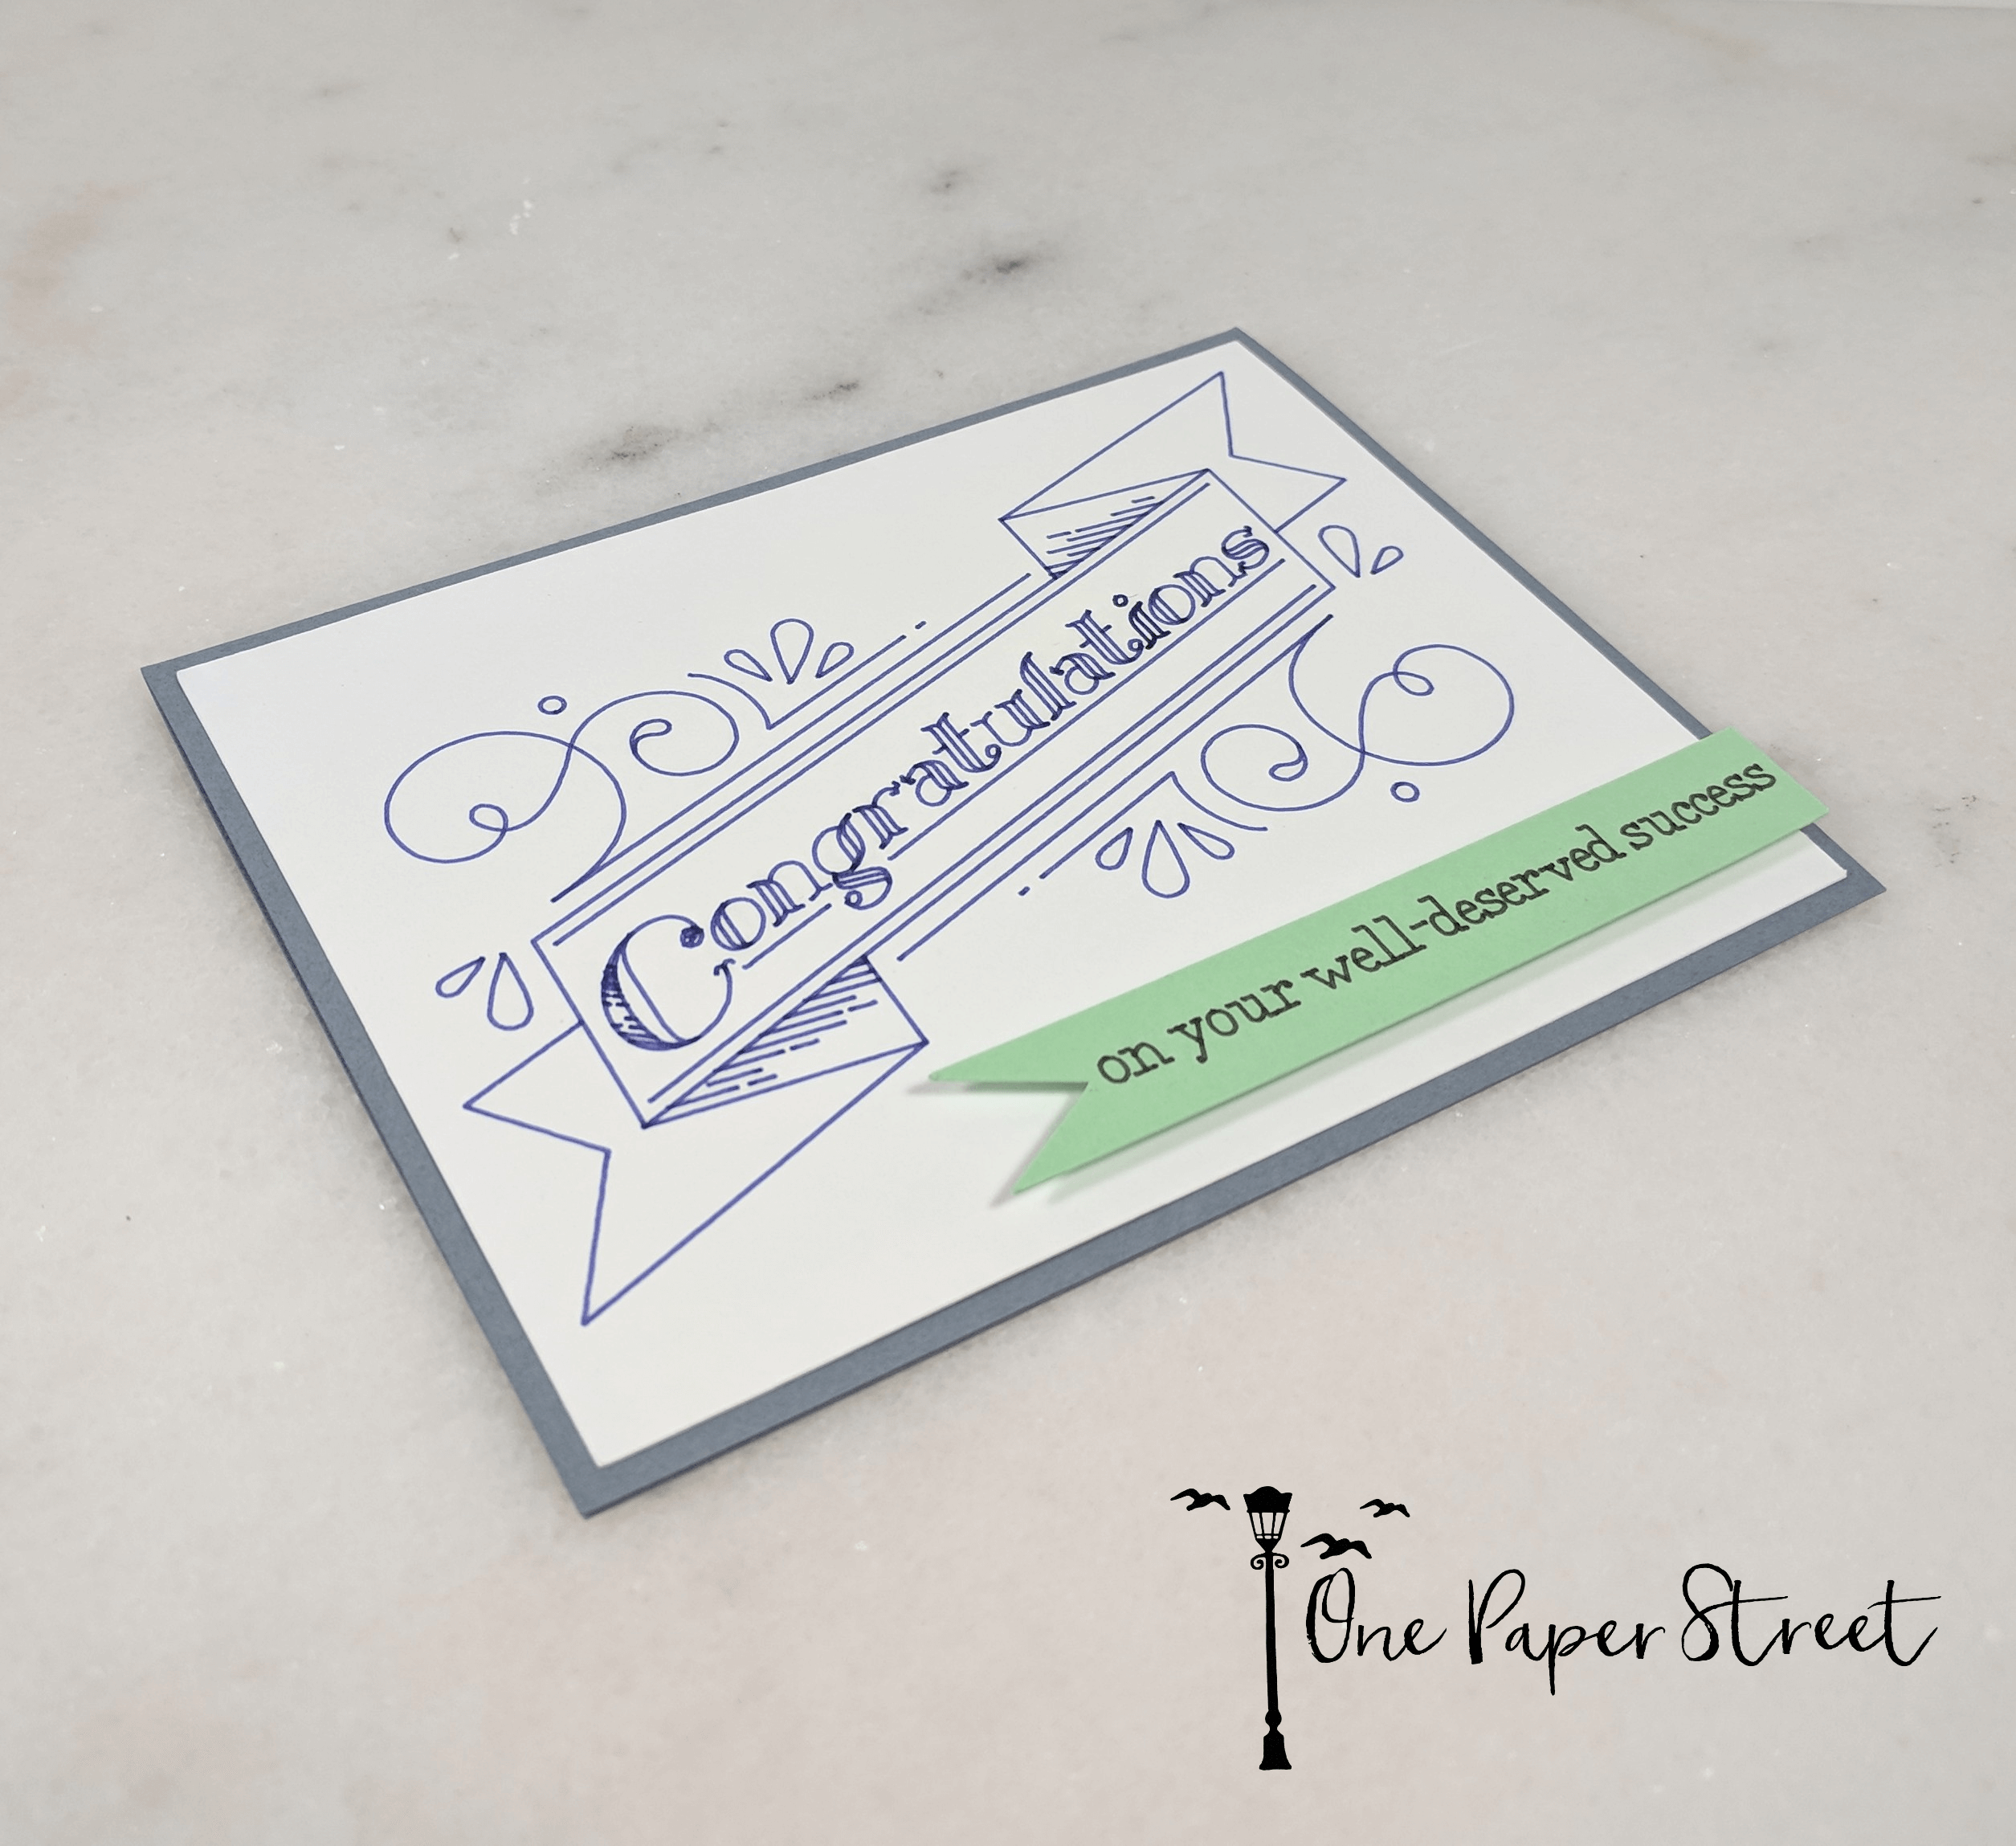
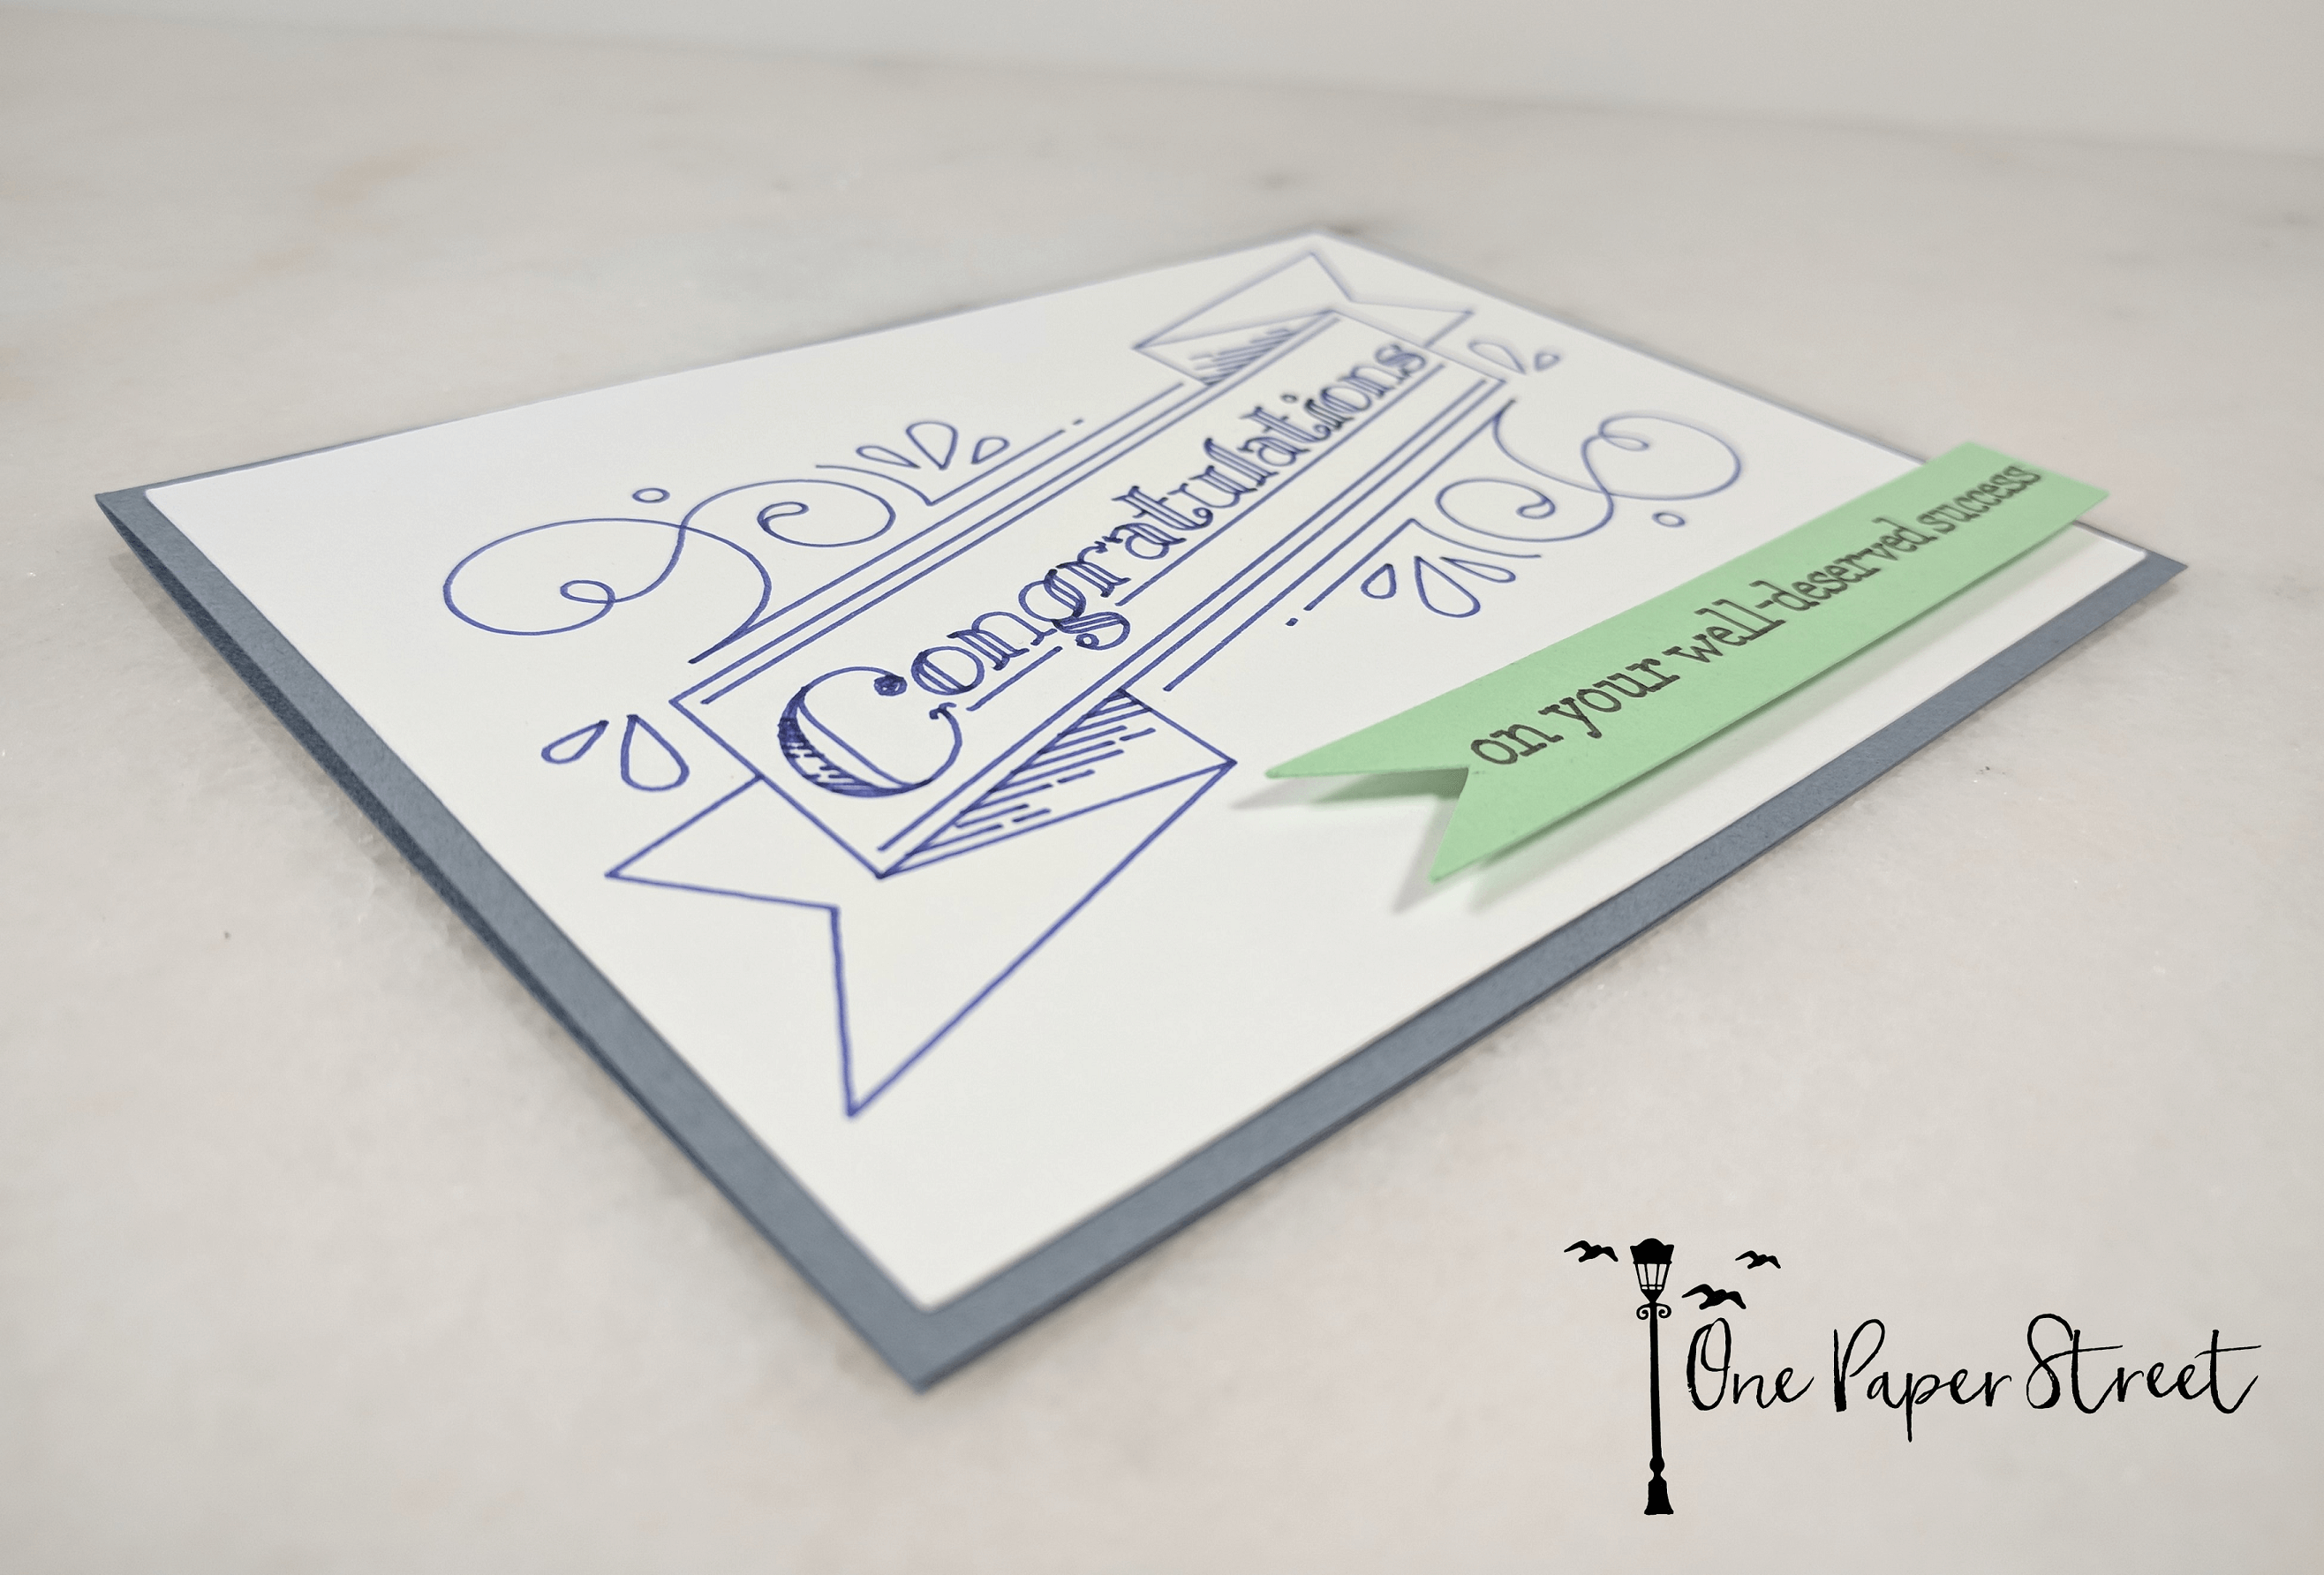
Do you need to tell someone “congratulations on your well deserved success”? Well, you’re in luck!This card is super fun, and was really easy to make. The design for this card was inspired by one of my co who was looking for graduation card. I needed to find a design that I could make quickly without sacrificing the look and feel of a handmade card. This design didn’t disappoint. It still looks like an elaborate drawing, but it really only took me 20 minutes to put four of these cards together after I picked out the supplies.
 View the exact specifications of this project in the Cricut Design Studio.
MATERIALS USED:
Please note: Other than the card base, the cardstock sizes indicated are larger than what they will actually be on the card. This ensures that you have enough paper to put on the Cricut mat to cut the design accurately.
Cricut Adhesive Cutting Mat, Standard Grip
Geode Cricut Fine Point Marker –From: Southwest Cricut Pen Set
Midnight Cricut Fine Point Marker –From: Cricut Antiquity Color Pen Set
Classic Crest Super Smooth Solar White (6’x6′)
Mint Green Cardstock (1’x4.5′) –From: Recollections Cardstock Paper, Essentials 20 Colors – 200 Sheets
Dark Grey Cardstock – card base (5.5’x4.25′) –From: Recollections Cardstock Paper, Essentials 20 Colors – 200 Sheets
Classic Crest Super Smooth Solar White (5’x3.75′)
Scrapbook Adhesives Initially Repositionable Mounting Squares
Forever In Time 3D Pop Dots Square Dual-Adhesive Foam Mount, 1/2-Inch
Forever In Time 3D Pop Dots Square Dual-Adhesive Foam Mount, 1/4-Inch
Feather No.55 Switch-Blade Shear, 5.5 Inch
CRICUT IMAGES USED:
Congratulations (Mustache Phrases and Sentiments cartridge)
Banner (Bits and Pieces cartridge)
WALK THROUGH:
Step 1:
Choose the materials you’d like to use for this project. Do you want the colors to be masculine, feminine, or gender neutral? I chose gender neutral, since I don’t have too many graduation cards in stock in my Etsy shop. Cut your card base to be 5.5’x8.5′ then score down the middle and fold in half. The final size of your card should be an A2 5.5’x4.25′ card base. you can get 2 exact A2 card bases from one 11’x8.5′ sheet of cardstock.
Step 2:
Click here to open this project in the Cricut Design Space. Note, you will need a Cricut machine, and access to the images to make this card. I have a standard Cricut Access membership, that I pay approximately $7.99 a month to use their designs.
Step 3:
Place your individual sheets of cardstock on the Cricut mat and feed them through the machine, following the the step by step instructions in the Cricut Design Space. I used the Geode Cricut Fine Point Marker to make the Congratulations focal point design and the Midnight Cricut Fine Point Marker to make the smaller sentiment on the banner.
TIP: Move the cardstock away about a quarter of an inch away from the left side of the mat. this will save you paper when your designs are ready to be cut.
Step 4:
Once your Cricut machine has cut out the design, start piecing everything together. First place the solar white congratulations design on the card base using repositionable mounting squares. Once complete, place the banner on either 1/2 inch or 1/4 inch Foam adhesive (I typically use a bit of both) and place it on the lower right hand side of the card.
Step 5:
Once you’ve completed the front of your card, place a 3.75’x5′ piece of solar white cardstock in the interior of the card to give the sender something to write a lovely message on. After that, stick your logo on the back, and you are ready share it!
This blog uses affiliate links when possible. If you choose to make a purchase through one of these links, I may receive a small commission (at no cost to you). I don’t make recommendations lightly, and only link to products that I know and trust. Thank you for your support.