
I absolutely loved making this card and I wanted to share how I did it. I originally made this good luck card for a friend who was about to take a really tough exam. Spoiler alert, they passed!
This chevron good luck card was so easy to make because most of the pieces cut using my Cricut Explore Air 2 machine. From there, it was just a function of putting everything together. I’m going to walk you through how I made it, and I hope that you like it! Let me know what you think at the end of the post by leaving a comment below.
Chevron Good Luck Materials Used:
This blog may use affiliate links when they’re available. If you choose to make a purchase through one of these links, I may receive a small commission at no cost to you. I don’t make recommendations lightly, and will only link to products I know and trust.
- Cricut Explore Air 2 Machine [Cricut] [Amazon]
- Adhesive Cricut Cutting Mat, Standard Grip [Scrapbook.com] [Cricut] [Amazon]
- Basic Tool Set – Cricut [Cricut] [Amazon]
- Ultimate Fine Point Pen Set – Cricut [Cricut] [Amazon]
- Scrapbook Adhesives Initially Repositionable Mounting Squares [Amazon]
- Tombow MONO Aqua Liquid Glue [Amazon]
- Forever In Time 3D Pop Dots Square Dual-Adhesive Foam Mount, 1/2-Inch [Amazon] [Scrapbook.com]
- Forever In Time 3D Pop Dots Square Dual-Adhesive Foam Mount, 1/4-Inch [Amazon]
- Trim Slant Tip Tweezers [Amazon]
- Feather No.55 Switch-Blade Shear, 5.5 Inch [Amazon]
- Neenah Solar White Cardstock [Amazon] [Scrapbook.com]
- EK Tools EK Scoring Board 12×12 [Amazon]
- Recollections Cardstock Paper, Essentials 20 Colors [Amazon]
- Mini Gold Brads
- Navy Blue Textured Cardstock
Cricut Images Used:
Chevron Pattern Overlay
Standard Square
Mustache Font

View the exact specifications of this project in the Cricut Design Space.
Chevron Good Luck Card Tutorial:
Step 1. Create the card layout.
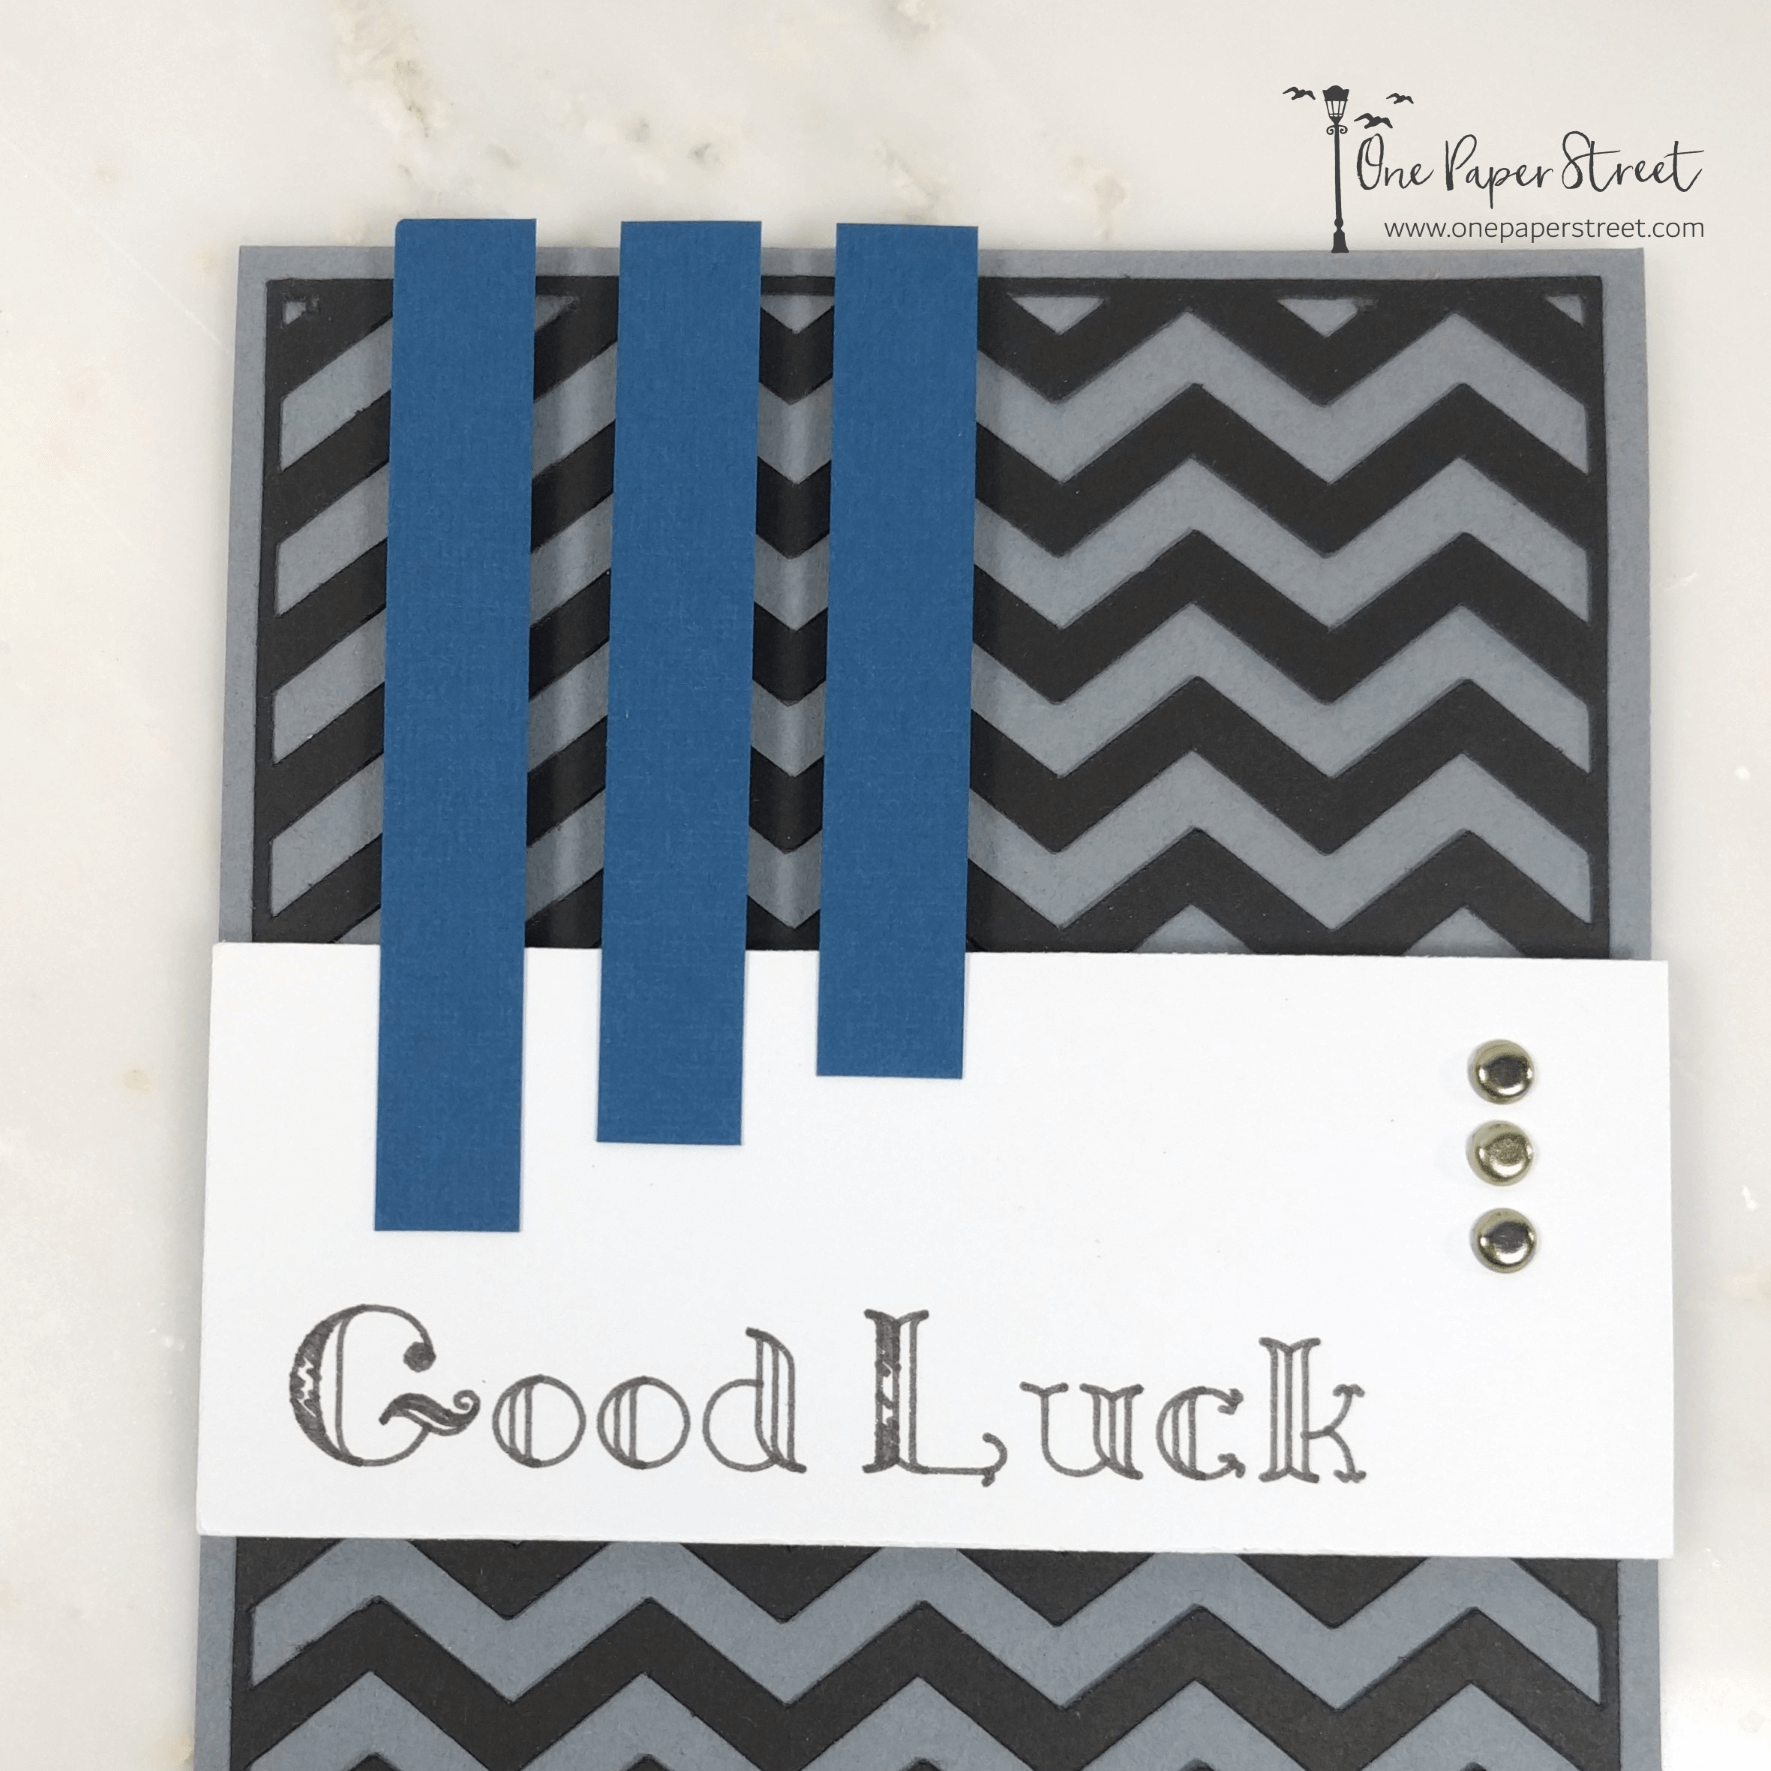
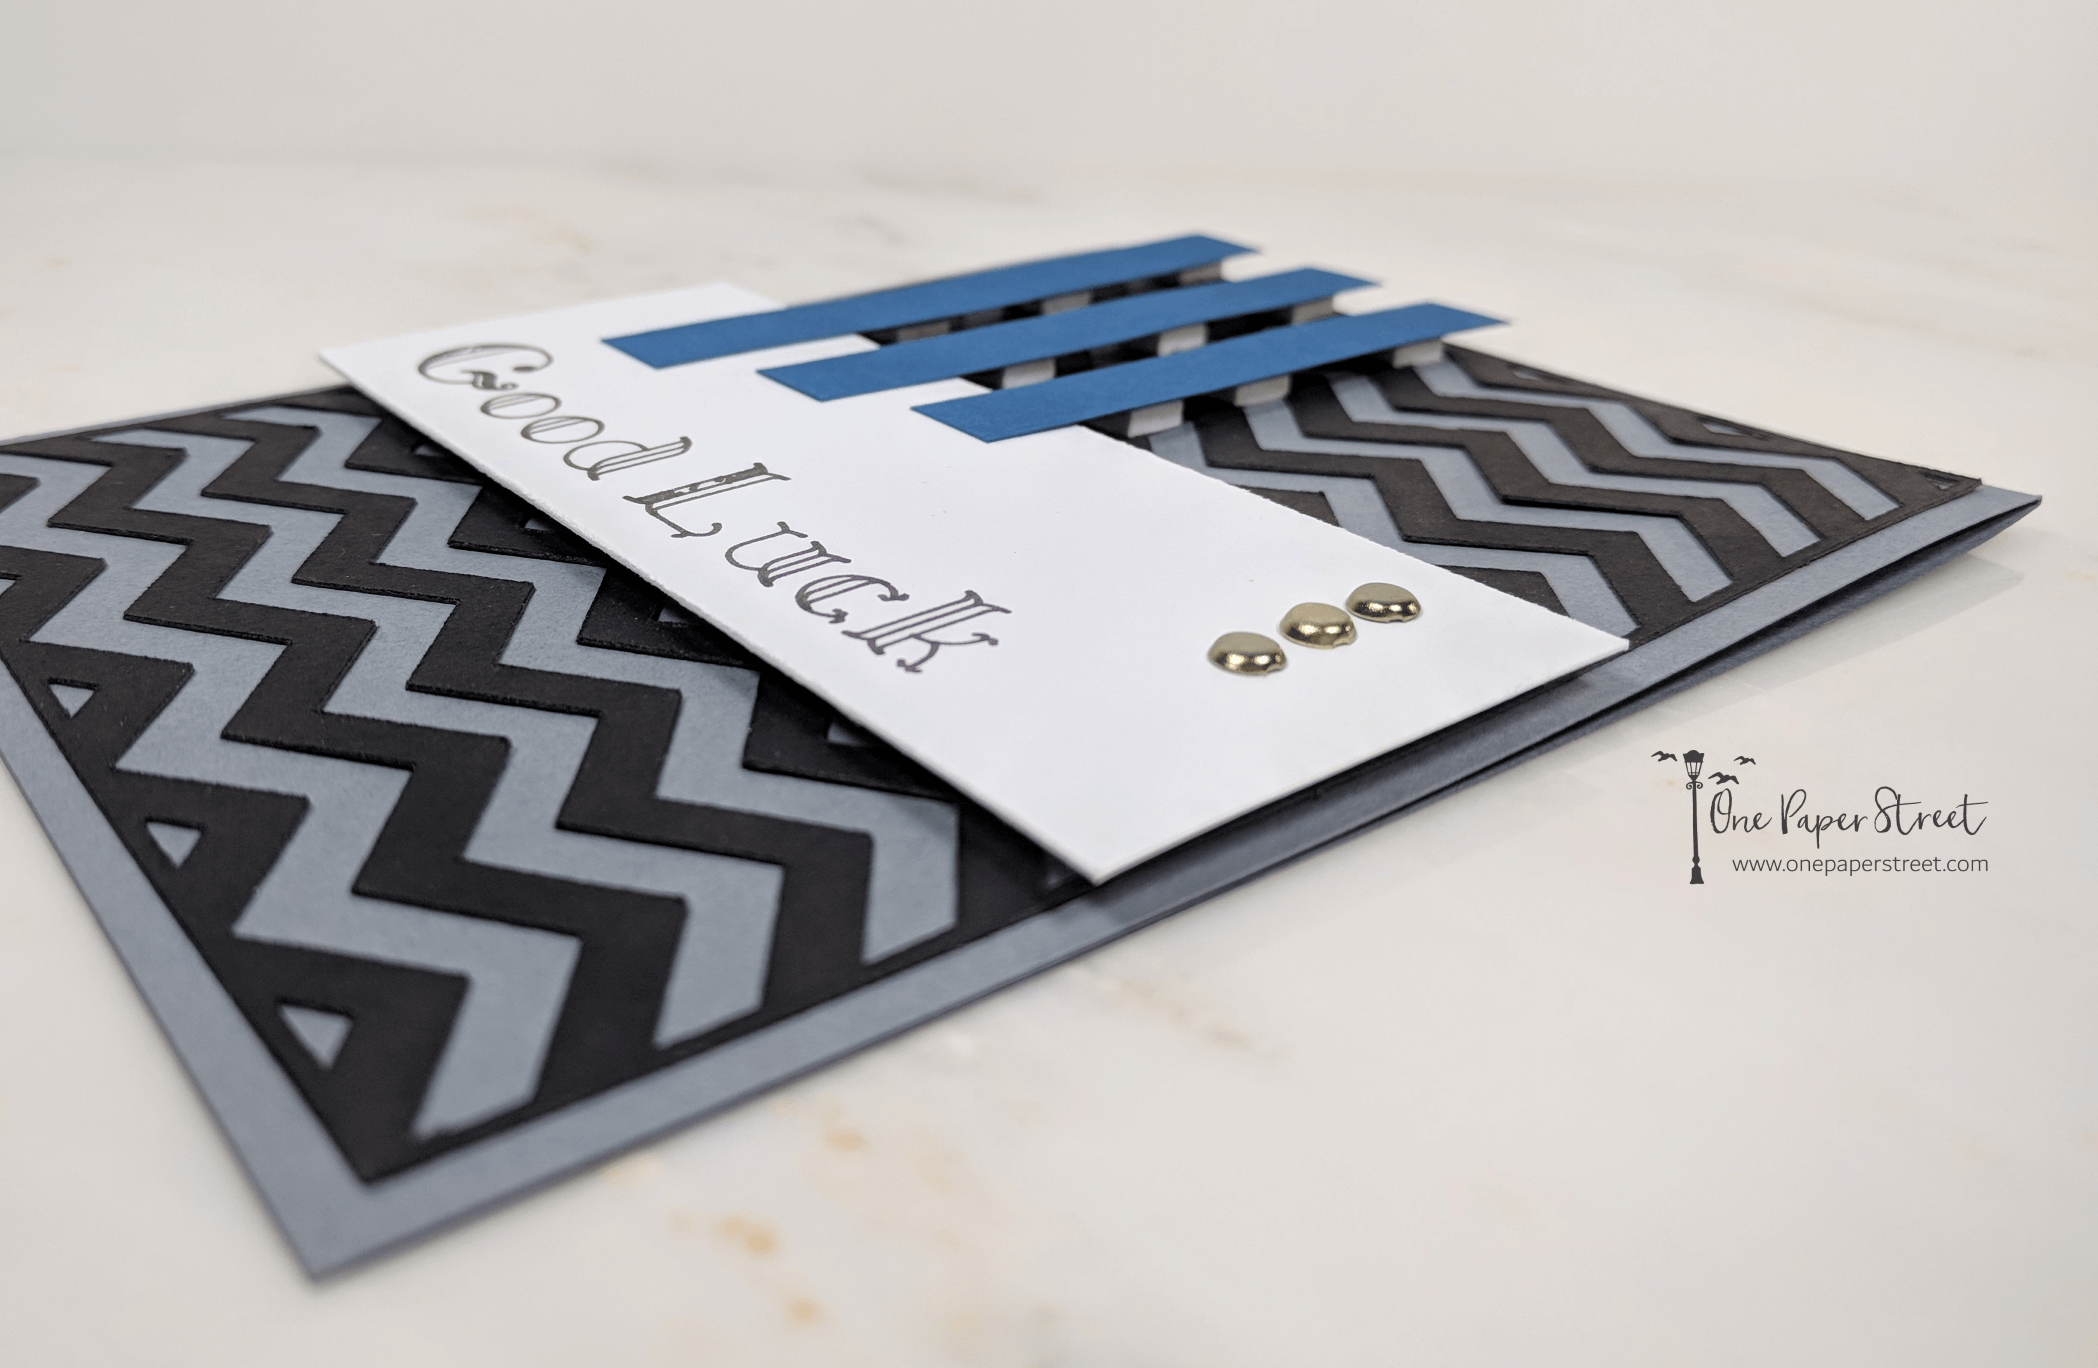
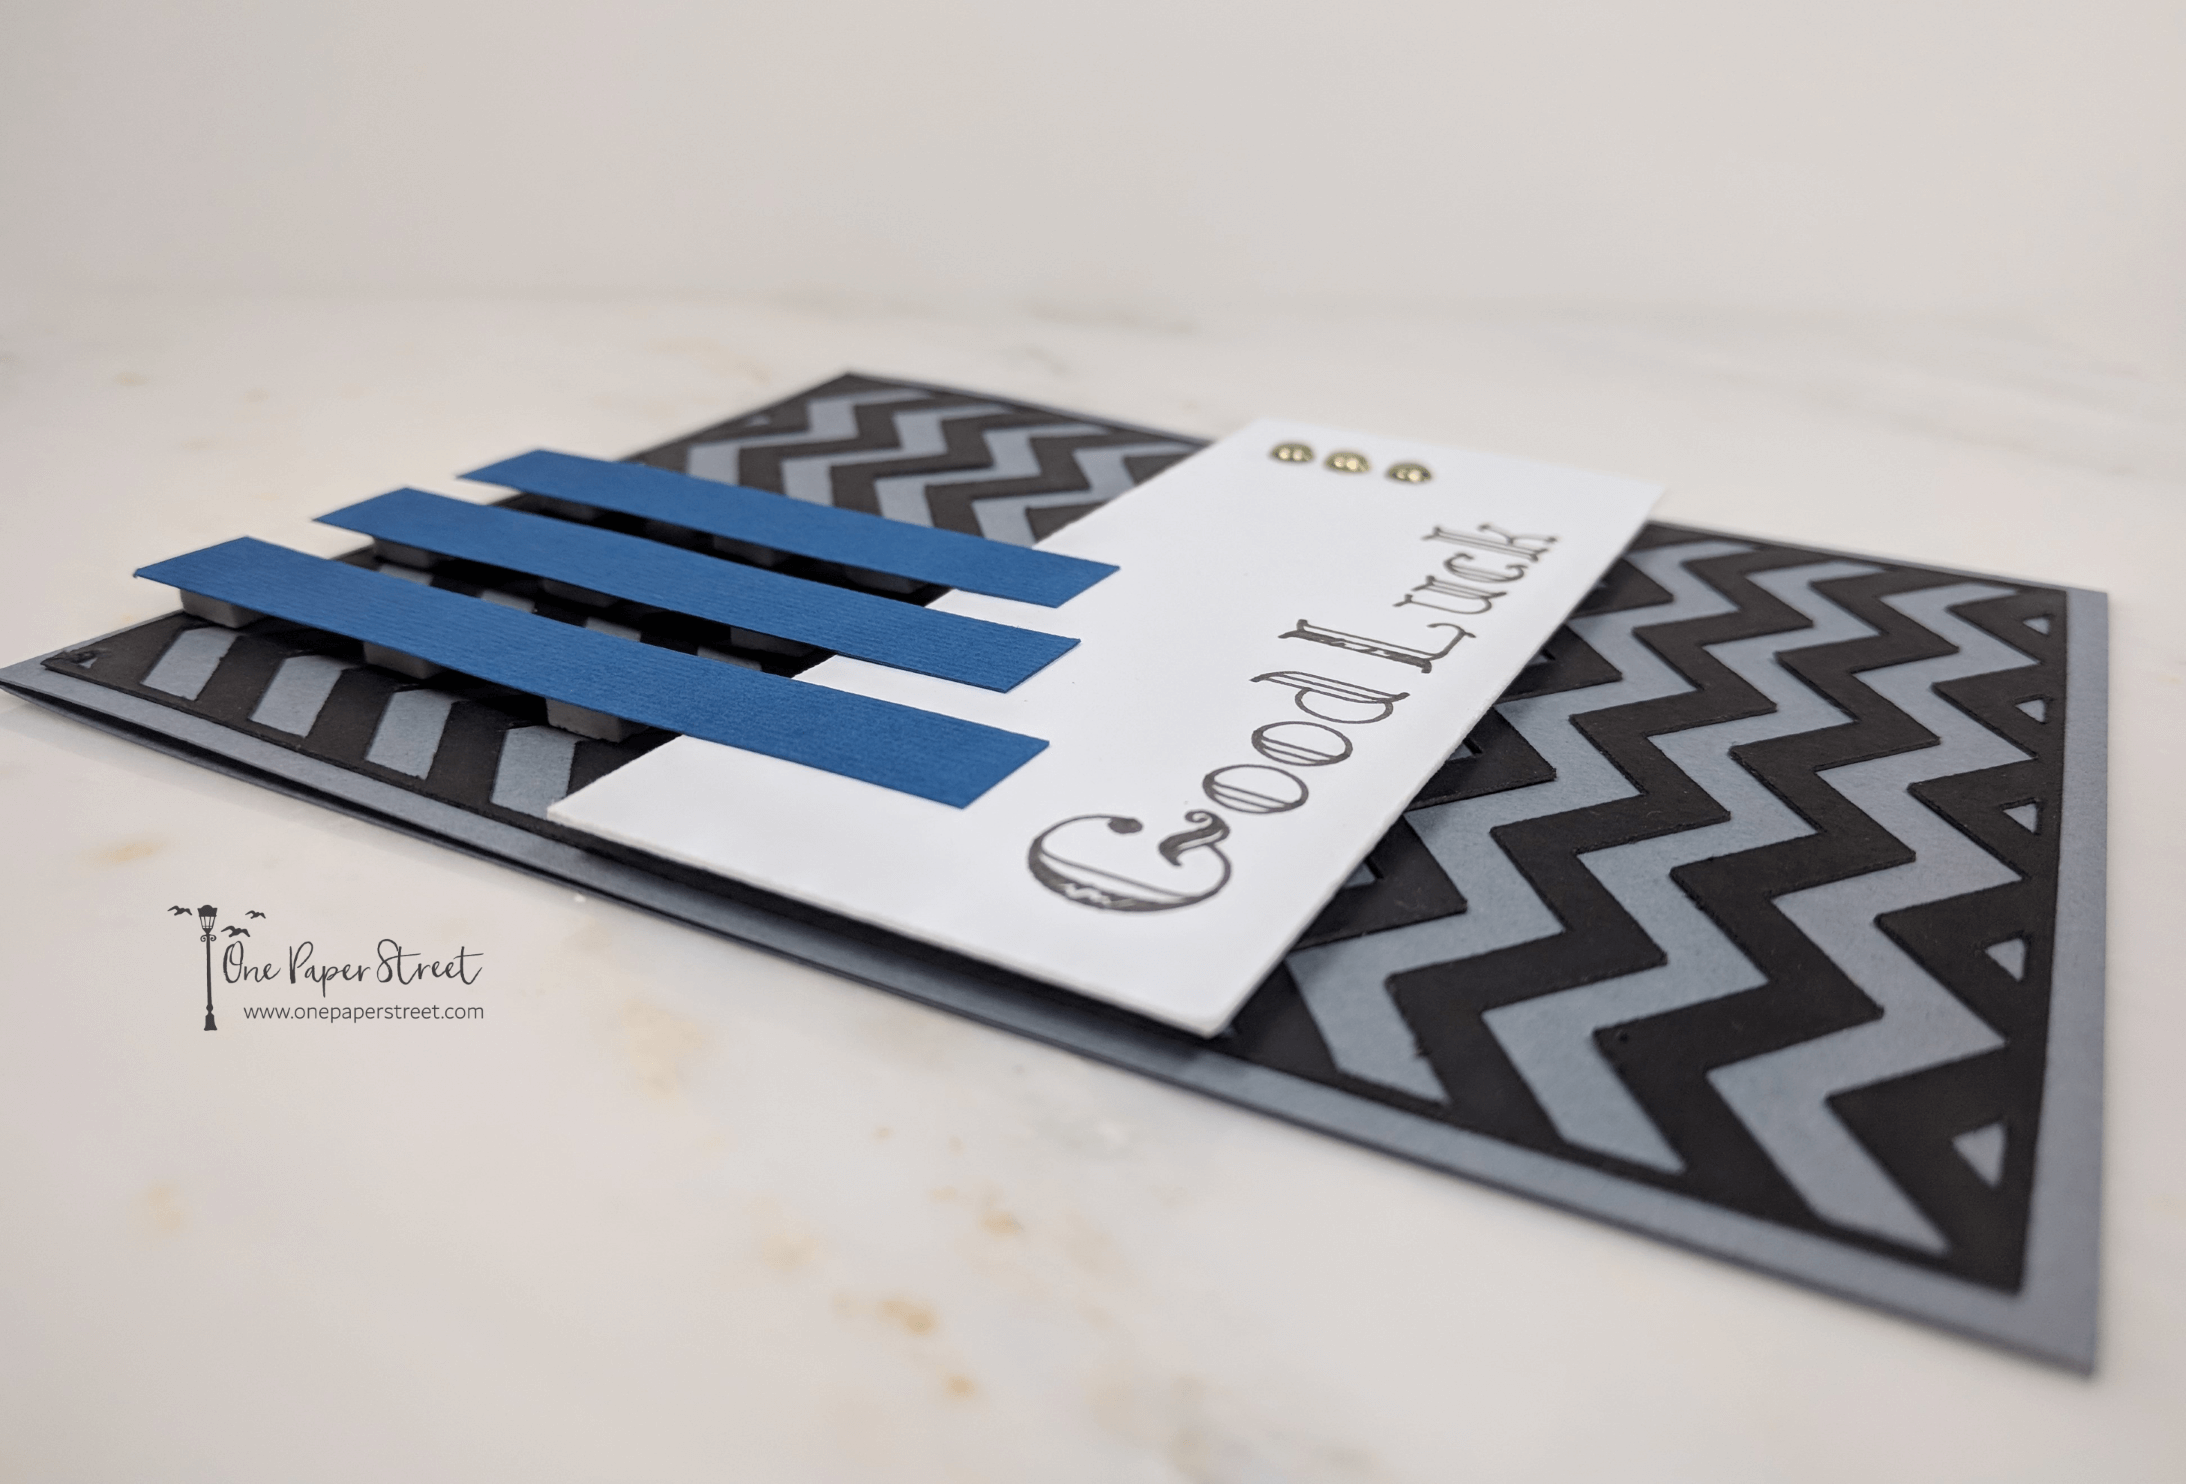
I created the layout for this chevron good luck card using the Cricut Design Space. The design space allows you to get a visual of what a card is going to look like before you even start creating it with your materials. View the exact specifications of this project here. Once I had the design all laid out, I chose the paper for this project. I wanted it to be a masculine card so I went with blacks, grays, and blues with a little bit of a gold accent. Textured card stock can also make a subtle accent piece.
Step 2. Cut everything out.
Once I picked out my colors, I ran each piece of paper through my Cricut Explore Air 2 machine and followed the instructions in the design space. If you’re new to Cricut machines and want to find more information, read the Mastering Your Cricut Machine here.
The most difficult part of this process was peeling the chevron background off of the Cricut mat. It was a fragile design that had to be managed with care, so I worked slowly and carefully to ensure that the design didn’t rip. I also used my cricket machine to draw out the sentiment on the card.
Step 3. Add the brads.
After everything was cut I was then able to start putting it together on the card. I started by adhering the Chevron background to the gray card base. Then I added the gold brads to the Neenah Solar White good luck card stock.
Tip: When you’re adding brads to any design, use an Exacto knife to cut a little x in the paper before trying to insert the brads. This will keep the paper from getting damaged.
Step 4. Put it all together.
I added the good luck sentiment on Solar White cardstock to the card base, then trimmed off any extra white cardstock that might be hanging over the side of the card.
lastly, I put some Forever In Time 3D Pop Dots on the back of each blue textured strip of cardstock and laid it over top of the card. I measured about .25 inches between each strip of navy blue. I also wanted them to be different height levels, so I did the same thing here that I did with the white card stock and made it a little bit taller than what I knew I wanted it to be on the card so that I could trim it later.
I hope you enjoyed this tutorial. My Cricut machine is well-loved, and I use it whenever I get the chance. If you own a Cricut machine too and are looking for more card making ideas, please check out some of my other Cricut Projects. Have a great day!